X
This article was co-authored by wikiHow staff writer, Jack Lloyd. Jack Lloyd is a Technology Writer and Editor for wikiHow. He has over two years of experience writing and editing technology-related articles. He is technology enthusiast and an English teacher.
The wikiHow Tech Team also followed the article's instructions and verified that they work.
This article has been viewed 927,587 times.
Learn more...
This wikiHow teaches you how to restore previously deleted photos on your computer, smartphone, or tablet. Keep in mind that, unless you're recovering the photos immediately after you deleted them, there's a good chance that some of the photos will not be recoverable.
Steps
Method 1
Method 1 of 5:
Recovering Photos from Windows
-
1Check the Recycle Bin. Before you go through the process of downloading and using file recovery software, double-click the Recycle Bin app icon to open the Recycle Bin, then look for your deleted photos.
- If you find your deleted photos, you can restore them by selecting them, right-clicking a selected photo and clicking Restore in the resulting drop-down menu.
-
2Download Recuva on a separate computer. You'll want to avoid downloading anything else onto your computer until you've recovered your photos, so use a different computer for this step. To download Recuva:
- Go to https://www.ccleaner.com/recuva/ in your browser.
- Scroll all the way down and click Free Download
- Click the CCleaner.com link on the left side of the page.
- Click Start Download
Advertisement -
3Install Recuva on a flash drive. Insert a flash drive into the computer on which you downloaded Recuva, then do the following:
- Double-click the Recuva setup file.
- Click Yes when prompted.
- Check the "No thanks, I don't need CCleaner" box.
- Click the Customize link.
- Uncheck every box on the page.
- Click the More link at the bottom of the page.
- Click Browse
- Scroll down and select your flash drive's name.
- Click OK
- Click Install
-
4Eject the flash drive when Recuva finishes installing. You can now run Recuva from the flash drive, which will allow you to scan your computer without adding files to it and potentially overwriting the deleted photos' space.
-
5
-
6Open Recuva. Double-click the recuva64 program, which is in the flash drive's window, to do so.
-
7Click Yes when prompted. This will open the Recuva window.
-
8Click Next. It's in the bottom-right corner of the window.
-
9Check the "Pictures" box, then click Next. You'll find the "Pictures" box near the top of the window.
-
10Click Next. This will allow Recuva to scan your entire computer for the deleted photos.
- If you know which folder the deleted photos were in, check the "In a specific location" box, click Browse..., and select the folder.
-
11Click Start. It's at the bottom of the window. Recuva will begin scanning your computer for deleted photos.
- This scan may take several minutes to complete.
-
12Review the results. Any file with a green circle next to it is a photo that is considered "healthy", meaning that you'll be able to restore it without losing any data.
-
13Recover any salvageable photos. Click the checkbox to the left of each photo that you want to restore (or click the upper-left checkbox to select everything), then do the following:
- Click Recover...
- Click Desktop
- Click Make new folder
- Click OK
- Wait for your photos to finish recovering into the new folder.
-
14Try restoring a backup. If you created a File History backup, you may be able to recover your photos from the backup. Connect the File History drive, then do the following:[1]
- Open Start
- Type in restore your files
- Click Restore your files with File History
- Find the photos' folder.
- Select the version of the folder that contained the photos.
- Click Restore


Advertisement
Method 2
Method 2 of 5:
Recovering Photos from a Mac
-
1Check the Trash. Before you try to restore any deleted photos with Time Machine, first open the Trash and look for the files there.
- If you find your photos in the Trash, you can select the photos, right-click a selected file, and click Put Back to restore them to their original locations.
-
2
-
3Type in time machine. Doing so searches for the Time Machine app on your computer.
-
4Click Time Machine. Its app icon resembles a teal box with a white clock on it. Doing so opens Time Machine.
-
5Go to your photos' location. On the left side of the window, click the folder that contained your photos.
-
6Go to a backup during which your photos were still on your Mac. Click the upward-facing arrow to the right of the Time Machine window to scroll through backups until you see your deleted photos appear in the main window.[2]
- If you scroll past the photos' creation date and they still aren't showing up, you can't use Time Machine to restore them.
-
7Select the files that you want to restore. Click and drag your mouse across a group of files to select them all, or hold ⌘ Command and click individual files to select them independently.
-
8Click Restore. It's a grey button near the bottom of the Time Machine window. This will restore your selected photos to their original location(s).
- You may have to repeat this process for different folder locations in Time Machine.


Advertisement
Method 3
Method 3 of 5:
Recovering iPhone Photos with iTunes
-
1Check your iPhone's "Recently Deleted" folder. If your iPhone uses iOS 10 or above, your "deleted" photos are moved into the "Recently Deleted" folder where they remain on your iPhone for 30 days. To check this folder:[3]
- Open your iPhone's Photos app.
- Tap Albums in the bottom-right corner.
- Scroll down and tap Recently Deleted
- Look for your photos.
- Recover photos by tapping Select, tapping photos that you want to recover, and tapping Recover in the bottom-right corner of the screen.
-
2Plug your iPhone into your computer. Insert the USB end of the iPhone's charger cable into one of your computer's USB ports, then insert the other end of the cable into your iPhone's charging port.
-
3Open iTunes. Its app icon resembles a multicolored musical note on a white background.
-
4Click the "Device" icon. It's an iPhone-shaped button in the upper-left side of the iTunes window. Doing so opens your iPhone's page.
-
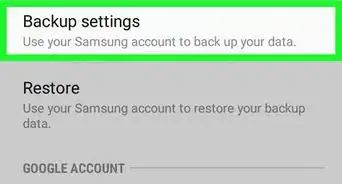
5Back up your iPhone. Click Back Up Now in the "Backups" section, then click Transfer Purchases if prompted. This will create a copy of your iPhone's files and settings as they currently are.
- Backups can take anywhere from a couple of minutes to half an hour to complete.
- Once you've restored a different backup with your photos included, you can save the photos and then return to the most recent version of your iPhone.
-
6Click Restore Backup…. It's on the right side of the "Backups" section. A pop-up window will appear.
- You may have to turn off Find My iPhone before proceeding.
-
7Select a backup. Click the drop-down box in the pop-up window, then select a date in the resulting drop-down menu.
- Make sure that you pick a date at which your photos were present on your iPhone.
-
8Click Restore. It's at the bottom of the window. Doing so will prompt the backup to begin restoring.
- You may be prompted to enter a password before proceeding.
-
9Wait for the restore to finish. This can take several minutes. Once the restore is complete, you can open your iPhone to view your photos.
- If you want to restore the most recent version of your iPhone, upload the deleted photos to Google Drive or iCloud before doing so. Otherwise, the photos will be removed from your iPhone once the backup is restored.


Advertisement
Method 4
Method 4 of 5:
Recovering Android Photos on Windows
-
1Download the Recuva setup file. Recuva is a free software-recovery program that you can use to recover your Android's deleted files from on your computer. To download it, do the following:
- Go to https://www.ccleaner.com/recuva/ in your browser.
- Scroll all the way down and click Free Download
- Click the CCleaner.com link on the left side of the page.
- Click Start Download
-
2Install Recuva. To do so:
- Double-click the rcsetup153 setup file.
- Click Yes when prompted.
- Check the "No thanks, I don't need CCleaner" box.
- Click Install
- Check the "Reboot now" box.
- Click Finish
- Wait for your computer to finish restarting.
-
3Plug your Android into your computer. Attach the rectangular USB end of your Android's charger cable into one of your computer's USB slots, then plug the other end into your Android's charging port. You should see a notification appear on your Android.
- If after a few seconds you don't see a notification on both your Android and your computer, try a different USB port.
-
4Place your Android in MTP mode. Tap the "Connected as a media device" notification (or similar), then tap the MTP option.[4]
- On some Androids, you may first have to open the Notifications shade by swiping down from the top of the screen.
-
5Open Recuva. Double-click the Recuva app icon to do so.
-
6Click Yes when prompted. This will open the Recuva window.
-
7Click Next. It's in the bottom-right corner of the window.
-
8Check the "Pictures" box, then click Next. You'll find the "Pictures" box near the top of the window.
-
9Select your Android as a storage location. Check the "In a specific location" box, click Browse..., scroll down to and click your Android's name, and click OK.
- If you don't see your Android's name, you can't scan your Android directly. To recover deleted files, you'll need to remove the SD card from your Android, plug it into an SD card to USB adapter, and plug the adapter into one of your computer's USB ports; after doing so, you can select the SD card as the location to scan.
-
10Click Start. It's at the bottom of the window. Recuva will begin scanning your computer for deleted photos.
-
11Wait for the scan to finish. This can take anywhere from a few minutes to around an hour, depending on how large your Android's storage is and how many photos you have to recover.
-
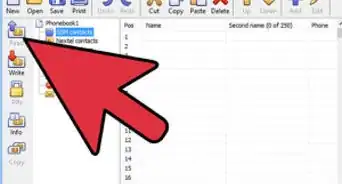
12Click the "Filename" checkbox. Once the scan completes, you'll see this option in the top-left corner of the Recuva window. This will select all of the recovered photos here.
-
13Recover the photos onto your computer. To do so:
- Click Recover...
- Click Desktop
- Click Make new folder
- Click OK
- Wait for your photos to finish recovering into the new folder.
- You may have to click Yes or OK when prompted before the recovery will initiate.


Advertisement
Method 5
Method 5 of 5:
Recovering Android Photos on a Mac
-
1Remove the SD card from your Android. Most Android phones or tablets have a removable SD card on which many of the Android's photos and other files are stored.
- The location of the SD card will vary, so check your phone's manual or online documentation to confirm its location.
- You cannot restore files deleted from the Android's internal hard drive without rooting your Android.
-
2Insert the SD card into your computer. You'll need an SD card to USB adapter in order to do so.
- You can buy an SD card to USB adapter online or in most tech stores for under $10.
-
3Download and install Mac Data Recovery. Go to http://www.recovering-deleted-files.net/recovery-software/mac-data-recovery/, scroll down and click Download, double-click the downloaded DMG file, and follow any on-screen instructions.
- You may need to verify the download if prompted.
- Mac Data Recovery is not free, but you can use the free version of the software to determine whether or not your files are recoverable.
-
4
-
5Click Start New Scan. It's at the top of the Mac Data Recovery window.
-
6Select your Android's SD card. In the upper-left corner of the window, click the SD card's name.
-
7Click Deleted Recovery. It's in the middle of the page.
-
8Check the "Deep Scan" option. You'll find this near the lower-right side of the window. Doing so will enable the deep scan, which has a higher chance of bringing back your deleted files than does the "Quick Scan" option.
- Deep scans can take several hours to run.
- You can leave this as "Quick Scan" if you're in a hurry, or if you only just deleted the file.
-
9Click Start Scan. It's in the bottom-right corner of the window.
-
10Wait for the scan to complete. This can take anywhere from a few minutes to a few hours, so make sure that your computer is plugged into a power source.
-
11Find your deleted photos. You should be able to browse the recovered files like you normally would in Finder. If your deleted files are in the same location that they were in before you deleted them, they can be recovered.
- If you can't find the deleted photos, they most likely can't be recovered.
-
12Select files to recover. Click and drag your mouse across the photos that you want to save, or hold down ⌘ Command while clicking individual photos.
-
13Click Recover. It's in the bottom-right corner of the window.
-
14Follow the on-screen registration prompts. If your photos are important enough to warrant buying the software, you'll be able to do so from this page. As soon as you purchase the software, you'll be able to recover the deleted files.
- The Professional version of Mac Data Recovery costs $99.


Advertisement
Community Q&A
-
QuestionCan I restore deleted pics from my laptop?
 Community AnswerMaybe. First check the recycle bin. The pictures should be in there if you haven't permanently deleted the recycle bin files. If they are not there you might be able to use a photo recovery program.
 -
QuestionHow do I restore photos that were on an SD card that were deleted while browsing through them?
 Community AnswerMethod 3 will show you how to salvage pictures that were deleted from a camera or memory card. Just follow those instructions and you should be able to restore the pictures.
 -
QuestionMy son used system restore on our 1 yr old Windows 10 system. It lost about half of our photos. Is there any way to retrieve them?
 Community AnswerDuring a non-destructive restore, the old files will be saved in a Windows.old folder. Using Windows Explorer, navigate to Windows.old\Users\\My Pictures to see if they're there. They may also be in the \Desktop folder if the pictures were stored in a desktop folder.
Advertisement
Warnings
- As soon as you realize that you've deleted your photos, refrain from moving, downloading, or installing any files.⧼thumbs_response⧽
Advertisement


References
About This Article
Jack Lloyd
wikiHow Technology Writer
This article was co-authored by wikiHow staff writer, Jack Lloyd. Jack Lloyd is a Technology Writer and Editor for wikiHow. He has over two years of experience writing and editing technology-related articles. He is technology enthusiast and an English teacher. This article has been viewed 927,587 times.
How helpful is this?
Co-authors: 34
Updated: September 15, 2021
Views: 927,587
Categories: Data Recovery
Advertisement