wikiHow is a “wiki,” similar to Wikipedia, which means that many of our articles are co-written by multiple authors. To create this article, 11 people, some anonymous, worked to edit and improve it over time.
This article has been viewed 27,186 times.
Learn more...
For those who like a challenge, have some time to spare, and like the feeling of keeping something out of the landfill, reupholstering old broken down lawn chairs might just spark your interest! For the cost of 2.5–3 meters (8.2–9.8 ft) of heavy duty outdoor fabric, and a fair amount of personal effort, you can tailor the chairs to appear as you'd like them to be, rather than resorting to accepting what the store has by way of replacements. The costs can be reduced by making your patterns and including a folded edging instead of buying extra edging tape.
Steps
-
1Take plenty of pictures of the old chair from every angle possible. Make sure to take close-ups of corners and sections that meet. You will need to be able to review these photos when piecing the material back together again.
-
2Dismantle the chair.
- Put on a paper mask to protect yourself from the fine dust that is released during the dis-assembly process.
- Use the single edge razor to speed up the dismantling of the old chair. Make quick strokes across the threads, not worrying too much about ruining the old material which will be thrown away, then pull the pieces apart.
- Again, take images whenever you come to a section where two pieces are connected, or wherever there is a complicated seam; this way you will know exactly how to re-sew the new fabric.
Advertisement -
3Retain some of the surrounding, old material whilst cutting away each old metal-leg ring section. This is so you don't have to sew into the very strong reinforcing ring material, especially if your sewing machine can't handle it.
- Be sure to make your pattern piece to incorporate these sections.
- Retain any of the old packing foam or other unusual parts needed later for re-assembly.
-
4Begin creating your own pattern pieces. Once everything is dismantled, take one of each unique piece and trace it on the brown packing paper:
- Poke holes in the paper wherever you may need to make guidelines later.
- If you are sewing without double fold bias tape, as shown in these images, then you will need to add the appropriate extra "folded-edging allowance" on to your pattern. In the project shown here, that meant 1 centimeter (0.4 in) folded either two or three times, equaling 2-3 additional centimetres being added to each pattern piece.
-
5Make sure to write notes for yourself on each pattern piece. You will need to note:
- Which direction is the front, back and top;
- The number of the piece you will need to cut out; and
- Which other pieces connect to each side of the piece.
-
6Lay out the pattern piece on your fabric. It is important to make sure that you plan which way the fabric's nap or material print direction will run for each piece you plan to cut out. For instance, the example shown first appeared to have no noticeable print or nap direction, however, when the fabric was turned at 90 degrees, the optical sheen changed from a warm tone to a cool tone.
- Try to picture in your mind which way you will be viewing each piece of the pattern piece before laying them out and cutting them.
-
7Be prepared for some basting. Basting and pinning each section is the best way to avoid fighting with holding pins or ending up with visibly uneven seems.
- The contrasting colour of the thread will make it easier to pull it out afterward.
- Follow the photos that you took initially to know where to sew the pieces together.
- A finished corner.
-
8Take your time. Sewing will be slow with this project. Work your sewing machine by slowing turning the hand wheel by hand and giving just enough power to move over these sections very slowly. The upholstery thread is very thick, so to make things go faster, fill up several sewing machine bobbins with your upholstery thread, so you do not constantly have to un-thread and refill the same bobbin.
- Increased thickness of fabric, at corners or fold seams, requires that you wear your safety goggles while stitching.
-
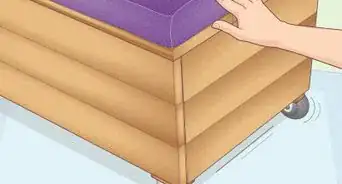
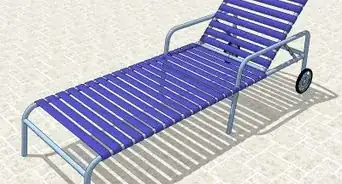
9Put it back together. Once everything is sewn then simply reassemble to the original metal frame. In this example, there were screws holding the armrests and top back sections to the metal frame:
- Assemble all the pieces out on the floor to check that you have sewn together everything. If anything is missing at this stage, be sure to make it!
- Slip the pieces back on in the order required. This means that pieces that serve as the base or foundation will need to be in place first, then pieces that slip over the top are fed back into place next. The order will depend on the style of the chair.
- Screw the fabric pieces back into place securely.
- A finished product in place.
-
10Done.


Warnings
- Safety: eye goggles, paper mask, and thimble⧼thumbs_response⧽
Things You'll Need
- Heavy-duty outdoor fabric (2.5-3 metres, resistant to sunlight breakdown) - Textilene, nylon, etc.
- Double fold bias tape (which will simplify the sewing but increase the costs)
- Heavy-duty nylon upholstery threat
- Single edge razor blade and thread puller
- Fabric scissors
- Reliable consumer sewing machine
- Ball-point needles (#100) for sewing machine
- Strong hand-sewing needle and thimble
- Basting thread in a bright contrasting colour (contrast to your replacement fabric)
- Roll of brown packing paper
- Needle nose pliers
- Safety goggles
- Paper mask (to protect yourself from the dust from disintegrating plastic fabric during dis-assembly of the old chair)
- Vacuum
- Digital camera (during dis-assembly)
- Screwdriver