This article was co-authored by wikiHow Staff. Our trained team of editors and researchers validate articles for accuracy and comprehensiveness. wikiHow's Content Management Team carefully monitors the work from our editorial staff to ensure that each article is backed by trusted research and meets our high quality standards.
The wikiHow Tech Team also followed the article's instructions and verified that they work.
This article has been viewed 29,291 times.
Learn more...
This wikiHow shows you how to connect an account for receiving monetary donations while hosting a Twitch channel. Twitch's currency system, Twitch Bits, is the most convenient way of setting up donations, but there are other options available for users.
Steps
Enabling Twitch Bits
-
1Open your browser and go to https://www.twitch.tv/.
-
2Click on your username in the top-right. This will open a drop-down menu.
- If you aren’t already logged in, click Log In in the top right and enter your username and password to sign in.
Advertisement -
3Click Dashboard in the drop-down menu.
-
4Select Partner Settings. This will appear as a tab in the Dashboard for your Twitch account.
-
5Select the Cheers option. This option allows you to enable Twitch’s first-party digital currency.
-
6Click on Enable Cheering with Bits. With this feature enabled, viewers can donate Twitch Bits to your channel.


Connecting a PayPal Account
-
1Open your browser and go to https://www.twitch.tv/.
-
2Click on your username in the top-right. This will open a drop-down menu.
- If you aren’t already logged in, click Log In in the top right and enter your username and password to sign in.
-
3Click Channel in the drop-down menu. This will open your channel feed in a new page.
-
4Click Edit Panels. This feature lets you add a description field for your Twitch channel.
-
5Click on the plus (+) icon to add a panel.
-
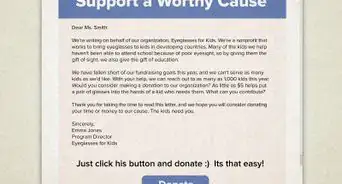
6Fill in the Panel Title and Description fields. Make sure to include your PayPal.me address in the description, along with a brief message to viewers about why you think they should donate.
-
7Click Save. This will post the panel with the link to your PayPal donation account in your channel description.


Using Cryptocurrencies
-
1Open your chosen cryptocurrency’s wallet app. If you don’t have a wallet app already, Bitpay is recommended for beginners.
-
2Click Receive.
-
3Copy your wallet’s address to your clipboard. This will show up as a series of seemingly random letters and numbers after you click Receive.
-
4Open your browser and go to https://www.twitch.tv/.
-
5Click your username in the top-right. This will open a drop-down menu.
- If you aren’t already logged in, click Log In in the top right and enter your username and password to sign in.
-
6Click Channel in the drop-down menu. This will open your channel feed in a new page.
-
7Click Edit Panels. This feature lets you add a description field for your Twitch channel.
-
8Click on the plus (+) icon to add a panel.
-
9Fill in the Panel Title and Description fields. Make sure to include your wallet’s address in the description, along with a brief message to viewers about why you think they should donate.
-
10Click Save. This will post the panel with the link to your PayPal donation account in your channel description.


Connecting to a StreamLabs Account
-
1Open your browser and go to https://streamlabs.com/. This will take you to StreamLabs’ website.
-
2Click your username in the top-right. A drop-down menu will appear.
-
3If you aren’t logged in already, click the Login button in the top-right and click Log In With Twitch on the page that pops up.
-
4Click Dashboard in the drop-down menu.
-
5Click on Donation Settings.
-
6Select a payment option. To enable PayPal, click the PayPal icon on the Donation Settings page.
- Other available payment options include: Unitpay, Skrill, and credit cards.[1]
-
7Click on the Settings tab. This will let you select your currency, as well as set minimum and maximum donation limits.
-
8Click Save Settings. Once you’ve completed filling out the donation section, the Settings page will display the link to your donation page.
-
9Copy your donation page link to your clipboard.
-
10Open your browser and go to https://www.twitch.tv/.
-
11Click your username in the top-right. This will open a drop-down menu.
- If you aren’t already logged in, click Log In in the top right and enter your username and password to sign in.
-
12Click Channel in the drop-down menu. This will open your channel feed in a new page.
-
13Click Edit Panels. This feature lets you add a description field for your Twitch channel.
-
14Click on the plus (+) icon to add a panel.
-
15Fill in the Panel Title and Description fields. Make sure to include your wallet’s address in the description, along with a brief message to viewers about why you think they should donate.
-
16Click Save. This will post the panel with the link to your PayPal donation account in your channel description.


About This Article

1. Open your browser.
2. Go to https://www.twitch.tv.
3. Click your username.
4. Select Dashboard.
5. Select Partner Settings.
6. Click on the Cheers option.
7. Select Enable Cheering with Bits.