This article was co-authored by wikiHow staff writer, Nicole Levine, MFA. Nicole Levine is a Technology Writer and Editor for wikiHow. She has more than 20 years of experience creating technical documentation and leading support teams at major web hosting and software companies. Nicole also holds an MFA in Creative Writing from Portland State University and teaches composition, fiction-writing, and zine-making at various institutions.
There are 8 references cited in this article, which can be found at the bottom of the page.
This article has been viewed 11,391 times.
Learn more...
Before you can start using your new Fitbit tracker, you'll need to connect it to a compatible smartphone, tablet, or computer. Start by installing the Fitbit app on your device, and then connect it to your Fitbit using Bluetooth. Learn how to install and set up your Fitbit for the first time, as well as how to customize the way your Fitbit syncs data to your dashboard.
Steps
Getting Started
-
1Make sure Fitbit is compatible with your device. Fitbit recommends pairing with a mobile device. To make sure your Android, iPhone, iOS (iPhone, iPad, or iPod Touch), or Windows 10 (e.g., Lumia, Surface) will sync with your Fitbit, visit http://www.fitbit.com/devices and search for your device.[1]
- If the device is not found, you can't use it to sync your Fitbit.
- If you don't have a compatible mobile device, you can use a Windows 10 PC or macOS. The Windows app is identical to the mobile app, but the macOS app has a different setup process.[2]
-
2Charge your Fitbit. Before you can pair your Fitbit with your Android, iPhone, iOS (iPhone, iPad, or iPod Touch), or Windows 10 mobile devices (such as a Lumia phone or Surface), it should have some battery charge.[3]Advertisement
-
3Plug the wireless sync dongle into the computer. If you're using a Fitbit that comes with a dongle (such as Surge) and plan to sync it with a computer, gently insert the dongle into an available USB port.[4]
- If you plan to sync a Fitbit Blaze with a computer, connect it to the computer using the charging cable that came with the device.
Enabling Bluetooth on Your Device
-
1Turn on Bluetooth on an Android. If you're using an Android device:[5]
- Open the Settings app and select “Bluetooth” (you may need to scroll down to find it).
- Flip the switch below Bluetooth to the On position.
-
2Turn on Bluetooth for Windows 10 Mobile. If you're using a mobile Windows 10 device:[6]
- Swipe down from the top of the screen and select “Expand.”
- If the Bluetooth tile is gray, tap it once. The tile will turn blue, which means that Bluetooth is now turned on.
-
3Turn on Bluetooth on a Windows PC. From the Windows desktop:
- Press ⊞ Win+S to launch search.
- Type “Bluetooth” into the search box, then press ↵ Enter.
- Make sure the switch is in the On position.
-
4Turn on Bluetooth on your Mac. If you're using a Mac:
- Click the Bluetooth icon (an angular, esoteric-looking symbol) at the top right corner of the screen.
- Select “Turn Bluetooth On.”
- If you don't see the icon, click the Apple menu and navigate to “System Preferences > “Bluetooth” and check “Show Bluetooth in menu bar.”
Setting up the Fitbit App
-
1Locate the Fitbit app in your device's app store. Navigate to the Play Store (Android), the App Store (iOS), or the Windows Store (Windows) and search for the app called “Fitbit.”
- macOS 10.5 users should download the Fitbit app from Fitbit's macOS download page.
-
2Install the Fitbit app on your mobile or Windows device. Once you've located the Fitbit app in the store, tap “Install” (Android), “Get” (iOS) or “Free” (Windows) to install it.
-
3Install Fitbit for macOS. If you're using macOS, double-click the installer file you downloaded, and then:[7]
- Follow the prompts to install the app.
- When the installation is complete, click “Set up New Fitbit Device.”
- The remaining screens will appear in a different order than the other platforms. Despite this, the information requested will be the same. Follow the on-screen instructions and use the remaining steps here for guidance.
- Click “New to Fitbit” and follow the prompts to create a new Fitbit account.
-
4Launch the Fitbit app on your mobile or Windows device. The app will open to a setup screen.
-
5Tap “Join Fitbit” to create a new account. A new screen will appear, containing a list of various Fitbit devices.
-
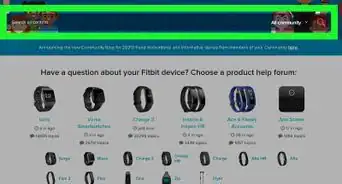
6Select your Fitbit model from the list. Several Fitbit models look similar, so be sure you select the model that's listed on the packaging for your Fitbit.[8]
-
7Tap “Set Up Your Fitbit [model]”. This text appears just below the large illustration of your Fitbit. Once you select this option, an orange screen will appear.
-
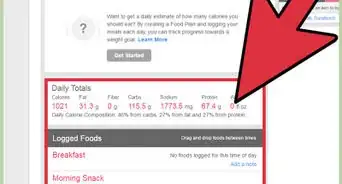
8Tap “Let's Go”. Now you'll be prompted to answer some personal questions (height, gender, weight, and more) that will help your Fitbit dashboard provide accurate results. Tap “Next Step” after answering each question until you arrive at the screen that says “Now let's put a name to those numbers.”
-
9Enter your name, email address, and password. Fitbit will now create an account for you based on the information you've provided it thus far.
- Before you can proceed, you'll need to agree to the terms of service.
- If you want to receive emails from Fitbit, check the box next to “Keep me updated.”
-
10Tap “Next Step.” Now you'll see an illustration of your Fitbit, as well as any additional parts (e.g., charger, dongles) it came with.
-
11Tap “Next Step” again to pair your Fitbit. Now that the app is installed and your account is set up, it's time to pair your Fitbit with your mobile device or computer.
Connecting Your Fitbit to Your Device
-
1Put the Fitbit into pairing mode. Follow the on-screen instructions in the app to turn on your Fitbit and put it into pairing mode. Until the device is paired, you'll see the word “Searching” at the bottom of the Fitbit app.
- If you see a message that says “Is your [model] powered on?” your device may not be charged, or the dongle or charging cable (if using a Surge or Blaze) may not be plugged in.
- Once the app finds your Fitbit, you'll see a message that says “We found your [model]!”
-
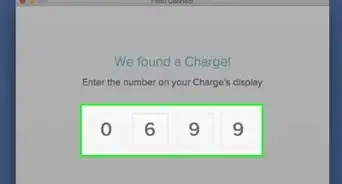
2Enter the numeric code from your Fitbit when prompted. The app should now display the message “Enter the number you see on your [model]. The numerical code should be visible on the face of your Fitbit. Once entered, the devices will automatically pair.
- If you are not prompted to enter a number, your model does not require one.
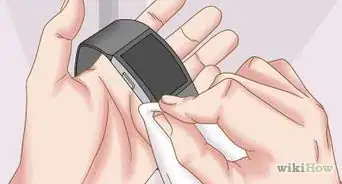
- If you are prompted to enter a code but do not see one on your Fitbit, check to make sure there is not a piece of black protective film over the face of your Fitbit. If the film is there, remove it with a fingernail.
-
3Tap “Next Step” and read through the wearing instructions. The next several screens will show you tips on how to wear and use your Fitbit. These instructions and features vary across different models.
-
4Tap “Done” when prompted. After the brief walkthrough, you will be logged into Fitbit and sent to the main app screen.
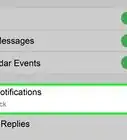
- If prompted to turn on notifications or give Fitbit permission to access features on your mobile device, select “Yes” or “OK.”
Syncing your Fitbit
-
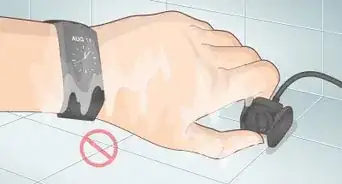
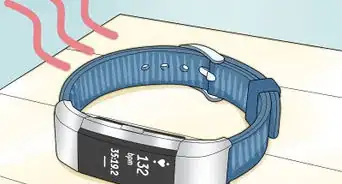
1Make sure Bluetooth is turned on. Your Fitbit is set up to sync automatically as long as it's paired with your device. When you're ready to sync, make sure you've turned on Bluetooth on your device and that your Fitbit is less than 20 feet away.[9]
- If your Fitbit requires a wireless dongle or charger cable to sync with a computer, make sure it's plugged in to the computer.
-
2Syncing with your Mac. If you don't sync your Fitbit with a Mac, you can skip this step. Your Fitbit will sync with your Mac automatically throughout the day, as long as you're in range.
- If you ever need to sync manually, open the Fitbit Connect app and click “Sync Manually.”[10]
- To view your synced data, log in to the Fitbit dashboard online.
-
3Launch the Fitbit app. On all other devices, open the Fitbit app. The main dashboard will appear. This dashboard, which may be blank now, will soon display all of the data you sync from your Fitbit.
-
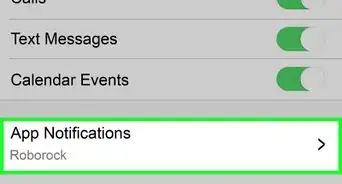
4Select your Fitbit. To customize your sync settings, first select your Fitbit model.[11]
- Android: Tap the ≡ menu and select “Devices.” Choose your Fitbit model from the list.
- iOS: Tap the “Account” icon on the bottom of the screen, then select your Fitbit model.
- Windows: Tap “Account” on the top of the screen, then choose your Fitbit model from the list.
-
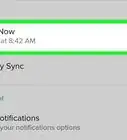
5Change automatic syncing preferences. On every platform, your Fitbit is set to automatically sync throughout the day. If you don't want your Fitbit to sync automatically, flip the switch next to “All-Day Sync” to the Off position.
- If you turn off All-Day Sync, you can still sync your Fitbit manually. This is explained in the next step.
-
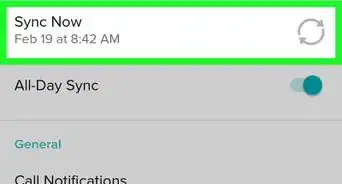
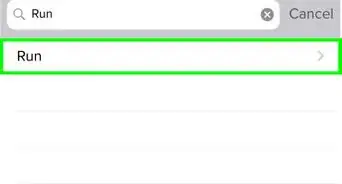
6Sync your device manually. Whether or not your Fitbit is set up to sync automatically, you can always choose to sync manually. This may be helpful if you want to see recent activity from the last few minutes appear in your dashboard. From the dashboard:
- iOS: Tap the “Account” icon and tap “Sync Now.”
- Android: In the ≡ menu, tap “Devices.” Select your device and then tap “Sync Now.”
- Windows: Tap “Account” and select your Fitbit. Tap the sync icon above the bottom bar (it looks like a circle made from two arrows.)
-
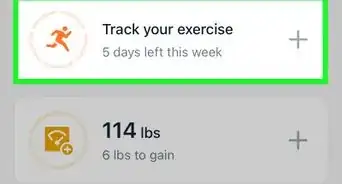
7Start using your dashboard. Now that your Fitbit is all set up, it's time to start tracking your movements. Be sure to read through your manual to learn about all of the features of your specific model. When you want to review your stats, just open the Fitbit app on your device to view your dashboard.
- By default, the app opens to the “Today” page, which shows your stats for the current day.
- For tips on using the dashboard, see Using Your Fitbit Dashboard.
- This process also works for different Fitbit products such as Fitbit Charge.


References
- ↑ https://help.fitbit.com/articles/en_US/Help_article/1873
- ↑ http://www.imore.com/how-set-and-start-using-your-fitbit-mac
- ↑ https://help.fitbit.com/articles/en_US/Help_article/1873
- ↑ https://staticcs.fitbit.com/content/assets/help/manuals/manual_surge_en_US.pdf
- ↑ https://support.google.com/android-one/answer/2819579?hl=en
- ↑ https://support.microsoft.com/en-us/help/17236
- ↑ https://www.youtube.com/watch?v=PEHMb8sB22o
- ↑ https://www.youtube.com/watch?v=eNbozxFz3oA&feature=youtu.be
- ↑ https://help.fitbit.com/articles/en_US/Help_article/1877/?l=en_US&c=Topics%3ASyncing&fs=Search&pn=1
About This Article