This article was co-authored by wikiHow staff writer, Travis Boylls. Travis Boylls is a Technology Writer and Editor for wikiHow. Travis has experience writing technology-related articles, providing software customer service, and in graphic design. He specializes in Windows, macOS, Android, iOS, and Linux platforms. He studied graphic design at Pikes Peak Community College.
This article has been viewed 2,202,825 times.
Learn more...
If you want to add an image to a web page, all you need is HTML. If you'd like to set an image as a background to a web page, you'll need both HTML and CSS. HTML stands for Hypertext Markup Language and is code that tells a browser what to show on a web page.[1] CSS stands for Cascading Style Sheets and is used to change the appearance and layout of a web page.[2] You'll need a background image that you'd like to use for your web page.
Steps
Setting Up Your Files
-
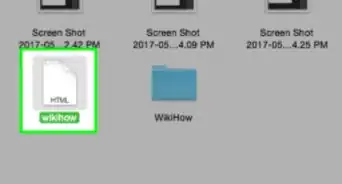
1Create a folder to hold your HTML file and background image. On your computer, create and name a folder that you can easily find later.
- You can name the folder anything you like, but when working with HTML, it's best to get in the habit of naming files and folders with short, single word names that are recognizable.
-
2Put the background image into the HTML folder. Put the image you'd like to use as background into the HTML folder.
- If you aren't too concerned with ensuring your website will run well on older devices with slower internet connections, you should be safe in using a higher resolution image as your background. Simple images with light, repetitive patterns are also a good choice when deciding on a background image so that you can read any text on top of it.
Tip: If you don't have an image, you can download a free background image. If you download an image, put it in the HTML folder you created.
Advertisement -
3Open a text editor or HTML Editor. You can create an HTML file using a basic text editor app such as NotePad on Windows or TextEdit on Mac. You can also use a what-you-see-is-what-you-get (WYSIWYG) HTML editor such as Adobe Dreamweaver.
- If you are using a WYSIWYG editor, click the option to open a new HTML file on the start of the page.
-
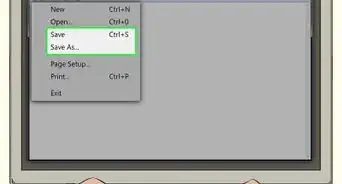
4Click File. It's in the menu bar at the top of the page.
-
5Click Save As (Notepad) or Save (TextEdit). It's in the file menu below. If you are using a PC, click Save As in the "File" drop-down menu. If you are using a Mac, click Save in the drop-down menu.
-
6Type a name for the HTML document. Generally, the first page of a website is called "index", but you can the page anything you want. Type the name of the file in the text field next to "File Name".
-
7Change the file type to an HTML document. If you are using a WYSIWYG editor, you only need to save the file. If you are using NotePad or TextEdit to create HTML, use the following steps to save the document as an HTML format.
- Notepad: Replace the ".txt" extension at the end of the file name with ".html".
- TextEdit: Use the drop-down menu next to "File Format" to select Wep page (.html).
-
8Click Save. It's in the lower-right corner of the window. This saves the text document as an HTML document.


Writing the HTML File
-
1Type <!DOCTYPE html> at the top of the HTML document. HTML code is made up of open and closed tags. Every well-written HTML page should start with <!DOCTYPE html>. This tells a web browser that the HTML file is an HTML file.
-
2Write <html> in the next line. This is the opening tag of your HTML code. This tells the browser your HTML code starts here.
-
3Type <head> in the next line. This is the opening tag for the Head of the HTML document. The head contains meta information that is not displayed in the web browser. This contains information such as the page title, it also contains the Cascading Style Sheets (CSS) which format the look of the HTML code.
-
4Type <title>Page Title</title>. This is the HTML code that contains the page title of your web page. The "<title>" tag is the opening tag of the Page title HTML code. The "</title>" of tag is the closing tag. Replace the text "Page Title" with any title you want name your HTML page. This text will appear in the browser tab at the top of the web browser.
-
5Type </head> in the next line. This is the tag that closes the head of your HTML document. If you wish to include any other information or style sheets for your HTML document, be sure to write them after the "<head>" opening tag, and before the "</head>" closing tag.
-
6Type <body> in the next line. This is the opening tag for the body of your HTML document. The body is where all the visual elements of your web page go. This includes text, images, buttons, and other elements that are viewable on the web page.
-
7Type <div style="background-image:url('[image url]');"> in the next line. This is the HTML tag to add a background image to your web page. Replace "[image url]" with the actual url location of the image you want to add. This can be the location of an image that is uploaded to an online server, or the local location of an image on your computer. [3]
- Alternatively, you can use CSS to set an background image.
- When you use a filename without a file path or URL (i.e, background-image: url("background.png");), the web browser will look in the web page folder for the named image. If the file is in another folder on your file system, you'll need to add the full path to that file.
-
8
-
9Type </body> in the last line. This is the tag that closes the body of your HTML document. When you are finished adding all HTML elements you want to include in your document, type this tag on the last line.
-
10Type </html> at the very end. This is the tag to close your entire HTML document. Type this tag on the last line.
-
11Save the HTML file. When you are finished with everything, click File and then Save to save your work. Your entire HTML document should look something like this:
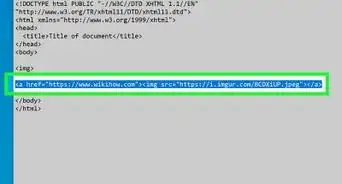
<!DOCTYPE html>
<html>
<head>
<title>Page Title</title>
</head>
<body>
<div style="background-image: url('https://www.website.com/images/image_background.jpg');">
</body>
</html>


Using CSS
-
1Create an HTML document. Use the steps outlined in Part 2 to write an HTML document. Your HTML document should contain an open and closing HTML tag, an open and closing head tag, and an open and closing body tag. You do not need to include the HTML tag to add a background image. This part teaches you how to set a background image using CSS instead of HTML.
-
2Type <style> in the head of the HTML document. This is the opening tag for cascading style sheets (CSS). This tag goes after the "<head>" tag, and before the "</head>" tag.
- Alternatively, you can create your CSS on a separate CSS document and link it to your HTML document.
-
3Type body { in the next line. This is the opening of the CSS code that will style the body of your HMTL document.
-
4Type background-image: url('[image url]'); in the next line. This line specifies the background image to be used. Replace the text "[image url]" with the actual url of the image you want to use.
- When you use a filename without a file path or URL (i.e, background-image: url("background.png");), the web browser will look in the web page folder for the named image. If the file is in another folder on your file system, you'll need to add the full path to that file.
-
5Type background-repeat:no-repeat; in the next line. This line tells the web browser to only display the image once, instead of repeating the image over and over again.
-
6Type background-size: cover; in the next line. This line tells the web browser to cover the entire background with the image.
-
7Type } at the end of the "Body" section of your HTML. If you wish to include any other CSS lines that affect the Body of your HTML document, be sure to include them now. Type "}" in the last line of the "Body" section of your CSS to close the body section.
-
8Type </style> at the end of your CSS. When you are finished including all the CSS you want to include, type "</style>" at the end. This tag closes your CSS.
-
9Save the HTML file. When you are finished with everything, click File and then Save to save your work. Your entire HTML document should look something like this:
<!DOCTYPE html>
<html>
<head>
<title>Page Title</title>

<style>
body {
	background-image: url("https://www.website.com/images/image_background.jpg");
 background-repeat:no-repeat;
 background-size:cover;
}
</style>
</head>
<body>

</body>
</html>


Reviewing the HTML File
-
1Right-click the HTML document. This displays a pop-up menu to the right of it.
-
2Select Open with. This displays a list of applications you can open the HTML in.
-
3Select the web browser of your choice. You can open the HTML in any web browser.
-
4Review the HTML file. Look over everything in the file and make sure everything looks right.
- When the browser opens, if you see HTML code instead of the background image, the HTML file may have been saved as a .txt or rtf file instead of an HTML document. You may want to try editing the HTML file in a different text editor.
Note: When the browser opens, if you don't see the image, make sure the image file name is spelled correctly in the index.html text editor window.
-
5Make edits to the HTML file. In the text editor window, move the cursor between the <body> </body> tags, and then type Hello world!. Reload the browser window to see the text on top of the background image.


Community Q&A
-
QuestionHow do I apply a background image from a folder?
 Community AnswerMake sure that the folder is in the same directory as the HTML, then just type the path. If there was an image called "image1.png" inside a folder named "folder," it would look like "/folder/image1.png.".
 -
QuestionHow do I add a photo to an HTML document for the background?
 Community AnswerBy using the background-img=" " tag, we can insert an image in HTML. You can add a colored background with the style attribute; for example, body style="background:yellow".
 -
QuestionWhen inserting a background picture, do I have to copy the URL from the folder location?Community AnswerNo. If the document and the background picture are in the same folder, you don't have to copy the URL.


References
About This Article

1. Upload the background image.
2. Open the HTML file.
3. Add the head of the HTMLdocument using the ' and ' tags.
4. Insert the and tags between the "Head" tags.
5. Add the body { element.
6. Add background-image: url(" "); inbetween the Style tags/
7. Add the full path to the image between the quotes.
8. Add } at the end of the body section of your CSS.
9. Save your changes.