This article was co-authored by wikiHow staff writer, Jessica Gibson. Jessica Gibson is a Writer and Editor who's been with wikiHow since 2014. After completing a year of art studies at the Emily Carr University in Vancouver, she graduated from Columbia College with a BA in History. Jessica also completed an MA in History from The University of Oregon in 2013.
There are 9 references cited in this article, which can be found at the bottom of the page.
The wikiHow Video Team also followed the article's instructions and verified that they work.
This article has been viewed 5,030 times.
Learn more...
Don't buy roses from the craft store! Create your own using fabric, ribbons, or felt and customize them for your special event or project. Play around with using different materials, colors, and sizes, for instance. To get started, sew a rose from a long, gathered piece of fabric or created a detailed rose with separate petals. Then, attach your fabric roses to other sewing projects for a beautiful floral look.
Steps
Rolling a Ribbon Into a Rose
-
1Choose double-sided ribbon in any color you like. Although you could use single-sided ribbon, double-sided ribbon gives your entire rose beautiful color and sheen. Decide if you'd like to buy wired ribbon, which will hold its shape, or non-wired ribbon, which makes a loose, soft shape. Then, choose a ribbon material and color.[1]
- Pick satin ribbon for a soft, shiny rose or use taffeta ribbon if you'd like a crisp, crinkly looking rose, for instance. You can also find novelty ribbon that has fun prints, texture, or lacy edges.
-
2Cut a 30 in (76 cm) long piece of ribbon. Pull the ribbon off of the spool until it's at least 30 inches (76 cm) long. Keep in mind that a longer piece of ribbon makes a wider, fuller rose. Then, cut the piece of ribbon from the spool.[2]
- A ribbon that's 30 inches (76 cm) long makes a rose that's about 3 to 4 inches (7.6 to 10.2 cm) wide.
Advertisement -
3Sew running stitches along the bottom edge of the ribbon. Thread a needle with thread that matches the color of the ribbon and tie a knot at the end of the tail. Insert the needle through the bottom corner of the ribbon and pull until the knot catches. Then, make long, straight running stitches along the bottom of the ribbon. Don't cut the thread once you finish the running stitches.[3]
- Work the running stitches about 1⁄4 inch (0.64 cm) from the bottom edge of the ribbon. This gives you a slight base for the bottom of the ribbon rose.
-
4Pull the ribbon to gather the bottom of the edge. Once you stitch to the opposite end of the ribbon, pull the ribbon down so the ribbon ruffles on 1 side. If you'd like a loose, wide rose, don't bunch up the ribbon very much. To make a tightly ruffled rose, keep pulling the ribbon so it's tightly gathered.[4]
-
5Hold 1 end of the ribbon and wrap the rest of the ribbon tightly around it. Pinch 1 end of the ribbon between your fingers to make the center of the rose. Then, wrap the ribbon tightly around the bud, keeping the edge with the stitches on the bottom.[5]
Tip: If you'd like to attach the rose to a stem, cut a piece of green floral wire so it's as long as you want the stem to be. Twist a knot into the end of the wire and press it onto the end of the ribbon before you roll the ribbon rose. The knot prevents the wire from slipping out of the rose.
-
6Stitch the bottom of the rose closed. Take the needle and thread that's still attached to the end of the rose and insert it horizontally through the bottom of the rose. Pull it through the layers of ribbon until it comes out the other side. Then, push it back through the base of the rose in the opposite direction. Sew back and forth through the bottom of the ribbon rose until it is secure.[6]
- Tie a knot and trim the thread tail close to the base of the rose once you've finished stitching.


Creating a Gathered Rose
-
1Cut a strip of fabric into a long rectangle. You can make the strip any size you like, but for a rose that's around 3 inches (7.6 cm) wide, cut the fabric about 30 inches (76 cm) long. If you want the rose to be around 2 inches (5.1 cm) high, make the rectangle 4 inches (10 cm) wide since you'll fold it in half.[7]
- Work with a knit or woven fabric, such as chiffon or poplin, so you can pull it and make it gather. Felt won't bunch together, so avoid using it.
- Play around with making different sizes. To make smaller roses, cut the fabric so it's shorter or create taller roses by making the rectangle wider, for instance.
-
2Trim 1 corner off of the end of the strip. Lay the strip flat on your work surface and use scissors to cut from the bottom corner of the fabric strip at a 110-degree angle to the top of the strip. Finish cutting about 1⁄2 inch (1.3 cm) from the top corner so you're left with a scrap that's shaped like a triangle.[8]
- Discard the fabric scrap since you won't need it for the rose.
-
3Fold the top edge of the strip so the fabric is level with the bottom. Hold the top corner of the fabric and bring it down to fold the fabric in half horizontally. This makes the center of your rose.[9]
- If you're working with satin or other slick fabrics, pin the fabric in place along the bottom.
-
4Thread a sewing needle and start a stitch at the bottom corner of the fabric. Use thread that matches the color of your rose and cut off a thread tail that's about 12 inches (30 cm) long. Tie a knot in the end. Then, insert the needle through the bottom corner of the fabric so it goes through both layers of fabric.[10]
- It's important to secure this first stitch so that when you pull the thread later, the fabric gathers without the thread coming loose.
Tip: To stitch roses with a sewing machine, set your machine to do a gathering stitch. If your machine doesn't have this stitch style, set it to the longest straight stitch that's available.
-
5Sew gathering stitches across the bottom edge of the fabric. Leave a 1⁄4 inch (0.64 cm) seam allowance and make long straight stitches across the folded fabric. Keep pulling the top edge of the fabric down so it lines up with the bottom edge as you sew.[11]
- Continue to sew gathering stitches and fold until you reach the end of the fabric.
-
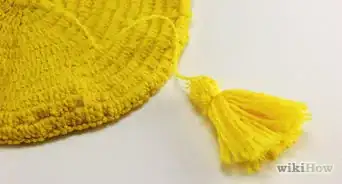
6Gather the fabric piece and twirl it so that you get a rose shape. Cut the thread to leave at least a 3 in (7.6 cm) tail. Then, pull the thread as you bunch the fabric together. Take the pointed end of the fabric and wrap the bunched strip around it so it forms the rose.[12]
- Wrap loosely for a rose that looks like it's opening.
-
7Stitch across the bottom of the rose so it holds its shape. Hold the rose together at the base and use your needle to sew across the underside of the rose. Work your needle through every layer of the bunched fabric so the rose doesn't come undone.[13]
- Feel free to sew fabric leaves to the bottom of the rose.

Making Roses with Individual Petals
-
1Cut 1 dome-shaped petal piece from felt. Get out a piece of felt that's the color you want the rose to be. To make the center of the rose, cut a felt circle and cut off the bottom 1/4 so the piece is dome-shaped.[14]
- Make the circle as big as you want the rose to be. For example, if you want the rose to be about 3 inches (7.6 cm) high, make the circle 3 inches (7.6 cm) wide.
- Although you could use other fabric, such as satin, felt holds its shape and doesn't fray.
-
2Make about 7 petal-shaped felt pieces. To make a petal shape out of felt, cut 3 hexagons that are the same size as the dome-shaped piece, but make their corners round. Then, cut 4 slightly larger petals for the petals at the edge of the rose.[15]
- Make the small pieces about 3 inches (7.6 cm) across and the large pieces around 4 inches (10 cm) across, for instance.
- If you don't feel like making petal-shaped pieces, you can cut all of them into dome-shaped pieces instead. This gives your rose a simpler look.
-
3Roll the dome-shaped piece tightly to make the center bud. Take the dome-shaped piece of felt and curl it tightly so it looks like the center of the flower. Pinch the piece at the flat edge so it doesn't unravel.[16]
- If you'd like to attach the rose to a stem, push a piece of craft wire through the bottom of the bud.
-
4Sew the bottom of the bud piece together. Thread a needle with about 12 inches (30 cm) of thread that matches the color of your felt and tie a knot at the end. Pinch the base of the rosebud and insert the needle horizontally so it goes through the flat edge of the piece. Then, bring the needle back through the felt in the opposite direction. Continue to stitch across the base of the rose until the felt layers are secure.[17]
- Don't cut the thread tail once you've finished sewing the rosebud.
-
5Wrap the small petals around the rosebud and sew across the base. Take the 3 small felt petals and wrap them around the center of the rose so the flat edges are on the bottom and the curved edges are at the top. Overlap the petals slightly so they look like they're unfolding and pinch the base. Then, sew back and forth through the bottom of the rose using a straight stitch.[18]
- Ensure that you stitch through the bottom of each petal so they don't fall off of the rose.
-
6Overlap the large petals around the edge of the rose and stitch them in place. Wrap the larger petal pieces around the rose so the flat edges are at the bottom and the curved edges are facing up. Overlap the petals a little and keep in mind that more of these petals will be visible than the smaller pieces at the center. Straight stitch across the base of the rose again so the bottoms of the petals are secure.[19]
- If you'd just like to make rosebuds, avoid wrapping larger petals around the small petals that you've already sewn.
- For a fuller rose, attach even more petal pieces to the edge of the rose.
-
7Wet your fingers and curl the petal tops outward to shape the rose. Dip your fingers in warm water and gently shape each petal outward with your wet fingertips so they look like they're blossoming. Try to make the larger petals around the edge of the rose appear more open than the petals near the center of the rose.[20]
Tip: If you'd like to give your roses long stems, insert a thin green craft wire through the bottom of a rose. Trim the wire so it's as long as you want the stem to be. Then, wrap green floral tape around the stem and secure it to the bottom of the rose.


Things You'll Need
Rolling a Ribbon Into a Rose
- Ribbon
- Scissors
- Sewing needle
- Thread
- Green floral wire, optional
Creating a Gathered Rose
- Sewing needle
- Thread
- Fabric
- Scissors
- Sewing machine, optional
Making Roses with Individual Petals
- Sewing needle
- Thread
- Fabric
- Scissors
- Green craft wire, optional
- Hot glue gun, optional


References
- ↑ https://sewguide.com/different-types-of-ribbons/
- ↑ https://sewguide.com/ribbon-rose-making-tutorials/
- ↑ https://sewguide.com/ribbon-rose-making-tutorials/
- ↑ https://sewguide.com/ribbon-rose-making-tutorials/
- ↑ https://sewguide.com/ribbon-rose-making-tutorials/
- ↑ https://sewguide.com/ribbon-rose-making-tutorials/
- ↑ https://sewguide.com/diy-fabric-roses/
- ↑ https://youtu.be/Z7XpsmNJq3A?t=51
- ↑ https://youtu.be/Z7XpsmNJq3A?t=75
- ↑ https://youtu.be/Z7XpsmNJq3A?t=146
- ↑ https://youtu.be/Z7XpsmNJq3A?t=284
- ↑ https://youtu.be/Z7XpsmNJq3A?t=656
- ↑ https://sewguide.com/diy-fabric-roses/
- ↑ https://sewguide.com/diy-felt-roses/
- ↑ https://sewguide.com/diy-felt-roses/
- ↑ https://sewguide.com/diy-felt-roses/
- ↑ https://sewguide.com/diy-felt-roses/
- ↑ https://sewguide.com/diy-felt-roses/
- ↑ https://sewguide.com/diy-felt-roses/
- ↑ https://sewguide.com/diy-felt-roses/
About This Article