X
wikiHow is a “wiki,” similar to Wikipedia, which means that many of our articles are co-written by multiple authors. To create this article, volunteer authors worked to edit and improve it over time.
This article has been viewed 11,675 times.
Learn more...
Starting seedlings for the garden or for educational purposes can be frustrating and difficult to monitor but with old toilet paper and hand towel rolls, it is cheap and easy. The system uses very little water and saves time. Potting soil used by many people to sprout seeds may contain plant hormones that may inhibit germination. Toilet paper is light and contains ample grip and moisture for delicate roots.
Steps
Part 1
Part 1 of 3:
Preparation
-
1Plan your project. Consider the following questions:
- How many seedlings do you want to grow? Use this amount to determine how many rolls you'll need.
- Where will you place the seedling starters? Choose a suitable spot unlikely to be in the way of everyday things and that is warm.
- What are the requirements of the seeds that you would like to plant? Think about germination temperature, light and humidity. If you're not sure, use a gardener's guide which has information about the particular plant you wish to grow.
-
2Collect the materials needed for the seedling starters. You'll need empty toilet or paper towel cardboard rolls, the amount being determined by the amount of seedlings you're going to grow. You'll also need the items listed under Things You'll Need below.


Advertisement
Part 2
Part 2 of 3:
Making the seedling holders
-
1Start the assembly. Cut the toilet rolls into rings roughly 4cm wide.
-
2Stuff each ring with approximately 1 meter of toilet paper. Do not compress the paper too much.
-
3Write the name of the seeds you intent to plant on the outside of the toilet paper rings.
-
4Place each stuffed ring on the table. Tear the top layers of toilet paper in the ring and place a seed in the tear and close the tear over the seed.
-
5Place the complete seedling starter in the plate with the seeded side upwards.
-
6Repeat until the plate is full.
-
7Slowly add the 500ml water to the plate. The toilet paper and cardboard will suck up most of the water. Slowly tilt the plate to ensure even wetting of all seedling starters.


Advertisement
Part 3
Part 3 of 3:
Growing the seedlings
-
1Place the plate with seedling starters in the plastic bag. Puff up the plastic bag to make room for the seedlings and tie the bag lightly to keep the air and moisture inside.
-
2Place the completed "greenhouse" in its appropriate warm and light location.
-
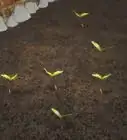
3Make a note on your calendar to inspect the seeds every 4 to 5 days. You don't want to miss the sprouts popping up!
-
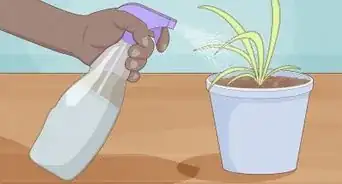
4Once the sprouts start forming leaves, you can remove them from the plastic bag. Plant the seedlings into potting soil or straight into the garden by placing the biodegradable seed starter directly into the soil. Mix a small amount of liquid plant food with the water and add it to the plate if you are not planting the seedling out directly after germination.


Advertisement
Things You'll Need
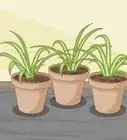
- A plate to place the seedlings in, measuring approximately 1cm deep with a diameter sufficient to hold the homemade seedling starters; you should be able to fit 15 seedling starters into a 23cm diameter plate
- A clear plastic bag big enough to accommodate the plate and some room for the seedlings to grow––bigger is better; you can use an old plastic bag recycled from electrical appliance packaging––just seal any holes with tape
- Toilet paper - one meter of plain single ply toilet paper for each seedling starter
- About 500ml water per plate of 15 seedling starters
- A craft knife for cutting the toilet rolls
- Any waterproof pen, marker or pencil to number or mark the content of each seed starter
- Seed


About This Article
Advertisement