This article was co-authored by Crystal Bear. Crystal Bear is a Professional Photographer and the Owner of Summer Bear Photography. Crystal specializes in weddings and portraits for women. She holds a BS in Interior Design and Consumer Science from San Francisco State University. Coming from a design background, Crystal brings a sense of style and artistry to her work that brings out her client’s inner confidence, showcases their beauty both inside and out, and puts them at ease. She also specializes in using the correct lighting and branding for women entrepreneurs.
There are 9 references cited in this article, which can be found at the bottom of the page.
This article has been viewed 19,002 times.
You're excited to travel the globe, but there's one thing standing in your way: your passport application, including the passport photo. Taking a passport photo doesn't have to be a pain. You can wear your regular clothes and go to a local drugstore or big box store to get it taken. However, you can also take it yourself using a digital camera, smartphone, or even a film camera.
Steps
Getting a Professional Photo
-
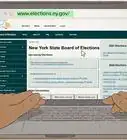
1Find a place that offers passport photos. Many businesses offer to take passport photos for a small fee, including drugstores, big box stores, and other photo-processing stores. Find a business in your area that offers this service.[1]
- For instance, you can get photos taken at places like Walgreens, CVS, Walmart, Target, and Costco.
- If you use the government services like the DMD office or the post office photos, wear heavier makeup because they usually have bright kind of flashes that wash out your face.[2]
-
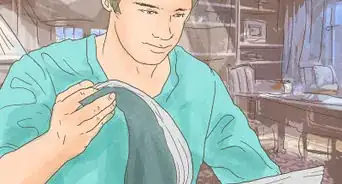
2Ask a store clerk to help you. Generally, anyone in the store can help you, though usually a person who works at the photo counter is best. Ask if they will take the photo for you. They have to use their camera to take your photo, which is connected to the store's software.Advertisement
-
3Pose appropriately. The U.S. Department of State recommends that you have a neutral expression or a regular smile. Also, you should look directly at the camera and keep your eyes open when taking the photo. Check with your country's laws to see what they require for the photo. For instance, both the U.K. and Canada require that you not smile at all.[3]
-
4Take off your hat and glasses. You can't wear a hat, head covering, or glasses while taking a passport photo. There are two exceptions to this rule. You can wear glasses if you can't take them off for medical reasons, and you can wear a head covering if it's required by your religion.[4]
- You must have a signed doctor's note with your application if you keep your glasses on.
- If a head covering is required for your religion, you may submit a statement with your photo stating that it's required by a recognized religion. The covering cannot obscure your face or hairline.
-
5Pay the fee for the photo to be printed. Drugstores charge for the service of taking your photo and printing it off. Usually it costs somewhere between $5 USD and $15 USD depending on where you are, so be ready to pay that fee.[5]


Taking Your Own Photo
-
1Find a white or off-white background. The State Department requires that your photo have a white background. When you're taking your own photo, find a white wall or other backdrop to take your photo in front of.[6]
-
2Pay attention to the lighting. The picture needs to be clear without glare or shadows. It should also be in good lighting. You may need to move around to find the perfect balance of good lighting and no shadows.[7]
-
3Remove glasses and hats. Unless you have a medical reason to keep them on, take your glasses off. Also, hats and head coverings need to come off unless it's a part of your religious beliefs.[8]
- With the glasses, you'll need a doctor's note if you keep them on. With the head coverings, you'll submit a letter stating that your head covering is required by a recognized religion.
- Also, take your headphones out. You can't be wearing electronic devices in the photo, specifically headphones or bluetooth ear pieces. Take them out before you snap the photo.[9]
- If you have a round face, you can put your hair down, so it does not look too round.[10]
- If the flash is too bright, you can wear heavier mascara, heavier eyeliner, put some lipstick, and a powder foundation.[11]
-
4Face the camera with a natural expression. You can make a natural smile in the United States, but don't do anything too crazy. You want to keep it pretty normal.[12]
-
5Take the photo. You can take the photo with a digital camera, film camera, or a smartphone. If you're using a smartphone, trying using a passport photo app, which will help you line up your photo appropriately.[13]
- To make it easier, have a friend take the photo for you if you're the one who needs the passport photo. If you take it yourself, you should use a timer and a tripod instead of taking a traditional selfie.
- Take multiple shots to make sure you get a good one.


Editing the Photo as Needed
-
1Take out red eye. If you ended up with red eyes in your photo, you can remove them digitally with a photo editing tool. However, that is the only digital alteration you are allowed to make.[14]
- Generally, all you need to do to take out red eye is to select the red eye removal tool in the photo editor of your choice and then click on each eye. Some editors even remove it automatically.
-
2Size the photo appropriately. Your passport photo needs to be sized according to your country's regulations. Google "[Your Country Name] passport photo size" to learn more. For instance, for the US, the photo needs to be 2 by 2 inches (5.1 by 5.1 cm), and your face needs to be 1 by 1.375 inches (2.54 by 3.49 cm) in length from top to bottom. You can use the State Department's tool to adjust your photo at https://travel.state.gov/content/dam/passports/content-page-resources/FIG_cropper.swf. You upload a photo and then adjust your photo to fit in the given outline.[15]
-
3Print the photo. You can print the photo at home, as long as you have photo paper and your printer prints cleanly. Make sure the photo is clear and not pixelated. You can also print it off at a drugstore for less than $1 USD.[16]
- Some apps, such as the Passport Photo Booth, will help you take the photo, and then they will send you a printed photo by mail for about $6 USD.
-
4Submit it before 6 months is up. The photo for your passport photo needs to be recent, specifically taken with the last 6 months. Therefore, make sure you get your application submitted before that time is up.[17]
- Make sure you submit the appropriate number of photos -- you'll often need to submit more than 1 copy!


Community Q&A
-
QuestionWhat happens when you use very bright flashes?
 Crystal BearCrystal Bear is a Professional Photographer and the Owner of Summer Bear Photography. Crystal specializes in weddings and portraits for women. She holds a BS in Interior Design and Consumer Science from San Francisco State University. Coming from a design background, Crystal brings a sense of style and artistry to her work that brings out her client’s inner confidence, showcases their beauty both inside and out, and puts them at ease. She also specializes in using the correct lighting and branding for women entrepreneurs.
Professional PhotographerUsually, very bright flashes wash out your face. So you should wear makeup, heavy mascara and eyeliner, lipstick, and powder foundation before posing for a photo. -
QuestionIf I have a round face, what can I do to get a good photo?Crystal BearCrystal Bear is a Professional Photographer and the Owner of Summer Bear Photography. Crystal specializes in weddings and portraits for women. She holds a BS in Interior Design and Consumer Science from San Francisco State University. Coming from a design background, Crystal brings a sense of style and artistry to her work that brings out her client’s inner confidence, showcases their beauty both inside and out, and puts them at ease. She also specializes in using the correct lighting and branding for women entrepreneurs.
Professional PhotographerYou can let your hair down so that your face does not look too round in the photo.


References
- ↑ https://www.cnet.com/how-to/how-to-take-your-own-passport-photos/
- ↑ Crystal Bear. Professional Photographer. Expert Interview. 21 January 2021.
- ↑ https://travel.state.gov/content/passports/en/passports/photos.html
- ↑ https://travel.state.gov/content/passports/en/passports/photos.html
- ↑ https://www.cnet.com/how-to/how-to-take-your-own-passport-photos/
- ↑ https://travel.state.gov/content/passports/en/passports/photos.html
- ↑ https://www.cnet.com/how-to/how-to-take-your-own-passport-photos/
- ↑ https://travel.state.gov/content/passports/en/passports/photos.html
- ↑ https://www.cnet.com/how-to/how-to-take-your-own-passport-photos/
- ↑ Crystal Bear. Professional Photographer. Expert Interview. 21 January 2021.
- ↑ Crystal Bear. Professional Photographer. Expert Interview. 21 January 2021.
- ↑ https://www.digitaltrends.com/photography/how-to-take-a-passport-photo/
- ↑ https://www.digitaltrends.com/photography/how-to-take-a-passport-photo/
- ↑ https://travel.state.gov/content/passports/en/passports/photos.html
- ↑ https://www.cnet.com/how-to/how-to-take-your-own-passport-photos/
- ↑ https://www.digitaltrends.com/photography/how-to-take-a-passport-photo/
- ↑ https://www.digitaltrends.com/photography/how-to-take-a-passport-photo/
About This Article

To take a passport photo, start by finding a white wall or backdrop with good lighting so there aren't any shadows or glares. Then, stand in front of the white background, and take off your hat and glasses if you're wearing them. Next, face the camera with a natural expression, and have someone take a photo of you using a digital camera or smartphone. Finally, upload and edit your photo so the size meets your country's requirements. For tips on how to get a professional passport photo taken, read on!