Easily activate the Out of Office Assistant in Outlook
X
wikiHow is a “wiki,” similar to Wikipedia, which means that many of our articles are co-written by multiple authors. To create this article, 10 people, some anonymous, worked to edit and improve it over time.
This article has been viewed 319,881 times.
Learn more...
If you have to leave the office for a bit, or you’re planning on going away on vacation, you may wish to let the people who send you email know that you’re away. If you have an Exchange account, Outlook comes with the functionality built-in. If you don’t have an Exchange account, you can still automatically respond to emails by creating a few rules. Follow this guide to set up your automatic replies, whether you have an Exchange account or not.
Steps
Method 1
Method 1 of 4:
Outlook 2010/2013
-
1Turn on automatic replies. Select an Exchange folder. Select the folder from your message store. You must have an Exchange folder selected in order to see the Automatic Replies option. Open the Automatic Replies (Out of Office) menu. You can find this by clicking the File tab and then selecting the Info tab.
-
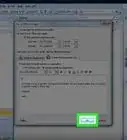
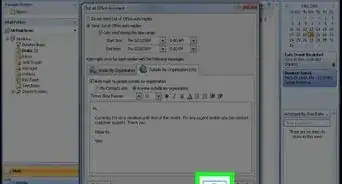
2Configure your replies. In the Automatic Replies menu, check the box labeled Send Automatic Replies. You can adjust the time that the assistant is active by checking the box and setting the time and date range.Advertisement
-
3Write your replies. For emails sent from within your exchange server, use the Inside My Organization tab. For responses to emails received from anyone else, use the Outside My Organization tab. Once you are satisfied with your replies, click OK.
-
4Disable Automatic Replies. If you set a date range for your automatic replies, the assistant will end automatically when the date range is over. If you didn’t set a range, it will continue until you open the Automatic Replies menu and select “Do not send automatic replies.”


Advertisement
Method 2
Method 2 of 4:
Outlook 2007
-
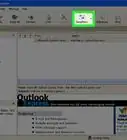
1Turn on the Office Assistant. Click the Tools tab. In the Tools menu, select Out of Office Assistant. Check the box labeled “Send Out of Office auto-replies.” You can adjust the time that the assistant is active by checking the box and setting the time and date range.
-
2Write your replies. For emails sent from within your exchange server, use the Inside My Organization tab. For responses to emails received from anyone else, use the Outside My Organization tab. Once you are satisfied with your replies, click OK.
-
3Disable Out of Office Assistant. If you set a date range for your automatic replies, the assistant will end automatically when the date range is over. If you didn’t set a range, it will continue until you open the Automatic Replies menu and select “Do not send Out of Office auto-replies.”


Advertisement
Method 3
Method 3 of 4:
Outlook 2003
-
1Turn on the Office Assistant. In the Tools menu, select Out of Office Assistant. Check the box labeled “I am currently Out of the Office.”
-
2Write your replies. In the box labeled “AutoReply only once to each sender with the following text:” enter the reply that you want to respond with.
-
3Add rules. You can add rules to your Assistant, such as forwarding messages from certain senders to another recipient. Click the Add Rule… button to configure a custom rule. For example, you could create a rule that would forward mail from a specific client to your associate so that the important emails aren’t missed while you’re away.
-
4Disable Out of Office Assistant. Out of Office Assistant will continue until you open the Automatic Replies menu and select “Do not send Out of Office auto-replies.”


Advertisement
Method 4
Method 4 of 4:
Send an Auto-Reply Without an Exchange Account
-
1Create your template. Without an Exchange account, the Automatic Reply options are unavailable. It is still possible to set up an automated response using a template and a few rules. Start by creating a new email. This will be the template for your automatic response.
- Choose a Subject that succinctly explains the situation. For example “Out of the office until <date>”. You could also write the words “auto-reply” in the Subject to let the recipient know immediately that the response is automated.
- Write a brief message. In the Body of the email, write a general message that can apply to anyone who receives it. Let the recipient know how to reach you, or who else to contact.
-
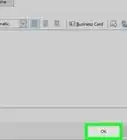
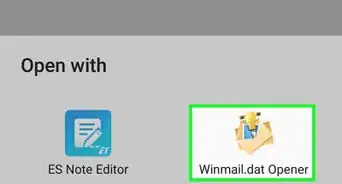
2Save your template. Once you are happy with the message, click Save As… In the “Save as type” dropdown menu, select Outlook Template. This will save the file as a template that loads into Outlook.
-
3Create the rules. In order to get the auto-response working correctly, you will need to define some rules to automate the process. In Office 2003/2007, click the Tools menu and select Rules and Alerts. In Office 2010/2013, click the File tab, select Info, and then click Rules and Alerts. This will open the E-Mail Rules menu.
- Click the New Rule button. You will be asked to select a template. From the “Start from a blank rule” section, select “Check messages when they arrive.” Click Next.
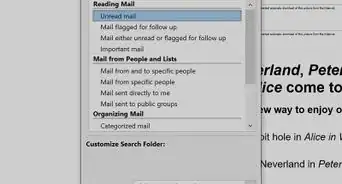
- Define which messages will get responded to. If you want to respond to every message you receive in your inbox, check the box for “where my name is in the To box”. You can narrow it down by designating specific sends, or emails with specific words in the subject or body. Click Next after making your selections
- Load your template. Select the “reply using a specific template” box in the next window to load the message that you created earlier. Click the link in the box description for “a specific template”. This will open a dialog asking where to look for templates. Select “User Templates in File System”. Open the message that you created earlier.
- Set your exceptions. Once the template is loaded, you can define instances when you don’t want the reply to be sent, such as to a specific recipient, or for specific types of messages. Click Next after making your selections.
- Name your rule. Before you can finish, you will need to set a name for your rule. User something that is easy to remember so you can disable the rule quickly in the future. Check the “Turn on this rule” box to activate the rule, then click Finish.
-
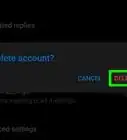
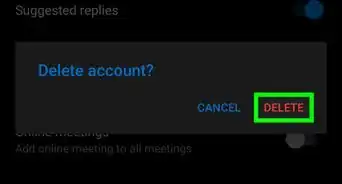
4Disable the rule. When you have returned to the office, you can disable the rule by opening the Rules and Alerts menu again. Select the Out of Office rule that you created from your list of active rules, and then click the Delete button.


Advertisement

About This Article
Advertisement