This article was co-authored by wikiHow Staff. Our trained team of editors and researchers validate articles for accuracy and comprehensiveness. wikiHow's Content Management Team carefully monitors the work from our editorial staff to ensure that each article is backed by trusted research and meets our high quality standards.
There are 14 references cited in this article, which can be found at the bottom of the page.
The wikiHow Video Team also followed the article's instructions and verified that they work.
This article has been viewed 10,389 times.
Learn more...
Ooly is a company that makes cartridge-style fountain pens with a variety of ink colors. These pens are a little different than ballpoint pens, so they require a light touch to use. When your Ooly pen runs out of ink, you can order new ink cartridges to refill it instead of searching for something else to write with. Ink clogs are easy to deal with and can be cleared out by soaking the nib in warm water. With proper care, you can use an Ooly fountain pen to bring art and writing to life with a free-flowing technique that is more comfortable than a ballpoint pen ever could be.
Steps
Writing with a Fountain Pen
-
1Grip the pen between your thumb and index finger. Place your index finger on top pen’s barrel, about 1 in (2.5 cm) from the nib. Curl your thumb around the pen’s underside. Keep your other fingers behind your index finger, using them to help stabilize the pen while you write. When you look down at your hand, it will be roughly in the shape of the letter C.[1]
- Many Ooly pens have a rubber grip on the barrel you can use to figure out where to position your fingers. Some pens without grips have differently-colored barrels instead.
- Some people prefer using a tripod grip, which you can do by setting your middle finger next to your index finger on the barrel.
-
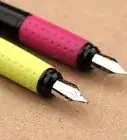
2Turn the pen so the pointed nib is against the paper. A fountain pen’s nib is mostly flat with a sharp tip. It has to be positioned so the tip is against the paper in order for the ink to flow out. Rotate the pen so the flat underside of the nib is facing your palm. It is a little different than using a ballpoint pen, but it’s something you get accustomed to the more you use your pen.[2]
- Some people refer to the positioning as the sweet spot. When the nib hits the sweet spot, the pen is able to glide over the page while releasing a steady flow of ink.
Advertisement -
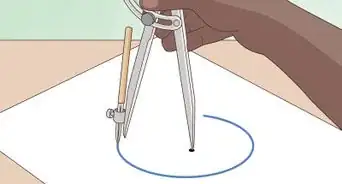
3Lean the pen back at a 45-degree angle from the paper. Try holding the pen at roughly a 45-degree angle from the paper. Let the back end of the pen rest between the edge of your hand between your index finger and thumb. Then, test the pen to see if you’re able to move it across the page with ease.[3]
- You can change the angle a little bit without stopping the pen from working. However, it won’t work if you hold the pen too straight, so keep it diagonal from the page.
-
4Press the pen nib down with a gentle amount of pressure while writing. Many people make the mistake of gripping too hard when first using a fountain pen. Ooly pens are no different and are more likely to shred your paper than anything else if you’re writing with a lot of force. Grip lightly, applying just enough force to keep the pen steady. Release your grip a little bit if you notice the pen scratching or cutting into the paper.[4]
- Ooly pens require way less force to use than regular ballpoint pens. Always try to be as gentle as you can when using one.
-
5Move the pen around with your arm instead of your hand. Once you have your Ooly pen in position, practice writing with it. Keep your fingers still and somewhat stiff. Instead, move your arm to sweep the pen along the page. While doing this, continue holding the pen at the same angle with the same amount of pressure.[5]
- When your pen falls out of position, it will begin skipping or scratching along the page. Stop and readjust your grip.
- Ballpoint pens have a rounded tip, so they work no matter how you’re holding them. Ooly pens won’t work the same way, but your hand won’t tire out quite as quickly.


Replacing an Empty Ink Cartridge
-
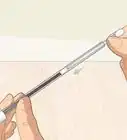
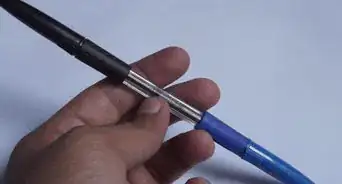
1Unscrew the pen by turning its barrel counterclockwise. The barrel is the top part of the pen containing the ink cartridge. Look along the length of the pen to spot where the two halves of the pen meet. Twist the barrel until it comes loose, then slide it away from the back half of the pen. The ink cartridge will come out with it.[6]
- The barrel is often a different color from the rest of the pen. Some Ooly fountain pens have a rubber grip over the barrel.
-
2Pull the cartridge out from the barrel by twisting it counterclockwise. The barrel attaches to the nib on one end and the cartridge on the other. Grip the cartridge lightly and begin turning it to the side. Slide it away from the barrel once it comes loose.[7]
- Handle the cartridge gently to avoid damaging it. Squeezing it too hard could cause it to break open, creating a very big mess if it has any ink left in it.
-
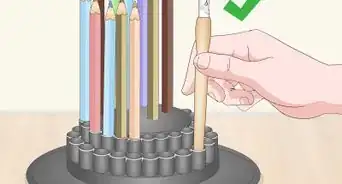
3Push the new cartridge into the barrel until you hear a click. Take the new cartridge out of its packaging and examine it. One of the ends will be smaller than the other. Insert the smaller end into the barrel and nib. Keep pushing it in with a gentle but firm amount of pressure until you hear it click in place.[8]
- If you’re having trouble getting the new cartridge to stay in, stand the pen up and push it down against a flat surface. Listen for the click indicating that the cartridge has locked in place.
- Ooly fountain pens are cartridge-based, and you can order replacements online through the manufacturer’s website. Although some similarly-sized cartridges from other companies may also fit, get the official product for an identical replacement that is guaranteed to work.
-
4Twist the barrel clockwise onto the back half to reassemble the pen. Hold the barrel in one hand and the back half in the other. Slide the barrel, ink cartridge first, into the opening on the other half. Then, twist the barrel clockwise by hand until the two parts are well-secured.[9]
- Make sure the cartridge is free of moisture and secure inside the barrel so it doesn't break when you close up the pen.
-
5Shake the pen to get the ink flowing before writing with it. Put the cap on and shake the pen up and down for about 15 seconds. Then, begin writing on a piece of scrap paper. Draw some sweeping lines or circles across the page.[10]
- To avoid ink splatter, always cap the pen nib before shaking it.
Cleaning a Clogged Nib
-
1Take the pen apart to remove the ink cartridge. Spin the barrel counterclockwise to separate it from the rest of the pen. The cartridge will be inside it, and you can also remove it by very gently turning it counterclockwise. Set the cartridge aside, disposing of it in the trash if it looks empty.[11]
- Look inside the cartridge to check the ink level. It is transparent, so you will be able to see the ink through it.
-
2Reattach the barrel to the pen by screwing it on clockwise. Hold the barrel in one hand and plug it into the opening on the back half of the pen. Rotate it until it locks in place. You won’t need the cartridge installed to do this.[12]
- While you could clean the pen without putting it back together, doing this will help force any leftover ink to drain through the nib.
-
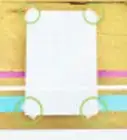
3Soak the nib in a cup of hot water for 3 minutes. Fill up a small glass or cup with enough water to submerge the nib. Then, stick the pen nib-first into the water. Rest the pen against the glass. Position it so it stays standing with the nib submerged.[13]
- Standing the pen up causes the remaining ink to run toward the nib. Make sure the pen doesn't fall over while you're soaking the nib, or else the ink will move in the opposite direction.
-
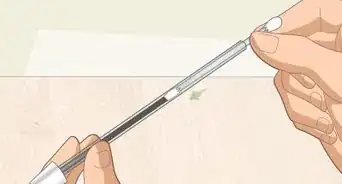
4Stir the pen in the water for a minute to shake out ink. Move the pen around the glass in a circle. Keep the nib submerged the entire time. Stir quickly to force out as much of the remaining ink as possible.[14]
- The water will change as the ink drains into it. Watch for the water to turn a consistent shade of whatever color ink you were using in the pen.
-
5Blot the pen dry on a paper towel. Wrap a clean paper towel around the nib and dab it gently to remove any moisture on it. Then, unscrew the barrel again. Clean out the rim and inner portion of the barrel, followed by the other portion. Make sure the pen is completely dry before attempting to use it.[15]
- Wipe the nib several times to finish drying it. Some of the water may leak through it while you’re cleaning the rest of the pen.
- If the pen is still a little wet, set the pieces on a paper towel and let them air dry for up to 30 minutes.
-
6Replace the ink cartridge and put the pen back together. Pick up the ink cartridge first and insert its smaller end into the barrel first. Then, fit the other half of the pen over the cartridge. Rotate the barrel clockwise to finish reassembling the pen. Test the pen afterward by attempting to write on a piece of scrap paper.[16]
- You may need to press down on the cartridge with a light amount of pressure to snap it in place. After putting it in the barrel, stand it straight up and press it against a flat surface until it stays in place.
- If the pen still won’t work, the nib may have some leftover ink inside of it. Take the pen apart and soak the nib again.


Things You’ll Need
Writing with a Fountain Pen
- Ooly pen
- Paper
Replacing an Empty Ink Cartridge
- Pen
- New cartridge
- Test paper
Cleaning a Clogged Nib
- Pen
- Glass
- Warm water
- Paper towel
- Test paper


References
- ↑ https://www.columbiaspectator.com/spectrum/2014/12/06/how-write-your-name-ivy-league-student/
- ↑ https://indianapublicmedia.org/amomentofscience/fountain-pens.php
- ↑ https://www.bestfountainpen.com/using-a-fountain-pen/
- ↑ http://www.vintagepen.net/how-to-use-flex-nibs.html
- ↑ https://www.youtube.com/watch?v=6XqUtIn4jQo&feature=youtu.be&t=387
- ↑ https://www.youtube.com/watch?v=jPAa607ApcQ&feature=youtu.be&t=53
- ↑ https://www.bestfountainpen.com/how-to-clean-a-fountain-pen/
- ↑ https://www.youtube.com/watch?v=hxg0I9md4DI&feature=youtu.be&t=11
- ↑ https://www.youtube.com/watch?v=hxg0I9md4DI&feature=youtu.be&t=17
- ↑ https://www.youtube.com/watch?v=hxg0I9md4DI&feature=youtu.be&t=40
- ↑ https://www.bestfountainpen.com/how-to-clean-a-fountain-pen/
- ↑ https://www.youtube.com/watch?v=XZLjtYJEOtc&feature=youtu.be&t=23
- ↑ https://www.youtube.com/watch?v=XZLjtYJEOtc&feature=youtu.be&t=38
- ↑ https://www.youtube.com/watch?v=XZLjtYJEOtc&feature=youtu.be&t=50
- ↑ https://www.bestfountainpen.com/how-to-clean-a-fountain-pen/
- ↑ https://www.youtube.com/watch?v=ORljQ1hIch0&feature=youtu.be&t=346
About This Article