This article was co-authored by Ryaan Tuttle. Ryaan Tuttle is a Home Improvement Specialist and the CEO of Best Handyman Boston. With over 15 years of experience, Ryaan specializes in home improvement and property maintenance by leveraging technology and craftsmanship. Ryaan holds his Construction Supervisor and Home Improvement Contractor Licenses. Unlike most handyman contractors, Best Handyman Boston is licensed and insured. Boston Magazine and LocalBest.com have named Best Handyman Boston the Best Handyman in Boston.
This article has been viewed 564,398 times.
A caulk gun is an easy-to-use tool for filling in cracks around things like windows, bathtubs, and doors. If you've never used a caulk gun before, you might be wondering how to set one up and use it to apply caulk. Keep reading to learn exactly how to use a caulk gun, including how to prep the area you're caulking, load the gun, and apply the caulk smoothly.
Things You Should Know
- Clean off the old caulk with a putty knife and wash the crack. Then, apply painter’s tape to the crack.
- Press the release trigger on the caulking gun and load the caulking tube with the nozzle facing away. Pierce the tube, then cut the front of the nozzle.
- Pull the trigger to apply the caulk. Try it over paper first, then hold the gun at a 45-degree angle to the crack and fill it with caulk.
Steps
Cleaning and Masking the Area
-
1Clean off all the old caulk with a putty knife. Before you apply any new caulk to a crack, make sure to remove any old caulk that may have been applied before.[1] By removing the old caulk that may be cracking, you're avoiding building a new layer on weak foundations. Additionally, you'll be able to be more precise with how much caulk you want to use.[2]
- Place the sharp end of the putty knife at the base of the old caulk. Then, grab the handle and push the knife forward. Keep pushing forward until all of the caulk has been removed.
- Alternatively, you can use a plastic caulk removal tool.[3]
- You can even use an Olfa knife.[4]
- To make the caulk easier to remove, try using a caulk softener, which you can find at any home improvement store. Just apply it, wait 20-30 minutes, then scrape it with a carpet or putty knife.[5]
- For silicone caulking, pry up one side and then pull the strip out with needle-nose pliers.
-
2Wash down the crack with rubbing alcohol, disinfectant, and hot water. Fill a bucket with hot water. With a rag, wash the crack with rubbing alcohol and disinfectant. A common household cleaning disinfectant will work perfectly. Then, with a different rag soaked in the hot water, wash the crack until it's clean. Dry it off with a cloth afterward.
- Caulking will insulate anything in the crack, so you want to make sure all dirt is completely removed.
- If there is any caulk or grime leftover, use a plastic scraper to lift it up.
Advertisement -
3Use painter's tape around the crack to be more precise. With a roll of painter's tape, stick one long strip above the crack and one long strip below the crack. This tape will protect anything you don't want touched from coming into contact with the caulk. It also acts as insurance in case you make a mistake later on.[6]
- Using painter's tape makes the caulking process more precise. It also means that you can make the caulking aesthetically pleasing too.
- Remove the tape quickly after you use silicone caulk, or else it could get stuck.


Loading the Caulking Gun
-
1Press the release trigger on the back of the caulking gun. There is a small trigger on the back of the caulking gun. Press this with your thumb. This will loosen the long steel rod that runs through the entirety of the frame. With your other hand, pull this rod as far back as you can and hold it.
- If you need to, ask a friend or family member to help keep the rod back as you work on inserting the caulking tube.
-
2Insert the caulking tube with the nozzle facing away. Still holding the steel rod back, load the caulking tube into the frame. Make sure the nozzle side is facing away from you. Insert the flat end of the tube into the back of the gun first. When the back end hits the back of the gun lower the front end of the tube downwards. Make sure the tube is snug and level.
- Some caulk guns have a piercing rod and tip cutter on the frame. Use these before putting the tube in the frame.
-
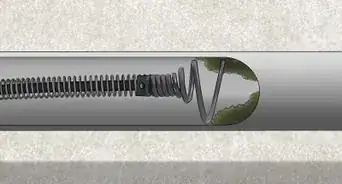
3Pierce the tube with the metal rod. Once the caulk tube is sitting securely inside the frame, push the back of the metal rod into the caulking tube. Make sure the hook plunges deep in the back. This hook keeps the caulk in place. It also helps the trigger at the bottom of the gun function.[7]
- If you become uncertain at any point, consult the instructions that are provided with your caulk tube. The instructions will tell you the precise method needed for that particular tube.
-
4Cut the front of the nozzle at a 45-degree angle with scissors to adjust the thickness of the caulk. A caulking tube will come with a long-sealed nozzle at the front. Cut this nozzle at the desired point so that the caulk will come out at the desired width. If the crack is large, consider cutting the nozzle close to the tube. If the crack is small, cut the nozzle near the end to be precise.[8]
- This choice is permanent, so think carefully about the thickness before you make the cut. However, it's better to cut the nozzle further away so it's thinner.[9] If the caulk's too thin, you can always cut the nozzle shorter.


Applying the Caulk
-
1Pull the trigger and move the gun over a piece of paper to practice. Hold the gun at a 45-degree angle with the nozzle facing downwards. Then, over a piece of paper, press the trigger at the back of the gun while moving the caulking gun steadily in one direction. The caulk should come out in a steady stream.[10]
- If you move the caulking gun too fast, the caulk will be too thin and uneven.[11] If you move the caulking gun too slow, the caulk will be clumpy and unworkable. Find a balance between the two.
- Don't worry if you pressed the trigger and no caulk came out. Let the pressure off the trigger then start again.
-
2Hold the caulking gun at 45 degrees to the crack. Hold the caulking gun with two hands. One hand should be by the trigger. Use your other hand to hold the end of the caulking tube, assisting your aim. Tilt the entire gun 45 degrees. The caulk should start to flow towards the nozzle.[12]
- Although the trigger will push some of the caulk out of the tube, by holding the gun at 45 degrees, you are using gravity to help with the process.
-
3Press the trigger to push the caulk into the nozzle. Once you push the trigger, the steel rod will push the caulk out the nozzle. Press the trigger firmly and steadily.[13] The caulk should begin to come out of the tube in a slow, controlled manner.
-
4Move the caulking gun across the crack. As the caulk comes out of the nozzle, move the caulking gun down the crack you wish to fill. The caulk will come out of the gun and go into the crack where it will solidify quickly. Try to move in a single, steady motion so the caulk fills the crack evenly.[14]
- If you missed any spots, don't worry. You can come back and fill in any missed points in a second run through. There's no obligation to fill the crack on your first try.
- If you've used painter's tape, don't worry if the caulk goes over it. You can peel this off after you're finished.[15] If you haven't used painter's tape, a putty knife and wire brush should remove any mistakes.
-
5Smooth the caulk over with a heated metal spoon if you want a smoother line. Heat a small metal spoon in hot water for 30 seconds. Then, slide the curved edge of the spoon over the caulk to smooth it over. This makes a more aesthetically pleasing caulking line. Use the heated spoon to fine tune the shape.[16]
- You can also wet your finger and run it along the caulk line to smooth it out.[17]
-
6Remove any painter's tape and let the caulk dry. Peel off all the painter's tape and leave the caulk to dry unbothered. Each caulk tube will direct you with the precise time to wait until it's completely dry. Generally, it takes at least 24 hours for the caulk to completely solidify.[18]


Expert Q&A
-
QuestionShould I smooth out the line of caulk?
 Barry ZakarBarry Zakar is a professional handyman and the founder of Little Red Truck Home Services based in the San Francisco Bay Area. With over ten years of experience, Barry specializes in a variety of carpentry projects. He is skilled at constructing decks, railings, fences, gates, and various pieces of furniture. Barry also holds his MBA from John F. Kennedy University.
HandymanYou don't have to, especially if you're happy with the bead you put down. However, if not, you can wet your finger and use it to smooth down the caulk before it dries. -
QuestionHow do you remove old caulking?
 Ryaan TuttleRyaan Tuttle is a Home Improvement Specialist and the CEO of Best Handyman Boston. With over 15 years of experience, Ryaan specializes in home improvement and property maintenance by leveraging technology and craftsmanship. Ryaan holds his Construction Supervisor and Home Improvement Contractor Licenses. Unlike most handyman contractors, Best Handyman Boston is licensed and insured. Boston Magazine and LocalBest.com have named Best Handyman Boston the Best Handyman in Boston.
Home Improvement SpecialistYou can buy a plastic caulk removal tool from Home Depot or Lowe's. It helps you pull out the caulking. -
QuestionCan I use an Olfa knife to remove the old caulk?Ryaan TuttleRyaan Tuttle is a Home Improvement Specialist and the CEO of Best Handyman Boston. With over 15 years of experience, Ryaan specializes in home improvement and property maintenance by leveraging technology and craftsmanship. Ryaan holds his Construction Supervisor and Home Improvement Contractor Licenses. Unlike most handyman contractors, Best Handyman Boston is licensed and insured. Boston Magazine and LocalBest.com have named Best Handyman Boston the Best Handyman in Boston.
Home Improvement SpecialistAn Olfa knife helps remove old caulk. It has a super-sharp thin blade that can get all the caulking out.
Things You’ll Need
- Putty knife
- Painter's tape
- Rubbing alcohol
- Disinfectant
- Hot water
- Caulking tube
- Caulking gun
- Scissors
- Piece of paper
- A spoon


References
- ↑ Ryaan Tuttle. Home Improvement Specialist. Expert Interview. 13 January 2021.
- ↑ https://www.bobvila.com/articles/how-to-use-a-caulk-gun/
- ↑ Ryaan Tuttle. Home Improvement Specialist. Expert Interview. 13 January 2021.
- ↑ Ryaan Tuttle. Home Improvement Specialist. Expert Interview. 13 January 2021.
- ↑ Barry Zakar. Handyman. Expert Interview. 20 August 2020.
- ↑ https://www.bobvila.com/articles/how-to-use-a-caulk-gun/
- ↑ https://www.prettyhandygirl.com/tool-tutorial-friday-how-to-use-a-caulk-gun/
- ↑ https://www.lowes.com/projects/paint-stain-and-wallpaper/how-to-caulk/project
- ↑ Barry Zakar. Handyman. Expert Interview. 20 August 2020.
- ↑ https://www.bobvila.com/articles/how-to-use-a-caulk-gun/
- ↑ Barry Zakar. Handyman. Expert Interview. 20 August 2020.
- ↑ https://www.bobvila.com/articles/how-to-use-a-caulk-gun/
- ↑ Barry Zakar. Handyman. Expert Interview. 20 August 2020.
- ↑ Barry Zakar. Handyman. Expert Interview. 20 August 2020.
- ↑ https://www.lowes.com/projects/paint-stain-and-wallpaper/how-to-caulk/project
- ↑ https://www.bobvila.com/articles/how-to-use-a-caulk-gun/
- ↑ Barry Zakar. Handyman. Expert Interview. 20 August 2020.
- ↑ https://www.bobvila.com/articles/how-to-use-a-caulk-gun/
- ↑ https://thecraftsmanblog.com/how-to-pick-the-right-caulk/
About This Article

To use a caulking gun, press the release trigger at the back of the gun, pull back the metal rod, and insert the caulk tube into the frame. Then, secure the tube by pushing the metal rod back into the frame. Next, cut off the tip of the tube, and position the nozzle at a 45 degree angle over the crack you want to seal. Finally, squeeze the trigger as you steadily move the nozzle along the crack. To learn more, including how to smooth over the caulk after applying it, read on.