This article was co-authored by Amy Guerrero. Amy Guerrero is an Arts and Crafts Specialist and the Owner of Sunshine Craft Co., a crafting studio based in Phoenix, Arizona. Amy specializes in macrame, DIY crafting, and teaching fiber arts. She offers monthly in-person and online workshops along with having developed a range of DIY craft kits for at-home projects. Amy holds a BS in Industrial Design from Philadelphia University. She worked as a graphic designer before starting her own business. Sunshine Craft Co. is a creative hub that offers a wide range of workshops, tools, and resources for any craft project to inspire creativity and community engagement.
There are 14 references cited in this article, which can be found at the bottom of the page.
This article has been viewed 290,255 times.
Not all gifts fit nicely into rectangular boxes for wrapping. As a result, there will be times when you will need to wrap an oddly shaped gift, like a cylindrical object or candle. Although this is tricky, it can be done. In order to wrap a cylinder-shaped gift, you can use a number of different methods. Try wrapping with paper and fold the ends like a fan or twist the ends to make the gift look like a candy. Alternatively, you could place the present in a gift bag for an easy wrapping solution.
Steps
Using a Fan Fold
-
1Measure and cut the paper. When you are wrapping a cylinder-shaped gift, you can easily measure out the amount of paper using the gift as a guide. Place the gift on the wrapping paper and make sure that the paper can go all the way around the cylinder. Cut the paper so that there is about a ½ inch of overlap. For the ends of the gift, pull up the paper on either side. The paper should be able to reach the center of the gift on both sides.[1]
- It is always a good idea to give yourself a little bit of extra paper.
- Use a durable wrapping paper that does not tear easily.
-
2Wrap the paper around the cylinder. Once the paper has been cut, place the gift in the center of the paper with the good side of the wrapping paper facing downwards. Make a tiny ¼ inch fold on one of edges of the long side of paper. Place a strip of double-sided tape along this fold. Then wrap the paper around the cylinder and seal with the tape.[2]
- Check to make sure the gift is in the center of the wrapping paper and adjust accordingly by sliding it into the middle.
Advertisement -
3Use your finger to create pleats. Begin with one end of the gift. Take the seam of the wrapping paper and fold it into the center. Hold down the piece with one finger and then with your other hand grab the edge of the paper and pull it into the centre. This should begin to fold the paper like a fan with pleats. As you move around the cylinder you can use your finger to crease the pleats. Continue this process all the way around the gift.[3]
- Once finished complete the same process on the other end of the gift.
-
4Remove or hide any blemishes. After you have created the fan fold at both ends of the gift you can remove any excess paper by cutting it off and taping the end down using double-sided tape. Alternatively, you could cut a small circle of wrapping paper, either using the same paper or a complimentary color, and tape it at the centre of the end to cover up any blemishes.[4]
-
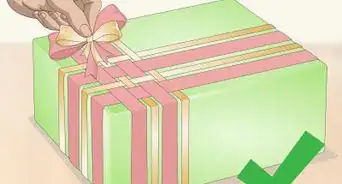
5Finish with a bow and/or ribbon.[5] Stand the cylinder-shaped gift upright and place it on the centre of a long piece of ribbon. Pull the ribbon up the side of the gift and tie a knot in the center at the top of the gift. Cut the ribbon so that there are two long tails of ribbon on either side. Then add a bow to the center of the gift on top of the ribbon knot.
- If desired, you can curl the ribbon and let it hang down the sides of the gift.
- Alternatively, could put a bow on the top of the gift without adding a ribbon for a simpler look.
- Choose a bow and ribbon that complement the color of the wrapping paper. For example, if you are using a red paper with gold stars, you may want to use a gold ribbon and a gold bow.
- You could also tuck foraged foliage into the ribbon to make your gift look gorgeous.[6]


Twisting the Ends
-
1Measure and cut the paper. When you are wrapping a cylinder gift using the twisting method, you will need more wrapping paper. Start by placing the gift on the wrapping paper and make sure you have enough paper to circle the gift. Leave a ½ inch of extra paper for overlap. For the ends of the gift, pull up the paper on either side and make sure that the paper fully covers the gift.
- The measurement for the ends does not need to be perfect, just make sure that you have an even amount on either side.
- It is best to have extra paper that can later be cut off if needed.
-
2Wrap the paper around the cylinder. Place the gift in the center of the paper with the good side of the wrapping paper facing downwards. Make a tiny ¼ inch fold on one of edges of the long side of paper. Place a strip of double-sided tape along this fold. Then wrap the paper around the cylinder and seal with the tape.[7]
- Make sure the the gift is situated in the center of the tube and adjust by sliding the gift with your fingers.
-
3Twist the paper at both ends. Grab the excess paper at either end of the tube and gently twist. You can can do this one end at a time for a more precise twist. Place a piece of tape around the twisted part of the wrapping paper to hold it in place. Fluff out the excess paper at the end to make the gift look similar to a candy wrapper.[8]
- This method works best for cylinder-shaped gifts that do not need to stand upright because the gift is meant to lay horizontally.
-
4Tie the ends with ribbon. In order to add some decoration and finishing touches, you can take a piece of ribbon and tie it around the twisted part of wrapping paper on either end.[9] Tie the ribbon in a knot and leave some excess ribbon hanging loose.
- Match the ribbon to the wrapping paper.
- Add a gift tag or card, if desired.


Creating a Sack
-
1Place the gift in the center of the wrapping paper. This method works best for cylinder-shaped gifts that can be stood upright. Place the gift in the center of the paper so that it is standing. Use a thick and high quality of wrapping paper, so that it can support the weight of the gift.
-
2Pull the opposite corners together. Grab the two opposite corners of wrapping paper and pull them together so that they meet over top of the gift. Then do the same thing with the other two corners. All four corners should meet in the center. Pinch them together with your finger and then using your other hand, squeeze the paper close to the gift.Advertisement
-
3Pleat the paper. In order to create a more professional and finished look, you can pleat the paper using folds and creases. Rather than have a bunched look over top of the gift, the pleats will give your wrapping a more professional appearance.
-
4Tie a ribbon around the paper. Once you have folded or bunched the paper at the top of the gift you can tie a ribbon around the paper to hold it in place. Choose a ribbon that matches with the wrapping paper.[10]
- Fluff up any excess paper.


Using a Gift Bag
-
1Cover the gift with tissue paper. This does not need to be done in any fancy way because it will be hidden in the gift bag. Essentially, you just want to cover the gift with tissue paper so that it is not visible if someone glances into the bag.
-
2Choose a gift bag that can support the gift. If you are wrapping something breakable, you should add a few pieces of tissue paper to the bottom of the gift bag to provide extra cushioning. Make sure you use a gift bag that fits the size of the gift. For example, the entire gift should be able to fit in the bag.
-
3Situate the gift inside the bag. Depending on the gift, you can either stand the cylinder upright or lay it down along the bottom of the bag. For example, if the gift is a jar of homemade sauce, you will want to stand the gift upright in the bag so that it does not spill.
- Alternatively, if you are wrapping cloths that you have rolled into the shape of a cylinder you can lie them down horizontally in the bottom of the bag.
-
4Add decorative tissue paper. Simply, take a piece of tissue paper and grab it in the center. Flick your wrist while holding the paper and then smooth the paper in a downward motion using your other hand. Turn the tissue paper upwards so that the puffed up part of the paper is facing up and then place it in the bag. The pinched end of the tissue paper should be inside the bad, with the fluffed ends sticking out the top.[11]
- Repeat this with three to four pieces of tissue paper.
- Choose tissue paper that matches with the color of the bag. You can use one color of tissue paper or multiple colors.
-
5Finished.


Wrapping a Candle
-
1Measure out the length of the brown paper or wrapping paper. Lay the candle down on its side on the paper. To find the paper’s ideal length, roll the paper around the candle. You want the paper to be able to completely wrap around once, with 1-2 inches excess.[12]
- Try to use thinner paper, as it’s easier to fold and pleat.
-
2Measure out the paper’s width. Keep the candle lying on its side. To measure the paper’s width, fold the paper over the top of the candle. Mark the top of the paper where you have enough material to cover half the top of the candle. Then, repeat the same process for the bottom of the candle. Mark the bottom of the paper where you have enough material to cover half the bottom of the candle.
-
3Cut your paper to size. Carefully trim your paper into a rectangle. Err on the side of caution—you can always trim off the excess.[13]
-
4Wrap the paper around the candle. Lay the candle on its side, and simply roll the paper around the candle. Add a piece of tape to secure the wrapping. You should have a few inches of excess paper sticking up over the top and bottom of the candle.[14]
-
5Take the inside corner of the excess paper on the bottom and press it down. As you press it down, you’ll start to create little “triangles” of excess material. Continue pressing them down, creating triangular folds which will form a pleated design.[15]
- As you create new folds, hold the old creases down with your other fingers to create neater lines.[16]
- Start with the bottom of the candle so you can place it on something sturdy when you’re done. That way, you’ll have a more stable working surface when you focus on the top (which is the part people will see).
-
6Work your way around the bottom of the candle, creating pleats. Once you’ve used all the excess paper, tape the bottom so the folds stay put.[17]
- Use double-sided tape if you want to tuck excess paper under and avoid seeing the tape. Otherwise, regular clear tape will work fine.
-
7Repeat the pleating process on the top of your candle. Start with the inside corner of the excess paper, and press it in. Try to keep the folds even as you work your way around, and tape the excess down when you’re finished.[18]
-
8Decorate your candle wrapping. Tie a piece of brown twine, colorful ribbon, or a bright bow around your candle to add pizzazz.[19] If you’re going for a professional or artisanal look, add a branded round sticker to the top of the candle or on the side.
- To top off the candle, you can also cut a circle of colorful paper slightly smaller than the area of the candle’s top. Tape the circle on with double-sided tape if you want to hide the spot where the pleats meet up.


Community Q&A
-
QuestionWhat can I use instead of wrapping paper?
 Amy GuerreroAmy Guerrero is an Arts and Crafts Specialist and the Owner of Sunshine Craft Co., a crafting studio based in Phoenix, Arizona. Amy specializes in macrame, DIY crafting, and teaching fiber arts. She offers monthly in-person and online workshops along with having developed a range of DIY craft kits for at-home projects. Amy holds a BS in Industrial Design from Philadelphia University. She worked as a graphic designer before starting her own business. Sunshine Craft Co. is a creative hub that offers a wide range of workshops, tools, and resources for any craft project to inspire creativity and community engagement.
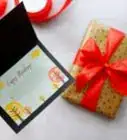
Arts & Crafts SpecialistYou don't need wrapping paper to wrap a gift. You can use a scarf, bandana, or tea towel as a practical way to beautifully wrap a gift.
Things You'll Need
- Wrapping Paper
- Gift Bag
- Tape
- Scissors
- Measuring Tape
- Tissue Paper
- Ribbons
- Bows
- Gift Tag
Warnings
- Be cautious when working with scissors.⧼thumbs_response⧽


References
- ↑ https://www.youtube.com/watch?v=dH_gpSfaA6E
- ↑ http://www.goodhousekeeping.co.uk/christmas/how-to-gift-wrap-circular-object
- ↑ http://www.popsugar.com/smart-living/How-Do-You-Wrap-Cylinder-Shaped-Gift-42782654
- ↑ http://www.goodhousekeeping.co.uk/christmas/how-to-gift-wrap-circular-object
- ↑ Amy Guerrero. Arts & Crafts Specialist. Expert Interview. 9 October 2020.
- ↑ Amy Guerrero. Arts & Crafts Specialist. Expert Interview. 9 October 2020.
- ↑ http://www.goodhousekeeping.co.uk/christmas/how-to-gift-wrap-circular-object
- ↑ http://ohhappyday.com/2014/11/5-ways-to-wrap-small-gifts/
- ↑ Amy Guerrero. Arts & Crafts Specialist. Expert Interview. 9 October 2020.
- ↑ Amy Guerrero. Arts & Crafts Specialist. Expert Interview. 9 October 2020.
- ↑ https://holidappy.com/holidays/tissuepapergiftbag
- ↑ https://www.youtube.com/watch?t=71&v=90AdBnrPoMM&feature=youtu.be
- ↑ https://www.popsugar.com/smart-living/photo-gallery/48629286/embed/48629289/How-to-Wrap-Candle
- ↑ https://www.youtube.com/watch?t=75&v=90AdBnrPoMM&feature=youtu.be
- ↑ https://youtu.be/90AdBnrPoMM?t=100
- ↑ https://youtu.be/90AdBnrPoMM?t=124
- ↑ https://youtu.be/90AdBnrPoMM?t=163
- ↑ https://youtu.be/90AdBnrPoMM?t=197
- ↑ https://www.rd.com/list/gift-wrapping-ideas/
- ↑ Amy Guerrero. Arts & Crafts Specialist. Expert Interview. 9 October 2020.
About This Article