

/en/word2010/modifying-page-layout/content/
Are you worried about making mistakes when you type? Don't be. Word provides you with several proofing features that will help you produce professional, error-free documents. In this lesson, you will learn about the various proofing features, including the spelling and grammar tool.
To make your document appear professional, you'll want to make sure it is free from spelling and grammar errors. Word has several options for checking your spelling. You can run a spelling and grammar check, or you can allow Word to check your spelling automatically as you type.
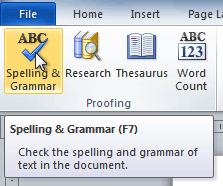 The Spelling & Grammar command
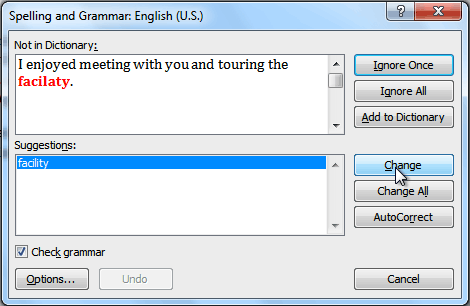 Correcting a spelling error
 Typing a correction
The spelling and grammar check is not always correct. Particularly with grammar, there are many errors Word will not notice. There are also times when the spelling and grammar check will say something's an error when it's actually not. This often happens with people's names, which may not be in the dictionary.
If Word says something is an error, you can choose not to change it. Depending on whether it's a spelling or grammar error, you can choose from several options:
If you're not sure about a grammar error, you can click Explain to see why Word thinks it's an error. This can help you determine whether you want to change it.
By default, Word automatically checks your document for spelling and grammar errors, so you may not even need to run a separate spelling and grammar check. These errors are indicated by colored wavy lines.
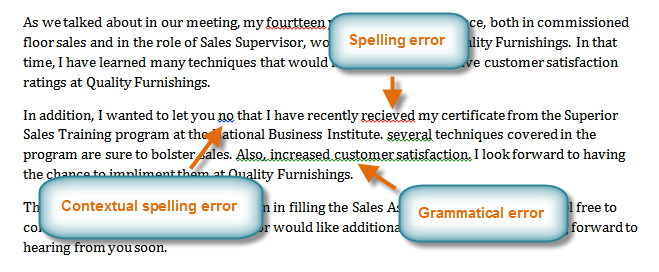 Spelling and grammar errors
A contextual spelling error occurs when the wrong word is used but the word is spelled correctly. For example, if you write Deer Mr. Theodore at the beginning of a letter, deer is a contextual spelling error because dear should have been used. Deer is spelled correctly, but it is used incorrectly in this letter.
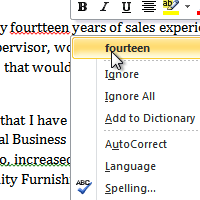
 Correcting a spelling error
You can choose to Ignore an underlined word, add it to the dictionary, or go to the Spelling dialog box for more options.
 Correcting a grammar error
You can also choose to Ignore an underlined phrase, go to the Grammar dialog box, or click About This Sentence for information on the grammar rule.
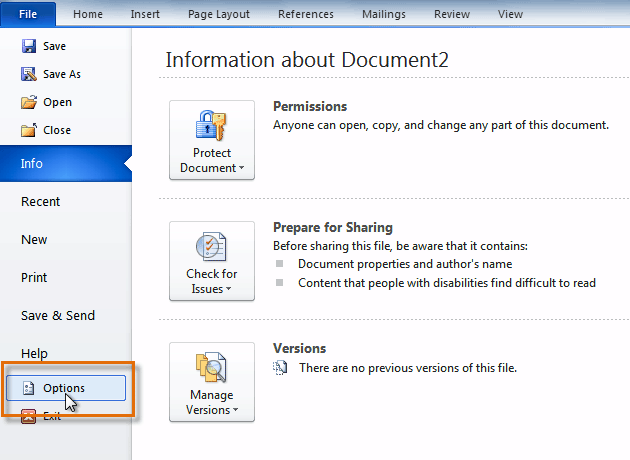 Clicking the Options command
 Changing the Proofing Options
If you've turned off the automatic spelling and/or grammar checks, you can still run a check by going to the Review tab and clicking the Spelling & Grammar button.
If you're sharing a document like a resume with someone, you might not want that person to see those annoying red, green, and blue lines. Turning off the automatic spelling and grammar checks only applies to your computer, so the lines may still show up when someone else views your document. Luckily, you can hide spelling and grammar errors in a document so the lines will not show up on any computer.
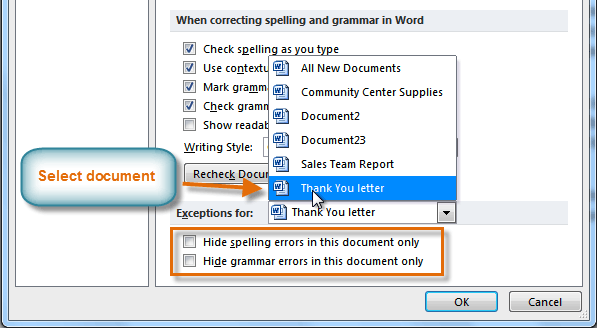 Creating exceptions for a document
/en/word2010/printing/content/