This article was co-authored by wikiHow Staff. Our trained team of editors and researchers validate articles for accuracy and comprehensiveness. wikiHow's Content Management Team carefully monitors the work from our editorial staff to ensure that each article is backed by trusted research and meets our high quality standards.
This article has been viewed 13,824 times.
Learn more...
Casing leather softens it to make it more pliable and easier to handle when you’re tooling it or adding designs. Mixing an actual casing solution, rather than just wetting the leather with water, ensures that your designs are dark and precise. Casing your leather properly gives your leather the right moisture content and prevents it from stretching. Casing your leather can help your leather goods look sharp and professional.
Steps
Wetting Your Leather
-
1Prepare your solution. For the best casing results, mix warm water with either a bit of dish soap, glycerin soap, or casing solution. The amount of water you need will vary depending on the size of the pieces of leather you’re casing. You should have enough water to fully submerge the largest piece. You should use enough soap to make the solution slightly bubbly when it’s mixed. [1]
-
2Run your leather through your solution. Hold one end of your piece of leather, and then dip it into the solution. Pull the whole piece slowly through the solution after the first end goes in. You should see bubbles rising from the piece of leather as you pull it through – this is a sign that the leather is absorbing enough liquid.Advertisement
-
3Let the leather sit. Before you store the leather for the casing, you should let some of the moisture evaporate out of it. How long you should let your leather sit out in the air varies depending on the size of the piece of leather. Leave it out until it mostly returns to its natural color.


Casing Your Leather
-
1Place the leather in a dark, sealed container. This will hold in the moisture that’s left in the leather after you’ve let it sit out. You can place the leather you’re casing in a garbage bag or a sealable food bag. A cooler or refrigerator not only controls moisture content in your leather more evenly, but allows space for more than one piece.[2]
-
2Check the color of the leather. When your leather is fully cased, your leather should be completely returned to its natural color. Darker hues will appear as you begin using leatherworking tools on it.[3]
-
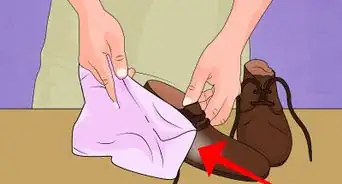
3Hold the leather to your cheek. In addition to the color, you can tell if the leather is finished casing by the temperature of the piece. The leather should be cool to the touch, indicating that the casing process is over.


Warnings
- Once you’ve cased your leather, try not to wet it again as you work it. You can use a bit of water now and then if you think It’s getting too dry, but over-wetting it can cause it to stretch.⧼thumbs_response⧽
- Casing and wetting leather are not the same. Wetting is quicker but won’t give your leather as good a quality as a casing will.⧼thumbs_response⧽


References
About This Article