X
wikiHow is a “wiki,” similar to Wikipedia, which means that many of our articles are co-written by multiple authors. To create this article, 12 people, some anonymous, worked to edit and improve it over time.
This article has been viewed 84,112 times.
Learn more...
Microsoft's Office suite is very expensive for the average user to purchase. The Professional version that includes Microsoft Access (database creation software) is even more expensive. A cheaper or free office suite within the reach of everyone is StarOffice/OpenOffice. Learn how to create a database, a table and create a form.
Steps
-
1StarOffice is the release version of OpenOffice. There are a few differences but they are mainly cosmetic. The first thing to do is to download and install OpenOffice.org[1] or StarOffice from Sun Microsystems.
-
2Once it has been downloaded and installed, in Windows XP, go to Start -> All Programs -> Star Office 8 -> Star Office Base and then press the Enter key.Advertisement
-
3A window will pop up titled 'Database Wizard'
-
4Accept the default settings and click 'Next'. Registering the database (is done locally) and makes it easier for Writer and Calc to use.
-
5Accept the default settings on the next window and then click on 'Finish'.
-
6A 'Save As' window will pop up. It defaults to 'My Documents'. Give your new database a name. For now call it 'MyContacts'. Accept the default settings and click on the 'Save' button.
-
7A new window will pop up titled 'MyContacts' and on the left you see four items, 'Tables, Queries, Forms and Reports'. 'Forms' will be automatically highlighted. However, we first need to create a table for our database, so click on 'Tables'. We will come back to forms later.
-
8To the right of the 'Tables' Icon under tasks click on 'Use Wizard To Create Table...'. A window titled 'Table Wizard' will pop up.
- The wizard will step you through creating your first database. On the right under Select fields for your table you will see 'Category'. Click on 'Personal'. Under 'Category' are sample tables, click on the 'down arrow' and highlight 'Addresses'. Under 'Available fields' all the fields for the sample table are displayed. To the right are four buttons. Click on the '>>' button. This will move all the fields under 'Available fields' to 'Selected fields'. Click on the 'Next' button.
-
9The Table wizard will now advance to step 2, Set types and formats. Under 'Selected fields' are all the field that were chosen. To the right of that you will see 'Field information'. Each field can be individually formatted in the way you want. Click on the various fields to get an idea of what types you have available. For now accept the defaults for each field and then click on the 'Next' button.
-
10The Table wizard will now advance to step 3, 'Set Primary Key'. As the database grows in size the primary key becomes more important. The primary key will speed up queries. For now, accept the default values and click on the 'Next' button.
-
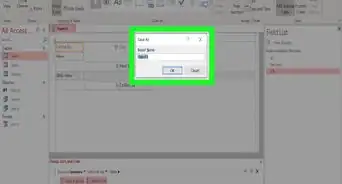
11The final step in creating your first table is 'Create Table'. Accept the default value for the table name. In this example it is called Addresses. Below that you have several choices on what to do next. Click on 'Create a form based on this table' and then click on the 'Finish' button.
-
12Two windows will pop up. The first windows is titled 'Untitled' and on top of that window is another window titled 'Form Wizard'. We will now create a form for data entry.
-
13Again the steps for creating a form are displayed on the left. As before accept the defaults and click on the '>>' button. This will move all the fields to the other side under 'Fields in the form'. Then click on the 'Next' button.
-
14The pop up window is titled 'Set up a subform'. Accept the default values. We will not be creating any subforms for now. Click on the 'Next' button.
-
15A new window will pop up titled 'Arrange controls'. On the right, the third button is the default. Click on the second button to the right of that, the fourth button. Click the 'Next' button.
-
16The 'Set data entry' will pop up. This will set the mode of data entry for your form. Accept the defaults and click on the 'Next' button.
-
17The 'Apply styles' window will pop up. Accept the default values and click on the 'Next' button.
-
18When the pop up window titled 'Set name' pops up accept the default values. Then click the 'Finish' button.
-
19Your form will now pop up and you are able to enter data. If you do not like how the form is laid out, you can easily change it. Here's how to change your form.
-
20Make sure the 'Forms' icon on the left is highlighted.
- Click on the 'Edit' menu item and highlight and click on 'Edit'.
-
21The Form editor will pop up displaying your form. Click on any of the fields and then 'drag and drop' them where ever you like. Don't worry about getting your form messed up. If you make too many mistakes and want to start over then close the form editor, don't save your work and start over again. It will take a little practice but once you get the hang of it you will find it easier to work with.
-
22Congratulations! You have created a Star Office Base database.
-
23Enjoy and have fun.


Advertisement


References
About This Article
Advertisement