This article was co-authored by Lisa Maciel. Lisa Maciel is an Event Stylist and the CEO of La Vie Posh. With more than five years of experience, she specializes in event styling, balloon installations, and prop rentals. Her work has been featured in party blogs, including Kara's Party Ideas and Catch My Party. Lisa holds a degree in Interior Design from Universidad Autónoma de Guadalajara.
There are 10 references cited in this article, which can be found at the bottom of the page.
This article has been viewed 8,346 times.
There are so many ways you can use paper to create decorations and gifts! From using patterned paper to make flowers, place cards, and garlands, to making coasters, magnets, and vases as gifts, the possibilities are nearly endless. Find paper that you love, and then use it to create decorations for your home that you can enjoy for a long time.
Steps
Decorating with Paper Cutouts
-
1Create beautiful place cards with paper for a dinner party. If you’re having friends and family over for a nice dinner, create special place cards to add an extra touch of class to your event. You could cut out squares, rectangles, triangles, or even differently-sized cards, depending on your taste. Use a pen or finely-tipped marker to write the name of a guest on each card.[1]
- Card stock works well for this kind of project because it’s thicker and less likely to bend or crease. You can find lots of different colors of card stock at your local craft store.
- Put the place cards on top of each person’s plate, or make a cute place card holder, like these pine cone place cards.
-
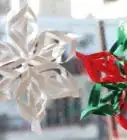
2Cut out paper flowers to put in vases for a versatile decorating option. Instead of purchasing fake flowers, make your own out of different kinds of paper. You can use card stock, scrapbook paper, or even tissue paper. Look up tutorials online and follow instructions for how to make different kinds of flowers, from roses to carnations to wildflowers.[2]
- Not only is this a fun craft, but it’s one that allows you to switch out your flowers easily for a quick decor update.
- You could also make an entire flower bouquet out of paper.
Advertisement -
3Decorate for a party with colorful garlands. Use double-sided paper that has color or patterns on both sides, and cut out circles, squares, or triangles. Then you can stitch them together with a sewing needle and thread to make long, colorful decorations for your next party. You could create one long garland, or make several shorter ones for a layered effect. Choose colors that match your theme to keep everything looking cohesive.[3]
- Cut out about 100 of each shape for a garland that’s 6 to 7 feet (1.8 to 2.1 m) long.
- To make this project easier, purchase a punch in the shape you want from your local craft store.
- For a cute Valentine’s Day option, cut out heart shapes from red and pink papers, stitch them together, and then hang them from the ceiling so that it looks like hearts are flowing down. This can also make a fun backdrop for photos!
-
4Use a cascading paper curtain to replace or accent your headboard. Purchase several types of paper, like gold foil, card stock, tissue paper, and textured papers, and cut out squares, circles, triangles, or any other shape that you like. Then, stitch 20-30 shapes together in a row with a needle and thread, leaving a little bit of space between each one. Repeat this process to create 7-8 different strands of shapes. Hang them from the ceiling at the head of your bed to create a whimsical illusion.[4]
- The varied weights of paper will make the shapes on the strands hang a little differently from piece to piece, which will make it look more dynamic.
- Depending on how high your ceilings are, you may need to make your strands longer or shorter.
- If you live in a dorm room, this can be an inexpensive and cute way to make your room more personalized.
-
5Use paper to make a unique framed piece of art. You could make a collage out of different patterned and colored papers. You could replicate an image or photo you love by cutting out different shapes from different colored pieces of paper. You could even design something on the computer and then print it out and frame it.[5]
- For a fun decoration, think of a quote you really love. Stencil it out onto white card stock and then cut it out. Make a background out of small, differently colored squares (try alternating pinks, oranges, and yellows for a bright look), and then paste the quote on top of the squares.
- For more ideas, visit craft sites or places like Pinterest.


Creating Paper Embellishments
-
1Make paper bows to add to packages and gifts. You can use paper bows for a lot of different things—of course you can add them to gifts and packages to make them look even more special. But you can also use them a decorations on a Christmas tree, you could add them to hair accessories, and you could even use them when making a wreath for your front door. Search for different tutorials online to find the kind of bow you want to create.[6]
- You can often download free templates online that you can follow when making paper bows.
-
2Learn how to make origami to make beautiful accents and gifts. From roses to animals to stars, there are hundreds of different origami shapes you can master. You can give them away as gifts or even use them to decorate your living spaces.[7]
- There are a lot of resources, videos, and books out there that will guide you through a step-by-step process to creating origami.
-
3Create paper rosettes to add to crafting projects. These can be added as accents to other projects, or they can be spread over a table at a party, or even used on the wall as decorations. They’re simple to make, as you just need paper, double-sided tape, scissors, and a hot glue gun.[8]
- There are a lot of different styles of paper rosettes out there. Look online for different tutorials to find the style that you prefer.


Making and Decorating Paper Lanterns
-
1Make a Chinese paper lantern to decorate your room and living spaces. Use construction paper and follow a wikiHow tutorial, or look up instructions online for how to make this lantern. Try decorating your construction paper or using different colors for an even prettier lantern.[9]
- This is a great craft to do with kids, too, since it doesn’t require many materials or much time! Just be careful if you’re working with young children that they use caution with scissors.
-
2Assemble a paper lantern garland to decorate an outdoor space. You will need patterned paper, hot glue, scissors, a ruler, craft wire, and a string of globe lights. Download a free printable pattern online for “party lantern garland.” Cut your paper to match the pattern, use your craft wire to create a frame for the lantern, and then secure your paper to the wire using your hot glue gun. Then you can thread the globe lights through the frames of the lanterns.[10]
- You could even use these as an indoor decoration if you wanted to.
-
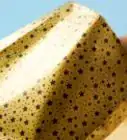
3Create a ruffled paper lantern for a whimsical decoration. Purchase several colors of crepe paper from the craft store. Cut the crepe paper into 4 in (10 cm) pieces. Use double-sided tape to secure the pieces of crepe paper to a paper lantern. Start at the bottom of the lantern, and complete one row at a time, letting each new row reach down and cover half of the row that came before it to simulate a ruffled look.[11]
- You can make each row a different color, or create larger sections of each color.
- These can also make fun decorations for a party. Make several of them and hang them at different heights.
-
4Cover a paper lantern in flower cutouts for a floral-themed accent. Use tissue paper to make dozens of stemless flowers, and secure them all over a paper lantern. You could use double-sided tape to secure the flowers in place, or use a dot of hot glue.[12]
- You could make several different colors of flowers, or make them all the same color, depending on the look you’re going for.
-
5Use thumbtacks to create a design in your paper lantern. Either draw your own design or print one off of the computer, then carefully lay it over your paper lantern. Use a thumbtack to gently press holes all along the design so that when you turn the light on, you’ll see the picture illuminated through the holes.[13]
- You could make a galaxy, a flower, or even someone’s face! The design is up to you.


Crafting with Mod Podge and Paper
-
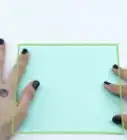
1Decoupage a glass vase with colorful paper to brighten up a room. Pick out some paper that is a fun color or cute pattern and use Mod Podge to cover the outside of a vase with the paper. This is a great way to use spare vases you might have left over from flower bouquets at home.[14]
- You can also find inexpensive vases at dollar stores.
- Try making some paper flowers to put into the vase for a nice touch.
-
2Match your dinnerware to a theme for a creative holiday accent. For example, for Thanksgiving you could Mod Podge fall-themed paper onto glass plates, platters, and serving bowls for a festive touch. Just make sure your dinnerware has enough time to dry completely before you use it.[15]
- You could Mod Podge balloon-patterned paper for birthdays, or pumpkins for Halloween. Visit your local craft or paper store to see what kinds of beautiful patterns are available.
-
3Make coasters as gifts for friends. Visit your local craft store and buy some inexpensive blank coasters, either made of glass or wood. Then use Mod Podge to decorate them with photos or pretty paper. Make sure to let them dry before you wrap them up or use them.[16]
- Try using book pages or even cut-outs from the covers of paper books to make coasters for a book-loving friend.
- Or if you have a friend who is a photographer, print off some of their work and use it to make a gift they will love.
-
4Cover a thrift store coffee table with Mod Podge and pretty paper. Visit some thrift stores until you find a coffee or end table that you like but that maybe could use a little updating. Then use pretty paper to make a collage or design on the top and seal it in place using Mod Podge.[17]
- If you have roommates, this can be a really fun activity to do together.
- Make sure to follow the Mod Podge instructions and let the table fully dry before you set anything down on it.
-
5Magnetize your favorite paper or pictures for a fun fridge accessory. Purchase clear gems from your craft store, as well as paper, magnets, and Mod Podge. Cut the paper into small circles that are a little bit larger than the gems. Use the Mod Podge to secure the paper to the bottom of the gems, and let them dry. After that, use hot glue to attach the magnet to the bottom.[18]
- Don’t forget to trim off any excess paper once your magnets are dry.
- You could use photos for a fun, personalized option, or consider using patterned paper to reflect someone’s hobbies. For example, use maps for someone who loves to travel, book pages for someone who likes to read, or even print off copies of someone’s online photos and use them to create a cute magnet set.


Things You’ll Need
Decorating with Paper Cutouts
- Paper
- Scissors
- Pen or markers
- Needle and thread
Creating Paper Embellishments
- Paper
- Double-sided tape
- Scissors
- Hot glue gun
Making and Decorating Paper Lanters
- Construction paper
- Paper lantern (optional)
- Hot glue gun
- Craft wire
- Scissors
- Ruler
- Globe lights (optional)
- Crepe paper
- Tissue paper
- Double-sided tape
- Thumbtacks
Crafting with Mod Podge and Paper
- Mod Podge
- Paper
- Paint brush
- Items to Mod Podge (table, vase, coasters, magnets)
- Scissors
References
- ↑ https://www.bhg.com/decorating/do-it-yourself/fabric-paper-projects/low-cost-home-decorating-with-paper/
- ↑ https://www.bhg.com/decorating/do-it-yourself/fabric-paper-projects/low-cost-home-decorating-with-paper/
- ↑ https://www.bhg.com/decorating/do-it-yourself/fabric-paper-projects/low-cost-home-decorating-with-paper/
- ↑ https://www.bhg.com/decorating/do-it-yourself/fabric-paper-projects/low-cost-home-decorating-with-paper/
- ↑ https://www.bhg.com/decorating/do-it-yourself/fabric-paper-projects/low-cost-home-decorating-with-paper/
- ↑ https://liagriffith.com/how-to-make-the-paper-bows/
- ↑ http://www.origami-instructions.com
- ↑ https://howdoesshe.com/chic-paper-rosette-backdrop-tutorial/
- ↑ https://www.firstpalette.com/Craft_themes/World/chinesepaperlantern/chinesepaperlantern.html
- ↑ http://ohhappyday.com/2013/04/party-lantern-garland-diy-free-printable/
- ↑ https://sadtohappyproject.com/how-to-make-a-paper-lantern/
- ↑ https://www.architecturendesign.net/20-amazing-diy-paper-lanterns-and-lamps/
- ↑ https://www.architecturendesign.net/20-amazing-diy-paper-lanterns-and-lamps/
- ↑ https://www.bhg.com/decorating/do-it-yourself/fabric-paper-projects/low-cost-home-decorating-with-paper/
- ↑ https://www.bhg.com/decorating/do-it-yourself/fabric-paper-projects/low-cost-home-decorating-with-paper/
- ↑ https://modpodgerocksblog.com/craft-ideas-for-beginners/
- ↑ https://modpodgerocksblog.com/craft-ideas-for-beginners/
- ↑ https://www.hgtv.com/design-blog/how-to/diy-stocking-stuffer-easy-personalized-magnets
About This Article

One way you can decorate with paper is to make paper bows. For example, make paper bows to add to packages and gifts to make them look more special. You can also use paper bows to help decorate Christmas trees or to add to hair accessories. Another way to decorate with paper is to learn how to make origami shapes, animals, flowers, and stars. Then, give your origami treasures away as gifts or decorate your shelves with them. If you’re having friends or family over for dinner, create special place cards out of paper to add an extra touch of class to your event. In order to make your bows and origami their best, look up some tutorials online. To learn how to make paper lanterns, keep reading!