This article was co-authored by Janet Peischel. Janet Peischel is a Writer and Digital Media Expert and the Owner of Top of Mind Marketing. With more than 15 years of consulting experience, she develops content strategies and builds online brands for her clients. Prior to consulting, Janet spent over 15 years in the marketing industry, in positions such as the Vice President of Marketing Communications for the Bank of America. Janet holds a BA and MA from the University of Washington.
There are 19 references cited in this article, which can be found at the bottom of the page.
This article has been viewed 7,276 times.
If you’re looking for a one-of-a-kind logo for your business or personal brand, there’s no need to shell out hundreds of dollars to have one designed professionally. You can create striking original artwork using a number of free online photo editors like Pixlr, Fotor, or Canva. Start by sketching out a rough draft of your logo, including any text and images you want to include. You can then use the photo editor’s selection of powerful tools to build your own unique logo.
Steps
Coming up with an Original Logo
-
1Think of a basic concept for your logo. Before you can begin putting together an eye-catching original logo, you’ll need to know what you want it to look like. Consider what the logo will be used for and try to find a way to distill it into a single image. Your logo should be a visual representation of your business, product, or brand.[1]
- Some aspect of your brand, such as a name, theme, or mascot, may provide inspiration for your logo. A logo for a company called “Caveman Donuts,” for instance, might depict a caveman tinkering with a "wheel" covered in frosting and sprinkles.
-
2Look at iconic logos for inspiration. If you're not sure where to begin, make a note of the way popular businesses and products are marketed. Run an image search for famous company logos to get a good overview, or start paying attention to signs, billboards, and product packaging when you're out running errands. Taking cues from some of the most enduring images in advertising can help you step up your own designs.[2]
- Be careful not to make your design too similar to any well-known logos. A suspicious resemblance could be considered copyright infringement.
Advertisement -
3Settle on a design that's fresh and innovative. A focused theme, simple yet inventive visual characteristics, and an instant association with your brand are all elements of a memorable logo. It's especially important to strike the right balance between detail and directness. Your logo should be identifiable enough to attract attention at a glance, but not so busy that it's off-putting.[3] [4]
- Minimalistic logos are all the rage nowadays. A few well-placed lines may be all you need to piece together a sleek, subtle design without a lot of frills.[5]
-
4Decide whether to use text, images, or both. Determine how elaborate you want your logo to be. It could feature a colorful piece of original artwork, or you might simply leave it as a name or symbol. You want the finished product to stand out, so get creative![6]
- If you don’t want to include images, try turning part of the text itself into the focal point of the design—a stylized letter “W” could stand on its own in a logo for “Wally’s Video Game Reviews.”[7]
- Keep in mind that the more detailed your design is, the more difficult it will be to bring it to life using an online photo editor.
-
5Sketch out your logo. Take your time committing your logo to paper. It doesn’t need to be perfect just yet, but you should be careful to make sure it contains all of the elements you conceived of for your design. Complete multiple drafts to experiment with possible variations and refine your basic concept.[8]
- Use a pencil to put down the first draft of your logo. That way, you’ll be able to easily make amendments and revisions as needed later on.
- A ruler or the spine of a book can come in handy for helping you trace straight lines and angles.
-
6Create a finished version of the logo. Go back and put the finishing touches on your rough draft by cleaning up your linework and correcting any mistakes you may have made. This time, you can use an ink pen or felt tipped marker to go over the edges. Retracing key areas will make your design more bold and make sure the emphasis is in the right place.[9]
- Lightly shade or color in open sections to create a mockup of how your design will appear on the screen.
Creating Your Logo Online
-
1Choose an online photo editor app. Running a quick search for “online photo editor” should pull up a long list of potential options. There are scores of different web-based programs to choose from, each of which offers powerful tools for creating and editing images from a computer or mobile device. Some of the most popular and highest reviewed apps include Pixlr, Fotor, and BeFunky.[10]
- Other online resources, such as Canva or Logo Maker by VistaPrint, are geared specifically toward designing logos, and may feature additional helpful tools.
- Be aware that some free photo editors rely on ads to stay afloat, which means your experience may be interrupted by the occasional pop-up or scrolling banner.[11]
-
2Open a new image. When you first load the photo editor, you’ll be given the choice to start from scratch or edit an existing image on your computer or device. Selecting the “open/create a new image” option will bring up a blank page, where you’ll be able to build an original logo from the ground up.
-
3Use the available drawing tools to reproduce your logo. Along the sidebar of the photo editor, you’ll see a row of buttons corresponding to the various design tools. Each of the geometric tools is useful for making a different precise design, including straight lines, angles, and shapes. For greater control, you can also try freehanding with the pencil or brush.[12]
- Once you’ve selected a tool, slide the size bar at the top of the page to make the outline thicker or thinner.
- Combining basic shapes and erasing the sections that overlap is a simple way to create letters and symbols.
-
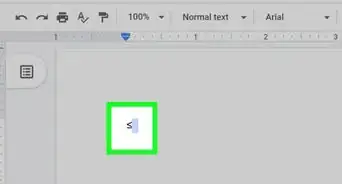
4Add a name, slogan, or other details using the text tool. Left click the text tool button once to select it, then left click again to place the text box wherever you want it on the image. A blinking cursor will appear and you can begin typing. When you’re satisfied with the text, left click anywhere on the image to merge it with the background.[13]
- Play around with different fonts until you find one that closely matches the lettering in your original design. You might even come across an alternative font that you like more in the process.[14]
- Drag the corner of the text box to adjust the size of the font and make it larger or smaller.
-
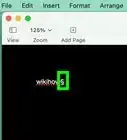
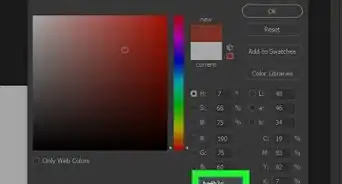
5Make use of captivating colors. Switch up the color of a line, shape, or font at any time by highlighting the desired shade on the color pallet. If the color you’re looking for isn’t included in the pallet, double click or hold your finger over the closest option. You’ll be able to pinpoint an exact shade from the full spectrum, then make it lighter or darker until you get the tone just right.[15]
- Select the paint bucket tool when you need to fill in a large area with a solid color.
-
6Refine your logo. Look over your completed design closely to inspect for flaws. Touch these up one at a time, giving each your full attention to make sure the end result is polished and neat. Think about any last-minute alterations you might want to make before exporting your logo.
- The eraser tool is good for correcting mistakes on a white background. If there’re lots of color in your design, use the eyedropper tool to match the surrounding colors and blend the mistake into the background.[16]
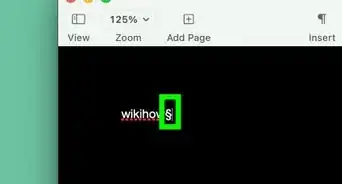
- Use the zoom tool or change the screen magnification by increasing the number percentage displayed at the bottom of the page. Enlarging your image will give you a closer look at the fine details.
Exporting and Finding Uses for Your Logo
-
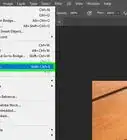
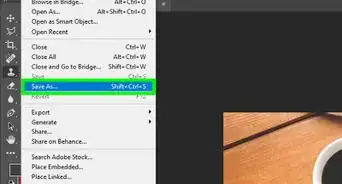
1Save your logo. Once you’ve got your design looking the way you want it, highlight the “File” tab in the upper lefthand corner of the screen and select “Save." You’ll be prompted to choose a name and location for the new image on your computer. Give your logo a name that will help you remember what it is, then hit the “Save” button again to finish creating the image.
- Click the dropdown list underneath the bar for the file name to choose your desired file format. Extensions like .jpeg, .gif, and .png are common, and will be acceptable for printing and uploading in most places.[17]
- If you’re editing on a mobile device, you’ll see an option that reads “Save/Export to gallery/camera roll.”
-
2Show off your logo online. Upload your new logo to your website, digital portfolio, or email signature to give it a personalized touch. You might also incorporate a small version of the image as a splash in the corner of an Instagram photo or YouTube video to tell viewers that what they’re seeing is your own original content.[18]
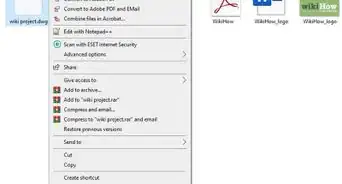
- Import your logo as a separate image to paste it into other file types.
- An original logo can make a great profile pic for your business or brand’s social media accounts.
-
3Print your logo for use on merchandise and other materials. Put your new design on apparel, product packaging, or business cards for distribution in the real world. Make sure it’s displayed front and center where it will be plainly seen. A well-designed logo will serve as a recognizable stamp for your brand.[19]
- Submit a digital copy of your logo along with the rest of your design specifications when having items printed professionally.
-
4Copyright your logo. If you're planning on using your logo to represent a money-making business or brand, it’s a good idea to file a trademark claim on it. Confirm your ownership of an original design by registering it with your country's Copyright Office. That way, you can rest easy that no one else will be able to use it for their own gain.[20]
- Copyrighting your design will allow you to take legal action in the event that someone tries to steal or reproduce it.[21]
- After successfully applying for a copyright, add the © symbol to your logo to let others know that it belongs to you.
Community Q&A
-
QuestionWhat's a good app for making logos?
 Community AnswerLogomakr makes pretty decent logos for beginners.
Warnings
- Avoid using more than two different fonts in the same design. The effect can come off as distracting and amateurish.⧼thumbs_response⧽


References
- ↑ https://99designs.com/blog/logo-branding/how-to-design-logo/
- ↑ https://inkbotdesign.com/100-famous-logos/
- ↑ Janet Peischel. Digital Media Expert. Expert Interview. 30 March 2021.
- ↑ https://designshack.net/articles/graphics/5-tips-for-a-memorable-logo/
- ↑ https://digitalsynopsis.com/design/creative-minimal-logo-design-inspiration/
- ↑ https://designshack.net/articles/inspiration/10-tips-for-designing-logos-that-dont-suck/
- ↑ https://creativemarket.com/blog/logo-design-tutorials-and-tips
- ↑ https://creativemarket.com/blog/logo-design-tutorials-and-tips
- ↑ https://speckyboy.com/inspiring-examples-logo-sketching/
- ↑ http://www.techradar.com/news/the-best-free-online-photo-editor
- ↑ https://thenextweb.com/creativity/2014/02/24/9-browser-based-photo-editing-tools/
- ↑ http://pixlr.com/blog/support/the-pixlr-editor-toolbar-explained/
- ↑ https://louisem.com/6962/how-to-use-pixlr-tutorial
- ↑ https://creativemarket.com/blog/logo-design-tutorials-and-tips
- ↑ http://blog.fotor.com/3-tips-for-using-colors-in-your-photos/
- ↑ https://www.youtube.com/watch?v=7sy-eeMPWF4&feature=youtu.be
- ↑ http://guides.lib.umich.edu/c.php?g=282942&p=1885348
- ↑ https://www.somewhatsimple.com/how-to-add-a-logo-to-photos/
- ↑ https://99designs.com/blog/logo-branding/how-to-design-logo/
- ↑ https://www.copyright.gov/circs/circ01.pdf
- ↑ https://inkbotdesign.com/copyright-a-logo/
- ↑ https://www.designhill.com/design-blog/starbucks-logo-overview-of-design-history-and-evolution/
About This Article