This article was co-authored by Mobile Kangaroo. Mobile Kangaroo is a full service repair shop and Apple Authorized Service Provider headquartered in Mountain View, CA. Mobile Kangaroo has been repairing electronic devices such as computers, phones, and tablets, for over 19 years, with locations in over 20 cities.
This article has been viewed 673,329 times.
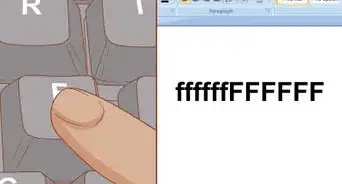
Just as you're typing the last words of your quarterly report, one of your keyboard keys starts sticking. Luckily, you have a few simple options available to clean out your keyboard. Sticky keys can happen because of dirt and debris in the keyboard, but they can also be a result of spilled drinks or other stickiness. The solutions below address both of these problems.
Steps
Shaking Out the Keyboard
-
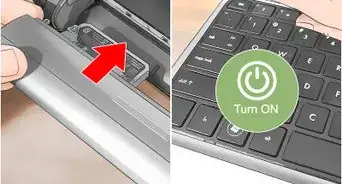
1Unplug the keyboard. If you have a laptop, turn it off.
-
2Turn the keyboard upside-down. You can also hold it at an angle, as long as part of the keyboard is pointing towards the floor.Advertisement
-
3Gently shake the keyboard. Let the crumbs shake out to the floor or table.
-
4Brush away any extra crumbs. If there's trash on the keyboard, brush it away.
-
5Check the keys again. See if they are working.


Blowing Out the Keyboard
-
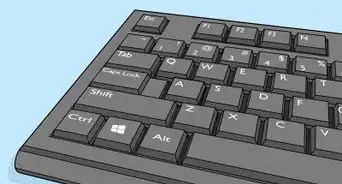
1Buy a can of compressed air. You can find it at almost any place that sells electronics.
-
2Turn the computer off. If you have a desktop, unplug the keyboard from the computer.
-
3Use the air to gently blow around and under the keys. Don't tilt the can, as it can pour out liquid.[1]
-
4Brush away any debris. If dirt or food is blown out, brush it away from the keyboard.
-
5Try the keys again. See if the keys are unstuck.


Cleaning Sticky Keys
-
1Wipe up any spills as they happen. If you spill a drink on your keyboard, unplug it and wipe it down.
-
2Clean the keys with alcohol if the drink dries. Make sure the keyboard is unplugged first, or your laptop is powered down. If the spill is mostly on top of the keys, use a cotton swab and rubbing alcohol to clean the keys.[2]
-
3Rub the tops of the keys. Make sure they are free from stickiness.[3]
-
4Use the cotton swab to go around the edges. Going around the edges should help with sticky keys, as it releases the bottom part of the key from the keyboard.[4]
-
5Check to see if your keys are unstuck. Once the alcohol is dry, check your keys to see if they are better.


Removing Keys to Clean the Keypad
-
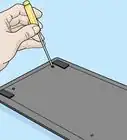
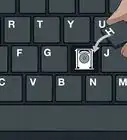
1Gently pry up the jammed key. Use a screwdriver or other flat instrument to get under the key, and pull up slightly on one of the edges.[5] You can also use your nail.
- If you are working on a laptop (whether PC or Mac), the key is held in place by a flimsy plastic clip, which also serves as the spring. The keys are attached in slightly different ways on each type of keyboard, so removing them will be different on each type.[6] If you're unsure if or how your laptop keys come off, consult your manual.[7]
- Mechanical keyboards should not be fixed by prying at the keys. Most keyboards include a key puller that will remove individual key caps off of the keyboard.
- Don't remove all the keys at once, as you may have trouble remembering where they all go. Don't do more than a couple at one time.
-
2Carefully wipe the inside of the button and the slot from which it was removed. Clear out any obstructions or crumbs that are jamming the key or the hinges underneath. You can use tweezers or toothpicks to help.[8]
-
3Use a cotton swab dipped in rubbing alcohol to clean off any sticky areas. Be sure not to have so much alcohol on the swab that it drips.[9]
-
4Let the key and keyboard fully dry. You don't want to leave any liquid underneath the keys, even rubbing alcohol.
-
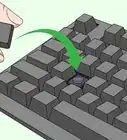
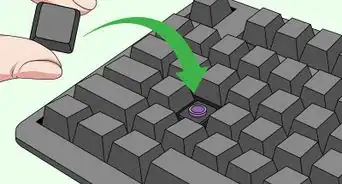
5Insert the keys back into their original places. Gently press the key down. It should snap back into place.[10]
- If using a laptop, insert the clip into the position it originally held before you place the key back into its spot.
-
6Check your keys. They should be unstuck now. If not, you may need to take it into someone who repairs computers.[11]


Replacing a Broken Key
-
1Pop off the key that isn't working properly. For example, if the 'A' key isn’t working, take it off. For methods of doing this, see How to Take Keys Off a Keyboard.[12]
-
2Pop off a working key and place the working key into the problem key position. For example, place the working 'S' key into the 'A' key position. If the 'S' key works while in the A spot, this means that the problem is with the actual A key and not the membrane or mechanical switch.
-
3Compare the problem key with the working key and look for inconsistencies. In some cases there's a ridge that fits into a slot, if the ridge has a bump in it, this can be fixed with a knife or scissors, run the sharp edge along the ridge back and forth to smooth out the ridge and try the key again.
-
4Order replacement keys online or through manufacturer if necessary. Or, if that's not possible, another option is to find a very cheap, broken keyboard of the same model (i.e. auction site), where the keys are still in good condition. That way you can salvage keys from the cheap, broken keyboard to use in your working keyboard.
Community Q&A
-
QuestionDoes my keyboard need to be replaced if only one key isn't working correctly?
 Mobile KangarooMobile Kangaroo is a full service repair shop and Apple Authorized Service Provider headquartered in Mountain View, CA. Mobile Kangaroo has been repairing electronic devices such as computers, phones, and tablets, for over 19 years, with locations in over 20 cities.
Computer & Phone Repair SpecialistsSometimes, the key is just dirty. Have you popped the key off to clean and restore it? If not, that may be worth a shot. If you have done that and the key still doesn't work, then you definitely need to replace the entire keyboard if you want to be able to use that key. -
QuestionHow can I remove an item that is jammed into the keyboard without removing the key?
 Community AnswerGet 2 things that are small and thin (Like 2 toothpicks or needles) and take the item out.
 -
QuestionWill WD-40 work and, if so, what are the suggested steps?
 Community AnswerIt doesn't work at all. Please don't use WD-40; it will damage your system. Try other products for it. In some cases, you have to tear down the system to repair.
Warnings
- Make sure the keyboard is unplugged, so you don't short it out.⧼thumbs_response⧽
- If the computer is new and still under warranty, do not remove the key without first contacting the manufacturer.⧼thumbs_response⧽
Things You'll Need
- Compressed air
- Rubbing alcohol
- Cotton swabs
- Tweezers or a toothpick
- Regular screwdriver (small)


References
- ↑ http://www.computerhope.com/issues/ch001337.htm
- ↑ http://www.pcworld.com/article/249212/how_to_clean_your_keyboard.html
- ↑ http://www.pcworld.com/article/249212/how_to_clean_your_keyboard.html
- ↑ http://www.pcworld.com/article/249212/how_to_clean_your_keyboard.html
- ↑ Mobile Kangaroo. Computer & Phone Repair Specialists. Expert Interview. 11 September 2019.
- ↑ http://www.fonerbooks.com/laptop15.htm
- ↑ http://www.pcworld.com/article/249212/how_to_clean_your_keyboard.html
- ↑ http://www.insidemylaptop.com/something-stuck-under-laptop-keyboard-key/
- ↑ http://www.pcworld.com/article/249212/how_to_clean_your_keyboard.html
- ↑ http://www.insidemylaptop.com/something-stuck-under-laptop-keyboard-key/
- ↑ Mobile Kangaroo. Computer & Phone Repair Specialists. Expert Interview. 11 September 2019.
- ↑ Mobile Kangaroo. Computer & Phone Repair Specialists. Expert Interview. 11 September 2019.
About This Article