This article was co-authored by wikiHow staff writer, Hannah Madden. Hannah Madden is a writer, editor, and artist currently living in Portland, Oregon. In 2018, she graduated from Portland State University with a B.S. in Environmental Studies. Hannah enjoys writing articles about conservation, sustainability, and eco-friendly products. When she isn’t writing, you can find Hannah working on hand embroidery projects and listening to music.
The wikiHow Culinary Team also followed the article's instructions and verified that they work.
This article has been viewed 11,179 times.
Learn more...
Razor clams are a staple of coastal towns on the east and west coasts. Digging up these tasty sea creatures is a family-friendly activity that everyone can partake in. If you had a little too much fun digging up your clams, you may have ended up with more than you can eat right now. Fortunately, you can freeze your clams for up to 3 months to enjoy them long after you brought them home.
Steps
Cleaning the Clams
-
1Rinse the shells off to get rid of the sand. Run your clams under cool tap water from the sink to wash off the sand and grime that may be on them. Use your fingers to gently scrub off any large dirt markings that might be on each clam.[1]
Tip: Try to get rid of the majority of the sand before you start cleaning the clams to make it easier on yourself.
-
2Boil a pot of water on the stovetop. Put a large pot of water on the stove at high heat and wait for it to boil. If the pot starts to boil over, turn the heat down slightly.[2]
- The water is boiling when you see large bubbles rising to the surface.
Advertisement -
3Dip the clams into the pot for 10 seconds. Place your clams into a colander or steamer basket, then dip them into the hot water. Make sure all of the clams are fully submerged. Shift the colander or steamer basket around so each clam gets an even amount of heat.[3]
- The hot water will open up the clams and make it easier to get to the meat.
-
4Cool the clams down in cold water immediately. Fill up a sink or a large bowl with cold water from your tap. Take the colander full of clams out of the boiling water and dunk the colander into the cold water, making sure they’re all fully submerged. Wait until they’ve cooled to at least room temperature before taking them out of the water.[4]
- The cold water cools them down so that they’ll freeze evenly.

Shucking the Clams
-
1Crack open the shells by pulling them apart. Hold 1 clam in your hands and grab each shell in either hand. Gently pull the shell halves away from each other until you hear a popping sound and the shells break.[5]
- The hot water should have separated the meat from the clams enough that it isn’t super hard to pull them apart.
-
2Pull the meat off the shell with your hands. Gently pull the meat, or the soft fleshy part of the clam, away from the shell. Try not to tear or rip it when you do. You can keep the shells around as decoration or dispose of them once the meat is taken out.[6]
-
3Cut or pull off any brown areas from the clams. The gills, palps, and intestines are all parts of the clam that you probably don’t want to eat. Use your fingers or a knife to cut off any areas that look brown from the clams and throw them away.[7]
- Cutting off these pieces before you freeze the clams will make it easier when you want to cook them later on.
- The majority of the clam meat should be pale cream in color.
-
4Rinse off the meat with cool water. Briefly run the clam meat under water from your sink to get rid of any leftover sand or grit. Scrub at any areas with your fingers if you notice they are particularly dirty.[8]
-
5Drain the clams on a paper towel. Place the meat on a paper towel to dry them off so they freeze and thaw better. Depending on how many clams you have, drying them out could take 10 to 40 minutes.[9]
Tip: The less water that is on the clams when you put them in the freezer, the better they will freeze.


Storing the Clam Meat
-
1Place the clam meat in an airtight bag in a single layer. Try to keep the clams in 1 single layer so that they freeze faster. There will also be less of a chance of the clams sticking together if you don’t stack them on top of each other. Press all of the air out of the bag before you close it.
- If you have a vacuum sealer, use that to remove the air from the bag before you seal up your clams.
-
2Label the clams with the date you froze them. Use a permanent marker to write down the date when you froze your clams. This way, you won’t accidentally leave them in the freezer for too long and potentially eat spoiled clams.[10]
-
3Put your razor clams into your freezer for up to 3 months. Since clam meat spoils fairly quickly, they stay fresh for a couple of months once they are frozen. Try to use them within 3 months for the best taste and quality.[11]
- If you notice a bad smell when you open them up, your clams have probably spoiled and you shouldn’t eat them.
-
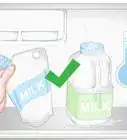
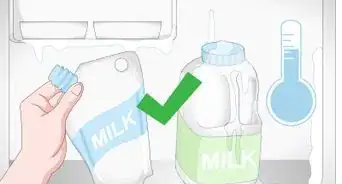
4Thaw the clams in the fridge for 1 day before you cook them. Take your clams out of the freezer and put them on the top shelf of your fridge to let them warm up safely. They will cook faster and more evenly once they’ve thawed out.[12]
Warning: Once you thaw your clams, don’t refreeze them. They won’t freeze well a second time and they may spoil.
-
5Fry the clams on their own or add them to recipes to enjoy. The traditional way to eat clams is to batter them with flour and an egg wash and then fry them up. You can try out this method or chop up the clam meat and add them to stir fries or pasta dishes to enjoy them with a meal.[13]
- Make sure your cooked clams reach an internal temperature of 145 °F (63 °C) before you eat them.[14]
- White wine pairs the best with cooked clams.


Things You’ll Need
- Pot
- Colander or steamer basket
- Large bowl
- Knife
- Paper towels
- Airtight bag
- Permanent marker
Warnings
- Always make sure your clams are cooked to 145 °F (63 °C) before you eat them.[15]⧼thumbs_response⧽


References
- ↑ https://wdfw.wa.gov/fishing/basics/digging-razor-clams
- ↑ https://wdfw.wa.gov/fishing/basics/digging-razor-clams
- ↑ https://wdfw.wa.gov/fishing/basics/digging-razor-clams
- ↑ https://nchfp.uga.edu/how/freeze/clams.html
- ↑ https://wdfw.wa.gov/fishing/basics/digging-razor-clams
- ↑ https://wdfw.wa.gov/fishing/basics/digging-razor-clams
- ↑ https://www.youtube.com/watch?v=0xU65qXafQI&feature=youtu.be&t=293
- ↑ https://www.doh.wa.gov/Portals/1/Documents/4400/332-072-RecHarvest.pdf
- ↑ https://www.doh.wa.gov/Portals/1/Documents/4400/332-072-RecHarvest.pdf
- ↑ https://nchfp.uga.edu/how/freeze/clams.html
- ↑ https://www.doh.wa.gov/Portals/1/Documents/4400/332-072-RecHarvest.pdf
- ↑ https://www.doh.wa.gov/Portals/1/Documents/4400/332-072-RecHarvest.pdf
- ↑ https://www.allrecipes.com/article/how-to-cook-clams/
- ↑ https://www.doh.wa.gov/CommunityandEnvironment/Shellfish/RecreationalShellfish/IllnessPrevention/HandleStoreandCook
- ↑ https://www.doh.wa.gov/CommunityandEnvironment/Shellfish/RecreationalShellfish/IllnessPrevention/HandleStoreandCook
About This Article