A simple guide to adding one or more rows anywhere in your spreadsheet
X
wikiHow is a “wiki,” similar to Wikipedia, which means that many of our articles are co-written by multiple authors. To create this article, volunteer authors worked to edit and improve it over time.
This article has been viewed 67,506 times.
Learn more...
Microsoft Excel is one of the most widely used spreadsheet editors because it offers plenty of functionality to be relevant throughout the years. One function is the capability of adding rows into the sheet. In case you’re in a position where you realize that you’ve missed a row while creating your spreadsheet, it’s nothing to sweat about because adding rows in an Excel spreadsheet is so easy.
Steps
Method 1
Method 1 of 3:
Inserting a Row
-
1Locate the Excel file that you need to work on. Using your PC’s file browser, navigate through your folders until you find the Excel file you want to open.
-
2Open the file by double-clicking it. Excel will automatically launch when you open an Excel document on your computer.Advertisement
-
3Select the sheet you’ll insert rows into. At the lower-left corner of the worksheet are some tabs. These tabs can either be labeled Sheet1, Sheet2, etc., or renamed to a name you prefer. Click on the sheet you will insert rows into.
-
4Select a row. Do this by clicking on the number of the row found on the left of the screen.
- You can also select a cell in the row above which you want to insert a new row.
-
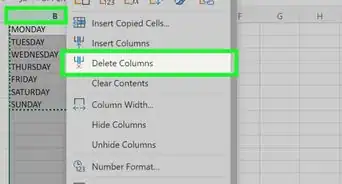
5Right-click the selected row. A context menu will pop out.
-
6Select “Insert.” A row will be inserted above the one you selected.


Advertisement
Method 2
Method 2 of 3:
Inserting Multiple Rows
-
1Open the Excel file that you need to work on. Find the file in your PC's folders and double-click on it to open it.
-
2Select the sheet you’ll insert rows into. At the lower-left corner of the worksheet are some tabs. These tabs can either be labeled Sheet1, Sheet2, etc., or renamed to a name you prefer. Click on the sheet you will insert rows into.
-
3Select the number of rows you want to insert. To insert multiple rows, highlight the rows below where you want to insert rows. Highlight the same number of rows as you want to insert.
- For example, if you want to insert four new rows, select four rows.
-
4Right-click the selected rows. A context menu will pop out.
-
5Select “Insert.” The number of rows you highlighted will be inserted above the rows you selected.


Advertisement
Method 3
Method 3 of 3:
Inserting Nonadjacent Rows
-
1Find the Excel file that you need to work on. Using your PC’s file browser, navigate through your folders until you locate the file you want to open.
-
2Open the file. Do this by double-clicking it. Excel will automatically launch when you open an Excel document on your computer.
-
3Select the sheet you’ll insert rows into. At the lower-left corner of the worksheet are some tabs. These tabs can either be labeled Sheet1, Sheet2, etc., or renamed to a name you prefer. Click on the sheet you will insert rows into.
-
4Select the rows. To insert nonadjacent rows, hold down the CTRL key and select nonadjacent rows by left-clicking on your mouse.
-
5Right-click the selected rows. A context menu will pop out.
-
6Select “Insert.” The number of rows you highlighted will be inserted above the rows you selected.


Advertisement


About This Article
Advertisement