X
wikiHow is a “wiki,” similar to Wikipedia, which means that many of our articles are co-written by multiple authors. To create this article, 12 people, some anonymous, worked to edit and improve it over time.
This article has been viewed 44,271 times.
Learn more...
Whether you're trying to preserve plantings during a period of dry weather, or you're establishing new plantings, if you find you need to water often for a short period of time, a temporary irrigation system may be the answer. Here are some steps and things to consider when installing such a system.
Steps
-
1Decide whether the cost and labor of a temporary system is cost effective in your situation. Even a minimal system can be expensive, and you may need to add the cost of the water if you are connected to a public utility or other water provider.
-
2Decide how and where you can connect to a water source. Drilling a well may be an option, but the additional cost can be prohibitive. Connecting to fire hydrants may be possible if the utility the hydrant belongs to permits use for this purpose, but you will likely be required to use a backflow preventer and water meter, and to disconnect the system when you are not on site.Advertisement
-
3Lay out the area you will be watering to determine the number of individual sprinkler heads you will need, and the amount of pipe and other materials required.
-
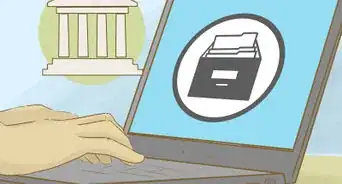
4Choose the type of sprinkler heads you will use, then use the manufacturer's literature to determine the spacing and water requirements for each head. Many home centers offer computer assisted design (CAD) services free of charge if you buy the materials from them.
-
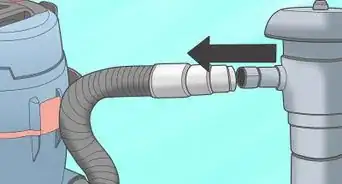
5Connect to your water source, using utility approved devices to control backflow and to meter water usage if required. Make sure you can valve off your sprinkler lines to control water flow after the system is installed. You can use standard ball or gate valves for this purpose, or invest in electrically operated irrigation valves if you choose to install a timer or controller in your system.
-
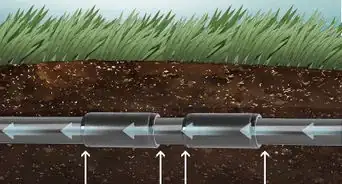
6Run mains, the larger pipes that provide water to branch lines and individual zones (if you need to break the system down or branch it for efficient watering) along edges of sidewalks or buildings. This ensures that their presence doesn't impede mowing, traffic, or other activities that will take place in the irrigated area.
-
7Install adapter tees where you will install your sprinkler heads, spacing them according to the design or manufacturer's coverage literature. An example would be a gear driven Rain Bird R-5000 head which can cover a 32 foot (9.7 meters) radius using 3 gallons (11 liters) of water per minute at 22 pounds per square inch pressure.
-
8After installing the piping system and sprinkler head adapter tees, flush all the pipes with water to remove trash that would otherwise stop up the sprinkler heads when they are installed. Allow enough water to run through the system to clean sand or other heavy material from within the pipes. For long runs with multiple heads, you may have to begin installing the heads closest to the water source to create enough pressure and velocity to flush the lines further down the run.
-
9Check the system for obvious leaks while the system flushes. Temporary irrigation such as those used by contractors often reuse components, including pipe and fittings, and these may be damaged during handling and while in storage. Even new pipe may have invisible damage that will appear when the system is operating, and repairing leaks before the heads are installed will prevent the need to re-flush it later.
-
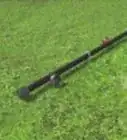
10Install the heads to the adapter tees using suitable connectors. Make sure they are stable, and stake each head if necessary to prevent them from becoming loose or breaking off during use. Use nylon zip ties to anchor the heads to the stakes.
-
11Preset the rotation (of rotating heads) to cover the amount of radius needed to cover the area you are watering, and to avoid spraying adjacent buildings or pavements where the water is at least wasted, if not damaging.
-
12Turn on the water, doing so slowly to avoid water hammer or other shock to the equipment. Watch the heads as they prime up and begin to operate, to make sure they are functioning as anticipated.
-
13Readjust any heads that are not covering their full area, and look for dry spots that often occur where the radius of two heads meet. Allow the system to run long enough to determine the amount of water you are applying is sufficient. You can place buckets or cans to collect water for a specified period of time, then measure to calculate how much is being applied, often measured in fractions of inches or inches (or millimeters).
-
14Keep in mind that since this is a temporary system, the materials, including the valves, pipes, and heads will be on top of the soil or grass. This means that they are exposed to hazards, so make it a routine to inspect the system regularly, preferably before each watering cycle, as busted pipes can cause flooding or erosion problems, as well as wasting water.


Advertisement
Warnings
- Make sure you have proper permits and permission from your local water service before connecting to a fire hydrant or other water main not on your own property.⧼thumbs_response⧽
- Water usage can become expensive, so calculating the gallons (liters) per month times the unit cost will prevent sticker shock when the utility (water) bill comes.⧼thumbs_response⧽
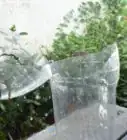
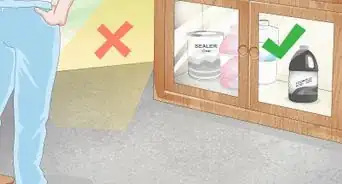
- When exposed to the sun, PVC breaks down. Inspect all PVC pipes for brittle and weak spots before you install them especially if they are re-used pipes.⧼thumbs_response⧽
Advertisement
Things You'll Need
- Basic tools for installing the pipe. For PVC pipe, you will need glue, fittings, a handsaw or pipe cutter, and sprinkler heads
- Stakes for anchoring the heads
- Zip ties


About This Article
Advertisement