This article was co-authored by wikiHow staff writer, Janice Tieperman. Janice is a professional and creative writer who has worked at wikiHow since 2019. With both a B.A. and M.A. in English from East Stroudsburg University, she has a passion for writing a wide variety of content for anyone and everyone. In her free time, you can find her working on a new crochet pattern, listening to true crime podcasts, or tackling a new creative writing project.
There are 11 references cited in this article, which can be found at the bottom of the page.
The wikiHow Video Team also followed the article's instructions and verified that they work.
This article has been viewed 7,407 times.
Learn more...
Camera straps are a necessity for both amateur and professional photographers. If you’d like to carry around your camera in a convenient, stylish, and inexpensive way, try making your own strap at home. Using basic crafting and sewing skills, try trimming and stitching different fabrics to create your very own camera accessory!
Steps
Assembling the Fabric and Fleece
-
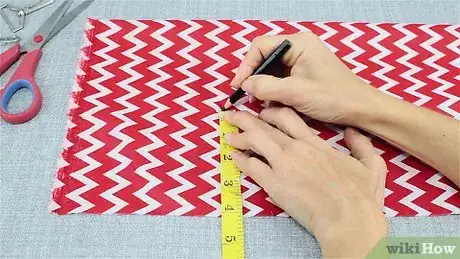
1Measure your fabric to be 32 by 4 in (81 by 10 cm). Use a measuring tape and a pen or other writing tool to mark off the dimensions of your new camera straps. Use a 32 in (81 cm) measurement if you’d like a strap that fits comfortably around your neck. If you’d like a thicker strap, feel free to mark off more than 4 in (10 cm).[1]
- Since you’ll be folding your fabric in half vertically, double the measurement of your desired strap width. If you follow these exact measurements, your finished camera strap will be 2 in (5.1 cm) wide.
- For instance, if you’d like your finished camera strap to be 3 in (7.6 cm) wide, measure and mark your fabric to be 6 in (15 cm).
- While there are no hard and fast rules for making a camera strap, you might have an easier time working with lighter fabrics, like cotton.
-
2Cut out the marked section of fabric. Use fabric scissors to cut out a large rectangle of material for your camera strap. Don’t worry if the edges of your fabric are a little jagged and uneven; when the fabric is stitched and folded, you won’t be able to see any of these edges.[2]
- If you don’t want to use scissors, consider using a fabric roller instead. This device works best on a flat surface designing for sewing prep.
Advertisement -
3Trim a piece of fusible fleece that is 32 by 4 in (81 by 10 cm). Lay out a piece of fusible fleece onto a flat surface. Next, use a measuring tape to mark off the exact dimensions of your fabric strap, so the fleece can be layered on top. Once you’ve made these markings, cut out this section of material with a pair of fabric scissors.[3]
- Fusible fleece is ironed on to different projects and helps make your strap sturdier.
- You don’t have to use this material in your strap—it just provides some extra dimension.
-
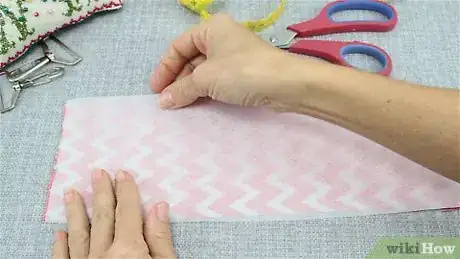
4Arrange the fleece on top of the fabric. First, lay out your original section of fabric on a flat surface, so you can start building your strap. As you place it down, adjust the edges and corners so both pieces of material are evenly aligned.[4]
- Make sure that the flat edge of the fusible fleece is facing up, and the softer side is flush with the fabric.
-
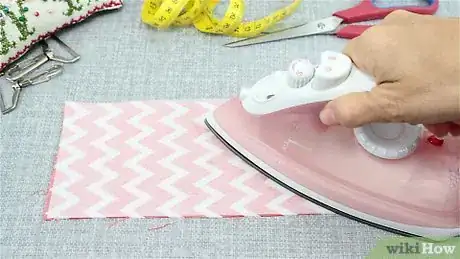
5Iron the fusible fleece so it adheres to the strap. Set your iron to a wool fabric or steam setting, then press the appliance on top of the fleece. Work the iron in sections, holding it in place for 10 seconds so the fleece can fuse with the fabric. Continue moving the iron down the fabric strip until the fleece is fully attached.[5]
- This might be easiest to do on an ironing board.
-
6Fold and pin the long strip of fabric in half. Take your combined fabric and fleece and fold it lengthwise. Try to line up the edges as closely as possible, so the finished product doesn’t look uneven.[6] Pin the folded material into place as you go, so the strap remains as even as possible.
- Any kind of pin can work for this project. If you’re new to sewing, consider placing the pins next to one another along the seam. If you’re more experienced, try spacing out the pins by 1 to 2 in (2.5 to 5.1 cm).
-
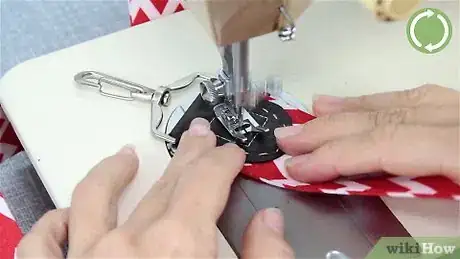
7Stitch the folded edges together with a sewing machine. Feed the folded fabric through your sewing machine. As you stitch both sides of the fabric together, remove the pins and set them aside. Continue stitching down the length of the strap until you reach the opposite end. If there’s any excess thread, trim it off with a small pair of scissors.[7]
- Your sewing machine might have a thread cutter attached to it; if so, feel free to use this tool.
-
8Pinch and roll your fabric to turn it inside out. Begin tucking and rolling your stitched strap so the hem is no longer visible. Continue pinching and pulling the material until the seam is no longer visible, and the fabric looks smooth.[8]
- You can use a long tool like the bottom of a pencil to help push the fabric into its proper formation.
Crafting and Connecting the Vinyl End Pieces
-
1Trace 2 rounded rectangles that are 1½ by 4 in (3.8 by 10.2 cm). Use a piece of paper or cardstock to sketch out a rough template for the end pieces of your strap. Draw out a curved rectangle with rounded edges and long lines. As you sketch, check with the ruler to make sure that the template is 4 in (10.2 cm) across and 1½ in (3.8 cm) wide. Once you’ve completed this template, cut it out with a pair of scissors.[9]
- You can use a variety of different shapes to design your end piece. If you don’t want to use a curved rectangle, try drawing and cutting out an hourglass shape that follows the same dimensions.
- You can find an exact template of the rectangular end pieces here: https://media.rainpos.com/5025/camerastrap_instrweb.pdf.
-
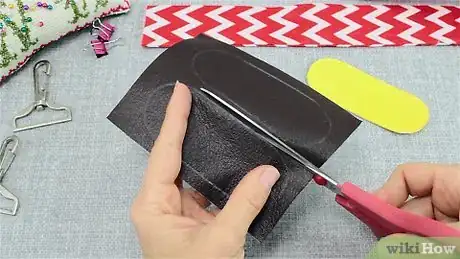
2Cut out 2 curved rectangles from a sturdy fabric. Use a marker or pen to trace around your end piece template. Instead of using a soft fabric, trace these shapes onto a sturdier material, like vinyl or faux leather. After you’ve marked off the different shapes, cut them out with a pair of fabric scissors.[10]
- A different type of fabric adds a nice contrast to the fabric you used for the strap.
-
3Fold 1 end piece in half around the ring of a metal clip. Slip 1 of your sturdy end pieces through the ring, buckle, or opening of your metal clasp. Crease the material around this opening so the end piece is folded in half completely.[11]
- You can purchase different kinds of clasps and metal rings from your local craft store.
-
4Secure 1 end of your strap inside the folded end piece. Place your folded end piece and metal clasp onto a flat workspace. Use 1 hand to hold the material in place, and another to tuck 1 end of the fabric strap between the folded rectangle. As you tuck, try sandwiching the end of your strap between both folds of the end piece.[12]
- Try to hold this in place once you’ve arranged the strap and end piece correctly.
-
5Hand stitch the end piece and strap it together. String a sewing needle with durable thread, and sew both folds of the end piece to the fabric strap. Work in small, consistent stitches, so the sewing job looks even all around the end piece. Once you’ve connected both halves of the curved rectangle together, tie off the thread and trim away any excess.[13]
- Don’t worry if your stitches aren’t perfect. The main purpose is to provide structure to your camera strap.
- If you don’t want the thread to be obvious, choose a colour that matches the material of your end pieces. If you’d like the stitching to stand out, use a more obvious colour like black or white.
-
6Stitch a boxed “X” in the middle of the end piece to make it secure. Re-thread your needle and begin sewing in the centre of your end piece. First, stitch a rectangle in the centre of your end piece. Next stitch in diagonal lines from corner to corner of this rectangle, creating an “X” inside of a box. As you did before, tie off the thread and trim away any of the extra.[14]
- This type of stitching is seen on a lot of garments, and it helps provide stability to different sewing projects.
- Your rectangle and “X” don’t have to be perfect—they just have to keep your end piece secured.
-
7Repeat this process with the opposite end piece and strap. Fold the other section of your end piece material around the loop, chain, or buckle of the metal clasp. After folding the vinyl or faux leather material in half and sliding it onto the other end of the strap, use a needle and thread to hand stitch the different components together. As a finishing touch, sew in the same “X” and rectangle into the centre of the other end piece.[15]
- While your end pieces might not look identical, they should look relatively similar.
-
8Clip both ends of the strap to your camera. Take the clasps attached to both ends of your strap and fasten them to the strap loops on your camera. Depending on the size of your metal hooks or clasps, you might not be able to fit your large hook around the loop. If this is the case, slide a metal ring onto each of these camera loops, and attach the metal hooks to these loops.[16]
- Before going out with your camera, place the strap around your neck to see if it feels comfortable. If the material feels scratchy or weird, you might want to re-do or adjust the project with a piece of different fabric.
Things You’ll Need
- Soft fabric
- Sturdy fabric
- Fusible fleece (optional)
- Iron
- Pen
- Measuring tape
- Scissors
- Sewing machine
- Pins
- Needle
- Thread
- 2 metal clasps or hooks
References
- ↑ https://m.youtube.com/watch?v=fYMaLRSWgjc&t=59s
- ↑ http://www.simplysewingmag.com/free-projects/how-to-sew-a-camera-strap/
- ↑ http://www.simplysewingmag.com/free-projects/how-to-sew-a-camera-strap/
- ↑ http://www.simplysewingmag.com/free-projects/how-to-sew-a-camera-strap/
- ↑ https://m.youtube.com/watch?v=tVMEVLT06C0&t=0m34s
- ↑ https://m.youtube.com/watch?v=fYMaLRSWgjc&t=1m20s
- ↑ https://m.youtube.com/watch?v=fYMaLRSWgjc&t=1m25s
- ↑ https://m.youtube.com/watch?v=fYMaLRSWgjc&t=1m40s
- ↑ https://m.youtube.com/watch?v=fYMaLRSWgjc
- ↑ https://media.rainpos.com/5025/camerastrap_instrweb.pdf
- ↑ https://m.youtube.com/watch?v=fYMaLRSWgjc
- ↑ https://m.youtube.com/watch?v=fYMaLRSWgjc&t=2m58s
- ↑ https://media.rainpos.com/5025/camerastrap_instrweb.pdf
- ↑ https://m.youtube.com/watch?v=fYMaLRSWgjc&t=3m31s
- ↑ https://media.rainpos.com/5025/camerastrap_instrweb.pdf
- ↑ https://m.youtube.com/watch?v=fYMaLRSWgjc&t=4m51s
