X
This article was co-authored by wikiHow staff writer, Jack Lloyd. Jack Lloyd is a Technology Writer and Editor for wikiHow. He has over two years of experience writing and editing technology-related articles. He is technology enthusiast and an English teacher.
The wikiHow Tech Team also followed the article's instructions and verified that they work.
This article has been viewed 105,378 times.
Learn more...
You can make a slideshow with Windows' free movie editor, Movie Maker. While the old Windows Movie Maker from earlier operating systems is no longer supported, Easy Movie Maker has the same functionality.
Steps
Part 1
Part 1 of 3:
Preparing Your Slideshow
-
1Download the Movie Maker app if you don't have it already. It's free in the Windows 10 app store; you can find it listed under the name "Easy Movie Maker".[1]
- While you can technically download the classic "Windows Movie Maker", Microsoft no longer supports it.
-
2Locate any photos you wish to put in your slideshow. Your dedicated "Pictures" folder is a good place to start if you don't have any ideas.Advertisement
-
3Locate any music you wish to put in your slideshow. If you don't want to move the actual music file (e.g., MP3), simply copy and paste the file.
-
4Right-click on your desktop, then select "New" and click "Folder". This will create a new, empty folder on your desktop.
-
5Place all of your media for the slideshow in your desktop folder. This will make retrieving these files whilst creating your slideshow a quick and efficient process. You are now ready to make your slideshow!


Advertisement
Part 2
Part 2 of 3:
Creating Your Slideshow
-
1Open the "Easy Movie Maker" app.
-
2Click the "New Project" option. This should take you to a photo selection screen.
-
3Select your photos, then click "Open". Easy Movie Maker will import your photos.
- If you forget to add a specific photo, you can add it into the slide show by clicking the plus sign in the bottom right-hand corner of Movie Maker.
-
4Click the two arrows pointing up and down at the bottom of Movie Maker's screen. This will allow you to reorder your photos as you see fit.
-
5Click and drag photos to reorder them.
-
6Click the checkmark at the bottom of the screen when you're done reordering. This will save your progress.
-
7Click a photo you wish to edit once to select it, then again to open it. You can change settings such as lighting, color, the photo's default animation, and the display duration from here.
- You can repeat this process for every photo in the slideshow.
-
8Click the checkmark in the upper right-hand corner of the screen when you're done editing.
- You can also click the X in the upper left-hand corner to cancel your edits.
-
9Click the black and white box between your first two photos to edit the transition. This will determine which effect, if any, displays while transferring from your first photo to your second.
- You can repeat this process for every transition in the slide show.
-
10Click the right-facing arrow in the upper right-hand corner of the screen when you're satisfied with your edits. This will take you to the text screen.
-
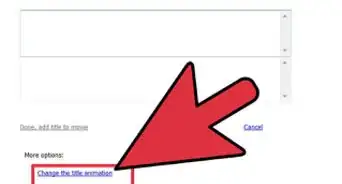
11Double-click the box that says "Double-Tap". This will allow you to input text.
-
12Click outside of the box once you're done entering text. This will cement your text to the photo.
- To add more text to the picture, click the plus sign in the lower right-hand corner of the screen.
-
13Click and drag the green slider at the bottom of the screen. This will adjust the amount of time your text remains on the screen.
-
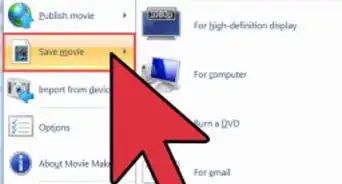
14Click "Save Video" once you've finished adding text to your slides. This is in the upper right-hand corner of your screen.
- Windows will prompt you to choose a save location. Make sure you save somewhere easily accessible.


Advertisement
Part 3
Part 3 of 3:
Adding Music to Your Slideshow
-
1Return to the Home menu of the Easy Movie Maker app.
- If you closed out of Movie Maker, simply re-open the app.
-
2Click the "Add Music" option. This will prompt you to select a video to add music to.
-
3Select your slideshow, then click "OK". The slideshow should be exactly where you saved it.
-
4Click the plus sign at the bottom of your screen. This will allow you to add music to your slide show.
-
5Select your music. You should be able to use most file types (e.g., MP3, WAV, WMV).
-
6Click "Open" when you've selected your music. This will import it into Movie Maker.[2]
-
7Click and drag the red slider at the bottom of the screen to adjust the music's length. Your music will automatically adjust itself to be the length of your slide show.
-
8Click "Save Video" in the upper right-hand corner of the screen when you're done. Your slideshow is now complete!


Advertisement
Community Q&A
-
QuestionIt does not support mp3 for adding music, only wmv, mp4, etc. How do I deal with this?
 Community AnswerThere is a program called Format Factory that you can use to change the music file from mp3 to wmv or whatever format you need. It is a free program.
 -
QuestionCan I make the box for the text wider?Community AnswerThere is a box on the left hand side and you click that and type in it. Once you do that, just type in it and it will get bigger as more writing comes out.
-
QuestionHow do I get rid of the black bars on either side of the pictures in my slide show?
 Community AnswerI don't believe this is possible in the application. This is one of the reasons why I am looking for a better alternative to Windows Movie Maker. The reason why the black bars are there is because the width/height ratio (aspect) is not the same as the screen you're making it for. If you were to fill the image in the screen area, the picture would look very stretched and ugly so they fix this by just adding bars to the end. I would rather have something else in place of the black bars like some sort of background.
Advertisement
Warnings
- If you plan on publishing your slide show, make sure you have permission to use all media (pictures and music) in it first.⧼thumbs_response⧽
Advertisement
Things You'll Need
- A computer
- Windows Movie Maker
- Pictures
-Step-13-Version-3.webp)
References
About This Article
Jack Lloyd
wikiHow Technology Writer
This article was co-authored by wikiHow staff writer, Jack Lloyd. Jack Lloyd is a Technology Writer and Editor for wikiHow. He has over two years of experience writing and editing technology-related articles. He is technology enthusiast and an English teacher. This article has been viewed 105,378 times.
How helpful is this?
Co-authors: 20
Updated: June 13, 2021
Views: 105,378
Categories: Windows Movie Maker
Advertisement