This article was co-authored by wikiHow staff writer, Nicole Levine, MFA. Nicole Levine is a Technology Writer and Editor for wikiHow. She has more than 20 years of experience creating technical documentation and leading support teams at major web hosting and software companies. Nicole also holds an MFA in Creative Writing from Portland State University and teaches composition, fiction-writing, and zine-making at various institutions.
The wikiHow Tech Team also followed the article's instructions and verified that they work.
This article has been viewed 152,956 times.
Learn more...
You can use albums to keep your photos organized in Google Photos. Albums are like containers for your photos—you can sort them into albums based on any criteria you choose. You’ll also have the ability to add, edit, or remove photos from an album any time. Learn how to create and manage albums in Google Photos, as well as how to rearrange the order of photos outside of their albums.
Steps
Creating an Album
-
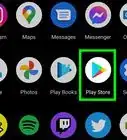
1Open the Google Photos app or visit http://photos.google.com. To keep your photos and videos organized, try sorting them into albums. You can do this using the Google Photos app or in a web browser.
-
2Create a new album. The steps are a little different depending on your device:
- Mobile: Tap the ⁝ icon and select “Album.” Now you’ll see a list of your photos, all with circles at their upper top corners.
- Web: Click the + symbol next to the search box and select “Album.” Your photos will appear, all with circles at their top left corners.
Advertisement -
3Click or tap the circle to select a photo. This will add the photo to the album. You can select as many photos as you’d like.
- See Adding Photos to an Album to learn how to add additional photos later.
-
4Tap “Create” (mobile) or click “Next” (Web). Now you’ll see a text box that says “Untitled” above the album’s contents.
-
5Enter a name for the album. You can call the album anything you want. Nobody will see the name unless you use the Google Photos sharing tools to share it with others.
-
6Click or tap the text tool (T) to write a description. It’s at the top right corner of the screen. Like an album title, nobody will see the description except you.[1]
-
7Click or tap the check mark to save. Your album is now live.
- To view a list of all of your albums next time you sign in, click or tap the Albums icon (at the bottom of the app, and on the left side of the website). The icon looks like a square with a bookmark at its upper-right edge.


Adding Photos to an Album
-
1Open Google Photos. You’ll be able to use this method with both app for mobile device and http://photos.google.com.[2]
-
2Click or tap the Albums icon. It’s at the bottom of the mobile app, and on the left side of the website. The icon looks like a square with a bookmark at its upper-right edge. Once clicked or tapped, a list of your albums will appear.
- If you don’t see any albums, you’ll need to create one first.
-
3Click or tap an album to modify. The album’s current contents will appear.
-
4Click or tap the Add Photo icon. It’s at the top right area of the screen and looks like a photo with a plus sign. Now you’ll see a list of your photos (outside the album), all containing circles at their upper left corners.[3]
-
5Click or tap to select a photo. When you select a photo, the circle at its upper left corner will turn to a check mark. All photos with check marks will be added to the album. You can select as many photos as you’d like.
-
6Click or tap “Done.” It’s at the top right corner of the screen. The photos you selected are now added to your album.


Rearranging Photos in an Album
-
1Open Google Photos. You can easily rearrange the photos inside of your album using the mobile app or at http://photos.google.com.
- To rearrange photos that aren’t in an album, see Rearranging Photos by Date and Time.
-
2Click or tap the Albums icon. It’s at the bottom of the mobile app, and on the left side of the website. The icon looks like a square with a bookmark at its upper-right edge. Once clicked or tapped, a list of your albums will appear.
-
3Select an album to manage. The contents of the album will appear.
-
4Click or tap the ⁝ menu. It’s at the top right corner of both the website and the mobile app.
-
5Select “Edit Album.” The album is now in edit mode, and you can tell this by the editing symbols at the top right corner of the screen.
-
6Drag a photo to move it. You can drag it as far up or down as you wish. When you’ve found a good spot for the photo, let go of the mouse (or lift your finger from the screen) to drop it there.[4]
- You can drag as many photos as you wish, but you’ll have to drag them all individually.
-
7Click or tap the check mark to save. The photos are now in the order you selected.


Removing Photos from an Album
-
1Open Google Photos. You can remove a photo from an album (without deleting it) using the mobile app or at http://photos.google.com.
-
2Click or tap the Albums icon. It’s at the bottom of the mobile app, and on the left side of the website. The icon looks like a square with a bookmark at its upper-right edge. Once clicked or tapped, a list of your albums will appear.
-
3Select an album to manage. The contents of the album will appear.
-
4Click or tap the ⁝ menu. It’s at the top right corner of both the website and the mobile app.
-
5Select “Edit Album.” The album is now in edit mode, and you can tell this by the editing symbols at the top right corner of the screen. Also, you’ll see a small X at the top left corner of each photo.
-
6Click or tap the X to remove a photo. The photo will disappear from the album. You’ll still be able to find it in the main photos list when you first access Google Photos.


Deleting an Album
-
1Open the Google Photos app or visit http://photos.google.com. If you no longer have use for an album, you can safely delete it without deleting the photos inside. Start by launching the app on your mobile device or visiting Google Photos in a web browser.[5]
-
2Click or tap the Albums icon. It’s at the bottom of the mobile app, and on the left side of the website. The icon looks like a square with a bookmark at its upper-right edge. Once clicked or tapped, a list of your albums will appear.
-
3Select an album to manage. The contents of the album will appear.
-
4Click or tap the ⁝ menu. It’s at the top right corner of both the website and the mobile app.
-
5Select “Delete Album.” A confirmation pop-up will appear, reminding you that deleting an album is permanent. Remember: the photos inside the album will not be deleted—just their container.
-
6Click or tap “Delete.” The album will now be removed from the album list.


Rearranging Photos by Date and Time
-
1Open http://photos.google.com in a web browser. When you access your photos, you’ve surely noticed that they appear in order by date and time. You can rearrange the order of these photos by changing their dates and times. You’ll need access to a computer.[6]
- To rearrange the photos in an album instead, see Rearranging Photos in an Album.
- If you’re not already signed in to Google Photos, do so now.
-
2Hold the mouse cursor over a photo. A selection circle will appear at the photo’s top left corner.
-
3Click the circle to select the photo. A check mark will fill the circle.
- You can select multiple photos to change all to the same date and time. Just click the circles on each photo you want to edit.
-
4Click the ⁝ icon at the upper right corner. A brief menu will appear.
-
5Select “Edit Date & Time.” Now you’ll see the “Edit date and time” pop-up. The photo’s current date and time information is visible on this window.
-
6Replace the current date and time with a new one. To move the photo closer to the top of the list, make the date later than the current one. To move the photo downward, make the date earlier.
-
7Click “Save.” Your photos will now be reordered based on the edited time and date.


Community Q&A
-
QuestionIf photos are deleted from the Gallery after an album has been created, will the photos be deleted from the album too?
 Community AnswerYes, but if you are using iOS (on an iPad, iPhone, etc.), you can recover the photos from the Recently Deleted album.
 -
QuestionHow do I organize Google Photo albums themselves? How do I create sub albums within parent albums?
 Community AnswerYou cannot create sub albums. Google does not let us have that simple and basic feature. It still lives in the era when data was less, so that it could be organized using just one layer of folders and there was no need of sub folders.
 -
QuestionIs there a way to arrange albums in alphabetical order by their names to make them easier to find in Google Photos?Community AnswerUsing the sort options provided by Google does not work now. The photos are sorted incorrectly no matter you choose 'oldest' or 'newest'. It ignores the 'date taken' on some photos. This happens more often recently. Previously there was no need to use this option and photos uploaded from PC were shown newest first on 'Photos' and became oldest first in 'Albums'. Not anymore, they are out of order now! You have to use 'custom' option to drag photos yourself in your album to put them to the right order. There is no option to sort by 'file name'.


References
- ↑ https://support.google.com/photos/answer/6128849?hl=en&ref_topic=6128848
- ↑ https://support.google.com/photos/answer/6128849?hl=en&ref_topic=6128848
- ↑ https://support.google.com/photos/answer/6128849?hl=en&ref_topic=6128848&co=GENIE.Platform%3DiOS&oco=1
- ↑ https://support.google.com/photos/answer/6128849?hl=en&ref_topic=6128848&co=GENIE.Platform%3DAndroid&oco=1
- ↑ https://support.google.com/photos/answer/6128849?co=GENIE.Platform%3DAndroid&hl=en
- ↑ http://googlesystem.blogspot.com/2015/08/organize-albums-in-google-photos.html
About This Article