X
wikiHow is a “wiki,” similar to Wikipedia, which means that many of our articles are co-written by multiple authors. To create this article, volunteer authors worked to edit and improve it over time.
This article has been viewed 25,228 times.
Learn more...
A picket fence endures everything that Mother Nature unleashes outdoors. As a consequence, any fence will eventually need to be repaired.
Steps
Method 1
Method 1 of 2:
Repairing the Gate
The gate typically develops problems before other parts of the picket fence. It may sag, drag the ground, bind or detach from the hinge post.
-
1Repair a sagging gate.
- Drill holes into two opposite corners of the gate’s frame, such as the bottom left corner and the top right corner. The space between the holes should match the openings at the end of the turnbuckle’s threaded rods.
- Screw the threaded rods of the turnbuckle onto the frame using the pre-drilled holes.
- Thread each rod into one end of the turnbuckle. Make sure that the slot for the screwdriver is facing you and not the gate.
- Insert the screwdriver into the slot and turn it until the gate frame is square.
-
2Repair a swollen gate.
- Remove the gate from the hinge post.
- Plane some wood from the latch-side of the gate.
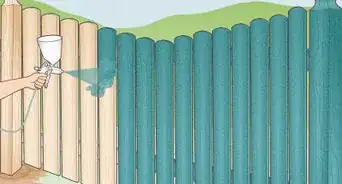
- Seal and paint the planed area.
- Reattach the gate to the hinge post.
Advertisement -
3Repair a misaligned hinge post.
- Push the hinge post against the fence frame.
- Attach temporary wooden braces to hold the hinge post in place at both the top and the bottom.
- Attach an L-bracket to the top using a screwdriver. Secure one side to the back of the hinge post and the other side to the frame’s exterior.
- Repeat with the bottom L-bracket.
-
4Repair loose hinges.
- Remove the gate from the hinge post by pulling the pins out of the hinges. Set the gate aside.
- Unscrew the remaining sides of the hinges from the hinge post.
- Drill out the holes using a 1/4" bit.
- Insert short lengths of 1/4" dowel into the holes.
- Cut the dowels flush with the surface of the post.
- Drill pilot holes for the hinge screws into the dowels.
- Screw the hinges back onto the hinge post.
- Replace the gate and secure the hinge pins.


Advertisement
Method 2
Method 2 of 2:
Repairing Fence Posts
Fence posts may rot or become wobbly, threatening the structural integrity of the fence. However, repairing fence posts does not have to be complicated.
-
1Repair a Wobbly Post
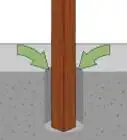
- Secure the fence post using temporary wooden braces so that the post will not wobble as you dig around the bottom.
- Dig a hole around the base of the pole that is 8" to 12" in diameter. Dig until you reach the bottom of the pole.
- Examine the hole to determine whether the fence post was set in dirt or concrete.
- Pound the post further into the ground using a sledgehammer if the post was set in concrete. The distance between the old concrete foundation and the ground should be about 6".
- Pour concrete into the hole. The concrete should come slightly above ground level.
- Shape the surface of the concrete using a trowel so that the surface angles down from the fence post. This will allow rainwater to run away from the base of the post and will prevent rot.
-
2Reinforce a decaying post.
- Dig a hole next to the rotten post. Determine whether the post is salvageable or if the post needs to be replaced because of extensive rot.
- Insert a shorter post into the ground next to the damaged post if the post does not have significant damage.
- Bolt the posts together, making sure that the bolts are secured to solid wood.
- Saturate the rotted area with a wood preservative to keep the rot from spreading.
-
3Replace a decayed post.
- Remove all of the nails that attach the stringers to the damaged post.
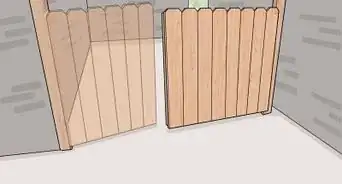
- Swing the sections of the fence at least two feet away from the damaged post.
- Prop the free sections of the fence on wood blocks to ensure that they do not pull away from other undamaged posts.
- Remove the rotten post. Lift carefully, particularly if the post was set in concrete. Posts set in concrete can weigh 100 pounds (45 kg) or more. Discard the post.
- Insert the new fence post into the hole.
- Pour concrete around the base of the pole until the concrete is slightly above ground level.
- Shape the surface of the concrete using a trowel so that the surface angles down from the fence post. This will allow rainwater to run away from the base of the post and will prevent rot.


Advertisement
Warnings
- Water pooling underneath your fence will eventually cause damage to the posts. Dig a shallow trench under your fence and fill it with gravel or crushed stone to encourage drainage.⧼thumbs_response⧽
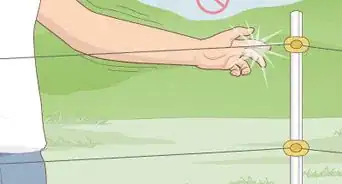
- Make sure to keep piles of leaves, lumber, sticks or debris away from your fence to discourage termites and rot.⧼thumbs_response⧽
Advertisement
Things You'll Need
- Drill
- Turnbuckle (measure your fence to purchase the correct size)
- Screwdriver
- Planer
- Sealant or paint
- Two L brackets
- Sledgehammer
- Concrete and a bucket for mixing
- Trowel
- Wood to make braces and temporary support blocks


About This Article
Advertisement