This article was co-authored by wikiHow Staff. Our trained team of editors and researchers validate articles for accuracy and comprehensiveness. wikiHow's Content Management Team carefully monitors the work from our editorial staff to ensure that each article is backed by trusted research and meets our high quality standards.
This article has been viewed 120,977 times.
Learn more...
There are many different payroll software companies you can use to process payroll but ADP does an exceptional job at helping your company process payroll. ADP can help payroll professionals grow along with company changes. They can also help payroll professionals stand out as people that employees, managers and department heads trust to get their pay checks right.
Steps
Starting a New Cycle
-
1Start a new cycle. This is how you begin each new pay period. This step clears out all of the data from the previous pay period. Then, it advances the system to the new pay period.
- Go to the payroll cycle page.
- Click on “Process” in the task bar at the top of the page.
- In the pop-up menu, under “Payroll,” select “Payroll Cycle.”
-
2Confirm the company code. If your business has more than one company that processes payroll, confirm the correct company code. To change the company code, click on the magnifying glass icon and select the correct company code.
- If you don’t have more than one company, do nothing.
Advertisement -
3Advance to the next pay cycle. Click on the green “Start New Cycle” icon. A popup window will appear that displays dates and deduction information for the upcoming pay period. Verify the week number, pay date and period end date. If you need to change any of this information, click on “Change Starting Week” to update it. Also, verify the scheduled deductions and special effects for the pay period. If all of this data is correct, click “Continue” in the bottom left-hand corner of the window.
-
4Allow the system to start the new cycle. After you click “Continue” in the above step, a popup window appears that displays the processing status. You will see a spinning circle to indicate that the system is processing the new cycle data. Once the process is complete, you will be returned to the payroll cycle page.
- Notice that the green “Start New Cycle” icon is now dimmed, and the other icons for processing payroll are now activated.


Manually Entering Paydata
-
1Use Automatic Pay for salaried employees. Your company may employ salaried employees or hourly employees who work a fixed number of hours each pay period. Work with an ADP representative to set up Automatic Pay for these employees. This way, you won’t have to enter their pay data each pay period.
- You can make changes to an employee’s salary or number of hours any time you need to.
-
2Set up employees to be paid. This is the process for entering data for your salaried and hourly employees who are not set up for Automatic Pay. You enter paydata in batches, which are groups of employees. You can use previously-created batches, or you can create and customize new batches.
- Click on “Process” in the task bar at the top of the page. In the pop-up menu, under “Payroll,” select “Payroll Cycle.” You will be directed to the Payroll Cycle page.
- Click on the “Enter Paydata icon” and select “Paydata” from the popup menu. You will be directed to a window where you can create a payroll batch.
- If you have already grouped employees into batches, the batches will be displayed in this window. Select the batch for which you want to enter paydata and click on “Go to Payroll Cycle.”
- If you want to create a new batch, click on the green “add” button. Add an alphanumeric code to identify the batch, and write a description so you know which category of employees is included in the batch. Select the paydata grid you want to use, depending on how you want your paydata displayed. Click on “next,” and you will be directed to a page that lists all of the employees in the company. Select the checkboxes next to the names of the employees you want to include and click on “Create Batch.”
- You will now see the paydata grid for the batch. Here is where you can enter any paydata information.
-
3Enter regular hours for hourly employees. Find the column entitled “Reg. Hours.” Enter the number of regular hours each employee worked. The system will automatically calculate the gross salary, deductions and net salary for the pay period. Click on the “save” button frequently to save data you have entered. When you are done, click on the “done” button.
- Enter the number of overtime hours in the “O/T Earnings” column.
- Enter any sick or vacation hours in the appropriate columns.
-
4Process one-time payroll changes. The system keeps salary and tax data for each employee and automatically calculates this information based on the number of hours you input. Also, employees set up for Automatic Pay automatically receive a paycheck. However, sometimes you need to make one-time changes. You can manually input these changes in the paydata grid.
- If an employee is set up for Automatic Pay but you need to change their salary or hours for this pay period, include the employee in the batch. Input the appropriate salary information in the paydata grid. This will override the Automatic Pay for the employee for this pay period.
- To input one-time deductions, such as a contribution to the United Way, click on “insert” and select “column.” In the popup window, select “Adjust Deduction” for the Paydata Field and choose the type of deduction for “Code/Type.” The name of the column heading will automatically update. Click “done,” and you will see the column in the paydata grid. Enter the dollar amount in that column for the employee.
-
5Add additional checks for bonuses, commissions, retroactive pay or advance pay. Select the employee for whom you want to create the additional check. Information for that employee’s regular pay for this pay period is already entered. Now, enter a second row for that employee to create a new check. Click on “insert” and select “new row.” A second row will appear with the same employee name. Now you can enter paydata for the additional check.
- Enter the tax frequency information, which calculates taxes based on the type of pay. For example, bonuses are taxed at different rates than regular pay.
- Find the column that describes the type of pay (such as “bonus” or “retroactive pay”) and enter the dollar amount.


Automating Paydata Entry
-
1Create an import template for Excel. You can import paydata from an Excel spreadsheet. First, you must create a spreadsheet with the exact same columns as the paydata grid. Open a paydata grid and export the column headers to an excel file.
- From the “Process” menu, select “Paydata.”
- Select an existing batch. Click the “Other Actions” link and select “Export to File.”
- Choose options for naming the file and what information to include in the export, and then click on “Export” at the bottom of the window.
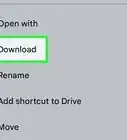
- When the file download window opens, choose the location where you want to save the file and click on “Save.”
- This will create an Excel file in a .CSV format. Enter all of your paydata in the Excel file.
-
2Import paydata from an Excel spreadsheet. You can import paydata from your external Excel file into the ADP system. First you have to upload the file to the ADP server. Then you can import the data into the paydata grid.
- From the “Process” menu select “Import.”
- You will be directed to an import window. Select “Paydata” from the options on the left.
- Click on the green “add” button.
- Select “Browse for Files” and choose the file you want to upload. Once your file has uploaded, click “Done,” and you will be returned to the Import Paydata window.
- Now the file has been copied to the ADP server, and you want to import it to the paydata grid. Select your file from the list. Select the “other actions” and click on “start.” When the import is finished, a “Success” message will display in the window.
- Now you can return to the Paydata page to edit your batch if needed.
-
3Import data from ezLaborManager. This is ADP’s time management and attendance software. You can purchase it with your ADP software package. It is a cloud-based system. Employees can log in to the system and enter their timecard information, hours and any other relevant payroll information. This data is automatically uploaded to your paydata grid. You can get into the system and manually correct or adjust any data as needed. This process saves a lot of time and limits mistakes due to data entry errors.[1] [2]


Finalizing Your Payroll
-
1Verify input. This step allows you to proofread your paydata entries. You can correct any errors before submitting your payroll for calculation. Always take the time to complete this step.
- From the Payroll Cycle page, click on the “Verify Payroll” icon.
- Click on the “View” box and select “Paydata – Full.”
- Click on the “Within Batch” box and select the batch you want to review.
- Click on the “Search” button, and the paydata for this batch will be displayed. You can see complete payroll information for all of the employees in this batch.
- If you find any errors, go back to the paydata grid and correct any entries. Then repeat the verification process.
- Once all of the entries are correct, click on the “Go to Payroll Cycle” button.
-
2Submit your payroll to ADP for calculation. Go to the Payroll Cycle window. Click on the “Calculate Preview Payroll” icon. This sends your paydata to ADP for calculation.
- In the popup window, verify that the pay period number and pay date are correct. If everything looks okay, click “Continue.”
- You will be returned to the Payroll Cycle window. Once the calculation is complete, an icon that says “Done” will appear under the “Calculate Preview Payroll” icon.
-
3Finalize your payroll. This step allows you to verify the accuracy of the payroll once it’s been calculated. In the Payroll Cycle window, click on the “Preview Results” icon. You can review total payroll information for the entire company. Also, you can drill down to verify payroll information by department or for individual employees.
- If you find incorrect information, click “Make Corrections” and edit the payroll batch. Then you will have to go back to the previous step and recalculate the payroll, and then run “Preview Results” function to verify the payroll once more.
- Once you are sure everything is correct, click on “Accept and Finalize Payroll.” A popup window will appear asking you to confirm. Click “OK,” and your payroll information will be sent to ADP for processing.
- Return to the Payroll Cycle homepage. You can see that the payroll for this pay period was accepted. Also, the “Start New Cycle” button is green once again. Now you are ready to start a new payroll cycle.


References
About This Article

To use ADP for payroll, start by making a new payroll cycle to clear out any old data. You’ll then need to check to see if the company code, the week number, pay date, period end date, scheduled deductions and special effects are all correct, then click “Continue.” Before manually entering the pay data, wait for the system to start the new data cycle. Once the popup window closes and the new payroll cycle page returns, you can set up the employees who are to be paid by clicking on “Process” in the task bar. Then click “Enter Paydata” and select “Paydata” from the popup menu. Select the employee or batch of employees and click “Go to Payroll Cycle.” You can now enter information such as the employees’ hours and any overtime, deductions and leave entitlements. For more tips, including how to automate your data entry, scroll down!