This article was co-authored by wikiHow staff writer, Travis Boylls. Travis Boylls is a Technology Writer and Editor for wikiHow. Travis has experience writing technology-related articles, providing software customer service, and in graphic design. He specializes in Windows, macOS, Android, iOS, and Linux platforms. He studied graphic design at Pikes Peak Community College.
This article has been viewed 67,118 times.
Learn more...
A wide range of musicians, entertainers, and mixed media artists use the program called Ableton Live to facilitate professional sounding presentations, either for a public event or in a studio recording scenario. This multi-feature digital audio workstation (DAW) can help you create the kinds of audio tracks that you want for nearly any genre or purpose. If you are a sound artist wanting to benefit from the complex features that the sound program provides, here are some of the most basic steps to help you use Ableton Live effectively.
Steps
-
1Check your computer specifications. Recording audio requires a lot of memory and processing power. The following computer specifications are required in order to use Ableton Live:
- Windows 7 (SP1), Windows 8 or Windows 10 (64-bit), macOS X 10.11.6 or later
- 64-bit Intel Core or AMD multi-core processor for PC, Intel Core 2 Duo Processor for Mac, Intel Core i5 processor or faster is recommended
- 4 GB RAM (8 GB or more recommended)
- 1366x768 minimum display resolution for PC, 1280x800 minimum display resolution for Mac
- ASIO compatible audio hardware for Link support (also recommended for optimal audio performance) for PC, Core Audio compliant audio interface recommended for Mac
- Internet access to authorize Ableton Live and download additional content.
- Minimum 3 GB hard disk space (8 GB recommended).
- 76 GB disk space for additional sound content.
-
2Install Ableton Live on your computer. Ableton Live has three versions, Intro for $99, Standard for $449. and Suite for $749. A free 90-day trial is available. You can also download Ableton Live Lite. If your version of Ableton Live came with an install disk, put the disk in your CD/DVD drive and run the disk. If you do not have a disk, you can use the following steps to download and install Ableton Live trial version from the website:
-
Windows:[1]
- Go to https://www.ableton.com/en/trial/ in a web browser.
- Click Download.
- Open the Ableton Live Trial zip file.
- Double click the "Setup.msi" file.
- Click Next.
- Check "I accept the terms in the license agreement" and click Next.
- Click Change to select an install location and click Ok.
- Click Next.
- Click Install.
- Click Yes.
- Click Finish.
-
Mac:
- Go to https://www.ableton.com/en/trial/ in a web browser.
- Click Download.
- Open the Ableton Live trial DMG file when it's finished downloading. |
- Click Agree
- Drag the Ableton Live app icon into the Applications folder.
Advertisement -
Windows:[1]
-
3Open Ableton Live. It has a grey icon that says "Live". Click the icon in the Windows Start menu, or in the Applications folder on Mac to open Ableton Live.
- If you are using the free trial, click Start your Free Trial in the center of the page. This will open a web page you can use to log in or register a new account.
-
4Start a new project. When you open Ableton Live for the first time, it will have a demonstration project open. Use the following steps to create a new project:
- Click File.
- Click New Live Set.
-
5Set up an audio interface. An audio interface is a device you used to plug a microphone or instrument into your computer. Use the following steps to set up your audio interface.
- Plug your audio interface into an electrical outlet (if it needs to be plugged in).
- Connect your audio interface to your computer using a USB cable.
- Click Options on Windows or Live on Mac in the menu bar at the top.
- Click Preferences.
- Click Audio.
- Select "ASIO" on Windows, or "CoreAudio" on Mac next to "Driver Type".
- Select your audio interface next to "Audio Input Device"
- Select your audio interface next to "Audio Output device".
-
6Switch between arrangement mode and session mode. Arrangement mode displays each track in a vertical column. It displays which clip is playing in each track. Session mode displays tracks horizontally with a timeline that moves from left to right. Click the icon with three horizontal lines in the upper-right corner to switch to session mode. Click the icon with three vertical lines in the upper-right corner to switch to arrangement mode.
-
7Create a track. There are three track types you can use in Ableton Live, MIDI, audio, and return tracks. MIDI tracks are used to process digital instruments such as a synthesizer or electric drum kit. Audio tracks process analog audio such as sound from a microphone or an electric guitar. Return tracks process the sound from audio and MIDI tracks and allow you to add additional effects. When you start a new project, it starts with two MIDI tracks, two audio tracks, as well as an effects and master return track. Use the following steps to create a new track:
- Click Create in the menu bar at the top.
- Click Insert Audio Track or Insert MIDI Track (You can also right-click and click Insert Audio Track or Insert MIDI Track).
-
8Add a folder of sound clips to Ableton Live. If you have sound samples or clips you want to add to a song or a mix, you will need to add the folder in Ableton Live. Use the following steps to add a folder in Ableton Live:
- Click Add Folder in the panel to the left (if you don't see the panel to the left, click the grey icon with the play triangle in the upper-left corner.
- Navigate to a folder on your computer that contains sound click it to select it.
- Click Select Folder.
-
9Add sound clips. To add a sound clip in Ableton Live, click the folder that contains the sound clip you want in the panel to the left. Then click and drag the audio clip you want to add to the track you want to add. You can only add MIDI clips (.mid files) to MIDI tracks, and you can only add audio clips (.wav/.mp3 files) to audio tracks.
- Access beats, loops, and other samples from available file folders in Ableton Live. One of the first steps to creating a track is to know how to locate sounds that will populate your files.
- Build the track by adding samples according to rhythm and timing conventions. Through a little bit of trial and error, you should become familiar with how to drag and-drop samples into your track effectively.
- Click and drag audio clips in the timeline to move them around and arrange them.
- To create a loop of a track, click and drag to highlight the section of a track you want to loop. Then right-click it and click Duplicate. Repeat for as many times as you want the track to repeat.
-
10
-
11Record sound on a track. Use the following steps to record audio on a track.[2]
- Connect an instrument or microphone to your audio interface.
- Click the icon with a solid circle on the track you want to record on to arm the track.
- Click Auto below "Monitor" to allow your recording to be heard in real-time.
- Use the second drop-down menu on the track to select which input your instrument or microphone is connected to on your audio interface.
- Click the icon with three horizontal lines to switch to the session view.
- Click just before the location, you want to start recording in the timeline.
- Click the solid circle button at the top to start recording.
- Click the solid square button at the top to stop recording.
-
12Add effects to a track. Ableton has a ton of built-in effects you can use to alter the sound of a track. You can use delay or reverb to give it an echo effect. You can add an amp to simulate a guitar amplifier. You can add an equalizer to control the tone of the track. You can also add third-party VST Plug-ins. Use the following steps to add an effect to a track:[3]
- Click Audio Effects in the panel to the left.
- Click the arrow icon next to an audio effect category to show all effects in that category.
- Click and drag an audio effect to the track you want to apply it to.
- Use the controls at the bottom of the screen to modify the effect settings.
-
13Mix the tracks. When you have enough tracks to make a song or sound sample, you can mix them to create the right balance of sounds. You can raise and lower the volume on certain tracks to mix them forward or backwards. You can also pan certain tracks to the left and right speakers. Use the following steps to mix your tracks.
- Click the icon with three vertical lines to switch to arrangement mode.
- Click and drag the arrow icon next to the sound meter at the bottom of a track to raise and lower the volume on that track.
- Click and drag the icon that resembles a knob to pan the track from the left and right speakers.
- Click and drag the arrow icon next to the sound meter on the Master track to raise and lower the volume of everything.
-
14Save your project. Use the following steps to save your project:
- Click File in the menu bar at the top.
- Click Save Live Set as.
- Type a name for the session next to Filename.
- Click Save.
-
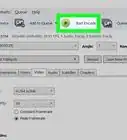
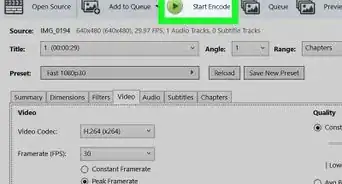
15Export your project as an audio file. When you have finished creating your session, you can render it as an audio file that you can play in other apps. Use the following steps to export your tracks as an audio file:
- Click File in the menu bar at the top.
- Click Export Audio/Video.
- Select a file type using the drop-down menu next to "File Type".
- Click On next to "Encode MP3".
- Click Export.
- Enter a name for the audio file next to "File Name".
- Click Save.


Community Q&A
-
QuestionIs Ableton Live free to use?
 Community AnswerNo, but you can get a basic version for free with almost every modern hardware synthesizer or MIDI-controller.


References
About This Article

1. Download and install Ableton Live from https://www.ableton.com/en/trial/.
2. Open Ableton Live.
3. Click New Live Set in the File menu to start a new project.
4. Click the icons with three lines in the upper-right corner to switch between session view and arrangement view.
5. Click and drag sound clips from the folders in the panel to the left to the tracks you want to add them to.
6. Right-click and select a track type to add a new track.
7. Click the play icon at the top to play your tracks.
8. Use an audio interface to connect a microphone or instrument.
9. Click the circle button on a track to arm it for recording.
10. Click the circle button at the top to record.
11. Click and drag effects from the "Audio Effects" folder in the panel to the left to add effects to a track.
12. Switch to arrangement mode and use the controls at the bottom of each track to mix them.