wikiHow is a “wiki,” similar to Wikipedia, which means that many of our articles are co-written by multiple authors. To create this article, 16 people, some anonymous, worked to edit and improve it over time.
This article has been viewed 274,316 times.
Learn more...
When you think of presentations, you probably think of PowerPoint slides. Slides can be a little boring, and everyone’s done them before. If you’ve decided to do something different, you may have looked at Prezi as an alternative. Prezi is an online presentation program that moves through a nonlinear presentation on a path, as opposed using slides. Follow this guide to get your Prezi presentation-worthy in no time.
Steps
Creating Your Account
-
1Visit the Prezi website. The bulk of your work with Prezi will occur in the online editor. Prezis are saved to the cloud and can be accessed anywhere that has an internet connection. There are several options to pick from when joining Prezi:
- Public. This is the basic membership, and comes with a small amount of online storage. All presentations made with this membership are public and can be viewed by anyone. This is the perfect option for a classroom presentation.
- Enjoy. This is the starter paid membership. It comes with more storage, and your presentations are private. You can also use your own logo.
- Pro. This is the most expensive form of Prezi. You can use the Prezi Desktop program to create a Prezi without internet access, and you get significantly more online storage.
-
2Download the iPad app. If you want to share your Prezi with a small audience, you can use the iPad to make it more interactive for the viewer. You can download the Prezi app for your iPad and iPhone. The app is free and lets you access your Prezi from anywhere that your device has internet access.
- You can navigate the Prezi by swiping your fingers and pinch-zooming
Advertisement -
3Access the Prezi editor. Once you have an account, you can log in to the Prezi website and begin creating your presentation. Click the Create link at the top of the Prezi homepage. Under “Your Prezis” click the “+New Prezi” button. This will start the editor


Planning the Presentation
-
1Sketch out your concept. The underlying functionality of Prezi means that you do not have to think in linear slides as you would PowerPoint. You are free to move the frame around your presentation landscape however you feel is best. This means, however, that a Prezi that is not planned properly from the beginning can quickly become a jumbled mess with no sense of direction.
- Draw out an overarching design of the Prezi. Think of how the presentation would look if it was completely zoomed out. Some of the most successful Prezis have a structure that the path of frames will follow.
-
2Set the foundations with your main points. Use the main points of your presentation as the anchors for the path your Prezi will take. Think of these main points as “focal” points; you will be focusing on these and using the surrounding landscape to build on them frame by frame.
-
3Think of your Prezi in terms of the "path". The path is how the presentation transitions from frame to frame. Instead of going in a linear motion, the path can be set in any order, and the "camera" will move around the presentation as it follow the path.
-
4Keep your paths steady. When you are planning out your Prezi, think about how you will be moving the camera over your landscape. Because Prezi allows for full zooming and rotations, there is a temptation to change the perspective often during a presentation. This can lead to motion sickness in the viewer, and distracts from the content of the presentation.
- Try to layout out your landscape so that the camera moves in a relatively linear fashion, either horizontally or vertically. Avoid rotating as much as possible unless it significantly enhances the message
- Save the zoom in and out feature for transitions between large sections. Zooming too much can be disorienting and distracting.
- Use the special features of Prezi sparingly to emphasize their effect on the audience.
-
5Start big. Because you have an essentially limitless canvas, make your focal points big to begin with. Then, as you add more details, you can add smaller objects and use small amounts of zoom to focus on them.


Making the Presentation
-
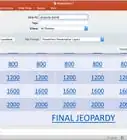
1Select your theme. When you first create your new Prezi, you will be asked to choose a template. The template of your Prezi defines how the text, colors and objects will all interact on the landscape. You can pick between 2D and 3D template. 2D themes are flat and the camera moves across the canvas. 3D themes allow you to zoom in and out of the background.
- Think of the template as a metaphor for what you are presenting. For example, if you are talking about surmounting obstacles to get where you are, choose the template of the mountain climbers.
- Avoid changing your theme after setting up your Prezi. The changes will push all of your text and objects out-of-whack. Pick a theme in the beginning and stick with it.
- You can turn a 2D background into a 3D one by right-clicking on a 2D theme and selecting “Change background”. Click on the Edit button next to the 3D option and you will be able to add up to 3 images that can be zoomed between.
- You can use the same “Change background” option to open the Theme Wizard, which will allow you to adjust the colors of the elements in your Prezi.
-
2Start placing your objects. Be sure to begin with the main points of your presentation. These will be the centerpieces of each section. You can add text, images, and other objects anywhere on the canvas. Continue to refer to your plan as you begin laying out the Prezi on the screen.
- To add text, simply double click anywhere in your Prezi. This will create a text box and you can begin typing or copy text from the clipboard. To split up a large block of text, select the text that you want to move and drag it elsewhere in the Prezi.[1]
-
3Manipulate your objects. Once you have an object on the canvas, click on it to open the Transformation Tool. The object will be highlighted by a box surrounded by tools to modify the object.
- Click and hold the Plus or Minus button to scale the object.
- Click and drag the corner of the box to resize the object.
- Click and hold the Hand icon in the center to drag the object around the canvas.
- Rotate the object by clicking and dragging the circle sticking out from one of the corners of the box.
- Edit the frame by clicking the Open Frame button at the top.
- Delete either the frame or the frame and the content by clicking the delete buttons next to the Open Frame button.
-
4Make sure your images are high resolution. If you are going to be focusing on images in your Prezi, remember that they will take up the entire screen when zoomed in on. This means that lower quality images that look good as a part of a webpage will look grainy when they are scaled up to fit the screen.
-
5Leave space around your objects. If you leave a fair amount of white space around your objects, Prezi will be able to easily focus on them when the camera zooms in. This will help make the text or image stand out to the audience.
-
6Use small text to great effect. If you want to surprise the audience with a fact or image, make it very small. This will make it illegible until the object is in focus. If the text is small enough, the audience won’t even see it coming.
-
7Use frames to create focus. Frames come in two forms in Prezi: visible and invisible. Visible frames highlight the object on the screen, and include a circle, brackets, and a filled oblong shape. Invisible frames allow you to define objects and sets of objects as the focus. Both types of frames will let you control how much zoom and object receives.[2]
- Invisible frames also allow you to create clickable sections of your presentation that can link to other parts of the Prezi or to the web. This is perfect for interactive presentations.
-
8Use frames to highlight a portion of text. If you have a paragraph of text in one frame, and want to highlight a key segment of it, create a frame around the text that you want to highlight. Create a path to it, and the camera will zoom in on just the framed text. This is useful for noting key figures or powerful phrases in a block of text.[3]
-
9Create a uniform style. Prezi doesn’t use font sizes, which can make it difficult to get headings and paragraphs to feel uniform. In order to match size, select the text that you need to resize. As you move the mouse to change the size of the text, look at the text that you are trying to match it to. Once the two are the same, the text that you haven't selected will become darker, signifying that the two are the same size.
- You can use this same procedure for matching the size of pictures and other objects.
- You can see when sections are aligned when a dotted blue line appears between the two.
-
10View your Prezi while zoomed out. A good Prezi will be able to be understood when the presentation is zoomed all the way out. This means that your key points should be large enough to be read when the camera is pulled back. They should also be aligned in a way that makes logical sense.
- You can return to the overview by creating an invisible frame around the entire project. Link to this frame when you want to pull back and show the whole project. This is especially useful when transitioning between major points.
-
11Keep your structure standardized. If you are using specific styles of frames to highlight your important ideas, stick to using those throughout your entire presentation. The same goes for colored text and other stylistic objects. A sense of design unity throughout the presentation will leave a stronger lasting impression and convey information more clearly.


Creating a Path
-
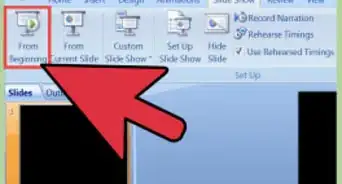
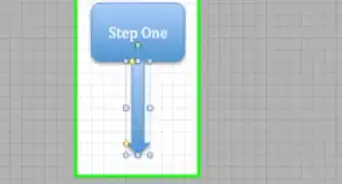
1Open the Path editor. In the Edit screen, click the “Edit Path” button on the left side of the workspace. This will allow you to start creating your path. Click on your first object, and then simply click on each consecutive object in the order that you want to present them.
- Remember to try to keep the path moving in a fairly linear route to minimize disorientation and increase the amount of information that the audience retains.
-
2Rearrange your path. If you need to adjust the path, simply click and drag a path point from one object to another. If you want to add a step between points, click the small plus sign icon next to a step and drag it to an object. This will create a new stop in the path.
- If you drag and drop a point on the path to an area with no object, that step will be deleted.
-
3Finalize your path at the end of your project. Don’t get too hung up on your pathing while you are adjusting your layout. Get the layout solid first, and then go through and set your final path. This will make organizing your content much easier.[4]


Presenting Your Prezi
-
1Practice your presentation. Before presenting your Prezi, run through it a few times to make sure that it flows well. Practice your timing for moving between frames. Ensure that everything receives the correct focus and that your transitions are not too jarring.
- You can add small notes to your frames that the audience is not likely to see that can aid you in your presentation. Consider putting hard-to-remember figures, dates, and important points in an out of the way place for quick reference.
-
2Navigate the path. When you are presenting, clicking Next will take you to the next stop on the path. If you want to zoom out, scroll around, or click on other parts of the presentation, all you need to do is click the Next button to return to the path.
-
3Take your time. Don’t rush through the frames during your presentation. Allow the audience time to process the information, and to settle from the previous transition. If you go too fast, the transitions will become overbearing.
-
4Let the audience ask questions. Because Prezi is not composed of slides, it’s very easy to move around the presentation. Use this ability to clarify audience questions and to easily backtrack to missed information. Zoom out to quickly find sections of your presentation that relate to the questions being asked.


Community Q&A
-
QuestionIs there any way to navigate through the prezi (while presenting) without having to click the "next" button?
 Community AnswerThere is an option called "AutoPlay" which helps to run the prezi without having to click the "next" button. There are different time interval options available in the autoplay, like: 4 seconds, 10 seconds, 20 seconds, etc.
 -
QuestionHow do I title my Prezi?Community AnswerClick My Prezis from the top menu to go to your Prezi dashboard. Find the Prezi you want to rename and hover your cursor over the Prezi thumbnail or click on it to bring up the options to view or edit it. Click View Prezi to be taken to the Prezi’s view page. Place your cursor on the title or description, and you’ll see it highlight. A pencil icon will also appear.
-
QuestionCan the presentation run on its own without clicking and can I stop it from turning when I move a photo to the path?
 Community AnswerThere is an option called "AutoPlay" which helps to run the Prezi without having to click the "next" button. There are different time interval options available in the autoplay, like 4 seconds, 10 seconds, 20 seconds, etc.


References
About This Article
1. Create an account.
2. Sketch out your concept.
3. Select a theme.
4. Place your objects.
5. Use frames to create focus.
6. Create a uniform style.
7. Create a path between objects.