This article was co-authored by wikiHow staff writer, Darlene Antonelli, MA. Darlene Antonelli is a Technology Writer and Editor for wikiHow. Darlene has experience teaching college courses, writing technology-related articles, and working hands-on in the technology field. She earned an MA in Writing from Rowan University in 2012 and wrote her thesis on online communities and the personalities curated in such communities.
There are 15 references cited in this article, which can be found at the bottom of the page.
The wikiHow Tech Team also followed the article's instructions and verified that they work.
This article has been viewed 270,600 times.
Learn more...
This wikiHow will teach you how to use your phone as a mic with either a built-in or downloaded app. There are a variety of great free apps available and there are apps that even let you use your phone as a mic on your computer.
Steps
Using Your Phone as a Computer Mic on Windows
-
1Download the computer client in addition to the mobile app. The free WO Mic download links for Windows is available on their website at http://www.wirelessorange.com/womic/. You'll also need to install the driver package available on the same page under "Install device driver on PC."
- You can find the WO Mic app for free on the Apple Store and Google Play Store. While the mobile app works for iPhone and Android phones, you can only use the computer client on a Windows (or Linux) computer.
-
2Open WO Mic on your phone and computer. This mobile app icon looks like a microphone icon that you'll find on one of your Home screens, in the app drawer, or by searching. On your computer, you'll find this newly added app in your Start menu.Advertisement
-
3
-
4Tap Transport and select a transport mode. A menu will pop-up and you can tap to select to connect via USB, WiFi, or Bluetooth. Connecting via USB is the most suggested as it is the most robust and has the highest bit rate.[1]
- For USB, you'll need to connect your phone via USB to your computer, then enable USB Debugging Mode (Android only) by going to Settings > About > Developer Options.[2]
- For WiFi, ensure your phone recognizes your computer's wireless network and is connected. There will almost always be a small WiFi icon on your phone's home screen that shows your connection to a network.
- For Bluetooth, ensure that Bluetooth is enabled for your device. You can usually turn Bluetooth on or off in your phone's "Settings" menu. You'll also want to enable Bluetooth on your computer via the Control Panel or your wireless connections menu. Wait for the device to pair with your computer.
-
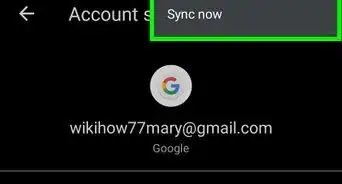
5Return to the main screen of the mobile app. You can use the navigation buttons on your screen to go back and close the menu. You can also close the app and reopen it.
-
6
-
7Click the Connection tab in the WO Mic computer client. You'll see this in the top left corner of the client window.
-
8Click Connect. This is usually the first option in the menu.
-
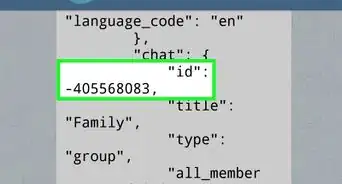
9Click to select a transport (connection) type. You'll see a list of options in the panel on the left side of the window. You'll need to select the same connection type as you chose earlier.
-
10Select the information in the "Details" pane. You'll need to specify certain parameters for the connection before you can continue unless you're using USB, which means you don't need to add any specific information.
-
11Click Connect. You'll see this at the bottom of the window.
- You should see your current status (Connected, disconnected) and connection type (USB, Bluetooth, Wi-Fi) in the panels at the bottom of the client window.
- As soon as the connection is successful, any noise picked up by your phone will be transmitted to your computer. If you want to hear the sounds that are picked up, go to Options > Play in speaker on your computer client.[3]
- You can click through Connection > Disconnect on your computer or tap the stop button on your phone to end the connection and recording.


Using Your iPhone as a Computer Mic on Mac
-
1Download the Microphone Live app from the App Store on your iPhone. The microphone app is free and highly rated on the App Store.[4]
- Search "Microphone Live" in the search tab that's located at the bottom of your screen. The app's developer is Von Bruno.
- This app is only available on the App Store for Apple devices.
-
2Connect the iPhone to your Mac via USB. The lightning cable that came with your iPhone will plug into your iPhone's charging port and an open USB port on your computer.[5]
-
3Open Audio MIDI Setup on your Mac. You can open this by clicking the Spotlight icon in your menu tray, typing "MIDI " then clicking the first search result that says "Audio MIDI Setup."[6]
- If your iPhone is plugged in and unlocked, you'll see it listed as an option in the left panel.
-
4Click Enable under your iPhone icon. You'll see this in the panel on the left side of the window.
-
5Open System Preferences. This is either a gear icon in your Dock or you can click the Apple logo in the top right corner of your menu, then click System Preferences.[7]
-
6Click Sound. You should find this in the second row with an icon of a speaker.
-
7Click iPhone in the Input tab. If this is already selected, you can skip this step.
-
8Open the Microphone Live app on your iPhone. This app icon looks like a microphone icon on a grey background that you'll find on one of your Home screens.
-
9Tap the power button centered in your screen. It will turn from red to grey to indicate it is on.
- Tap Front iPhone Mic if it isn't already selected at the lower left corner of your screen.[8]
- You can swipe your finger up and down the screen to adjust the volume of the microphone.
-
10Tap No output (if that's what you see). If this is already displaying correct information, you can skip this step.
- Tap Dock Connector in the menu that slides up.
- You should see on your computer that the input level in the System Preferences screen shows you the sounds picked up by the microphone in your iPhone.[9]
- You'll need to keep the Microphone Live app open on your iPhone for it to continuously work.


Using Android
-
1Download and install Smart Recorder from the Google Play Store . Smart Recorder is a free app that's supported by ads, but you can get rid of ads by paying a monthly Google Play Pass fee for $4.99/month. You'll find the Google Play Store on one of your Home screens, in the app drawer, or by searching.[10]
- Enter "Smart Recorder" in the search bar at the top of your screen and tap the search result that displays "SmartMob" as the developer. Tap Install to continue.
- Some Samsung phones running Android 6.0 may have a pre-installed voice recording app called Samsung Voice Recorder. You can use that app similarly to Smart Recorder, but Smart Recorder has better reviews and ratings in the Google Play Store.[11]
-
2Open Smart Recorder. This app icon looks like a microphone next to a red dot that you can find on one of your Home screens, in the app drawer, or by searching.Advertisement
-
3Tap the record button. This looks like a red circle with another microphone icon inside it.
- If this is your first time using Smart Recorder, you'll need to tap Allow so the app can access files for storage and your microphone to record audio.
-
4Point your phone's mic towards the sound. On most smartphones, the mic is at the bottom of the phone on the same side as the screen so it's near your mouth. For the best results, put the mic as near as you can to the source of the noise (up to an inch or two away). If you can't get very near to it, just point the microphone towards the noise.
- If the volume isn't an issue (like if you're in a silent room), you can usually place your phone face-up on a table next to you.
-
5Tap the checkmark to end recording. To end and save your recording, tap the circle around the checkmark at the bottom of your screen.
- If you want to pause the recording and start it again later, tap the circular button with the timer running. You'll see the word "Pause" change to "Resume," which indicates that you can resume recording.
-
6Preview your recording (optional). If you want to make sure your recording is clear and free of noise issues, you can tap the play icon to preview the file.
- You can also change the name of the file by tapping in the area that displays the default name (usually it is something similar to "Recording 1").
- Your audio file is saved and you can find it by tapping Recordings in the bottom left corner of the app's main screen
- You can share the recording by tapping Share under the recording's preview.


Using iPhone
-
1Open Voice Memos. This app icon looks like a red and white wavelength that you'll find on one of your Home screens or inside the Utilities folder.[12]
-
2Tap the circular button. You'll see this recording button at the bottom of your screen.
-
3Point your phone's mic towards the sound. On most smartphones, the mic is at the bottom of the phone on the same side as the screen so it's near your mouth. For the best results, put the mic as near as you can to the source of the noise (up to an inch or two away). If you can't get very near to it, just point the microphone towards the noise.
-
4Tap the stop icon. You'll see this button at the bottom of your screen where the recording button was.
- After you tap the stop icon, your voice memo is automatically saved. You can edit it with any device (like an iPad) logged in with the same Apple ID.[13]


-Step-34.webp)


References
- ↑ https://wolicheng.com/womic/
- ↑ https://wolicheng.com/womic/faq.html#enable_usb_debugging
- ↑ https://wolicheng.com/womic/
- ↑ https://apps.apple.com/gb/app/microphone-live/id1070812067
- ↑ https://www.switchingtomac.com/tutorials/how-to-use-your-iphone-as-a-microphone-on-a-mac/
- ↑ https://youtu.be/KJnr-wEZMzI?t=50
- ↑ https://youtu.be/KJnr-wEZMzI?t=76
- ↑ https://www.switchingtomac.com/tutorials/how-to-use-your-iphone-as-a-microphone-on-a-mac/
- ↑ http://www.vonbruno.com/microphone
- ↑ https://play.google.com/store/apps/details?id=com.andrwq.recorder&hl=en_US
- ↑ https://help.smartmob.dev/article/111-privacy-policy
- ↑ https://support.apple.com/guide/iphone/make-a-recording-iph4d2a39a3b/ios
- ↑ https://support.apple.com/en-us/HT206775
- ↑ http://www.wirelessorange.com/womic/faq.html
- ↑ http://crowdmics.com/
- ↑ https://itunes.apple.com/us/app/voice-changer-plus/id339440515?mt=8
- ↑ https://apps.apple.com/us/app/voice-recorder-free/id685310398
About This Article

1. Download the computer client in addition to the mobile app.
2. Open WO Mic on your phone and computer.
3. Tap the Settings icon in the mobile app.
4. Tap Transport and select a transport mode.
5. Return to the main screen of the mobile app.
6. Tap the start icon in the mobile app.
7. Click the Connection tab in the WO Mic computer client.
8. Click Connect.
9. Click to select a transport (connection) type (the same transport type you selected in the mobile app).


-Step-34.webp)