This article was co-authored by Crystal Bear. Crystal Bear is a Professional Photographer and the Owner of Summer Bear Photography. Crystal specializes in weddings and portraits for women. She holds a BS in Interior Design and Consumer Science from San Francisco State University. Coming from a design background, Crystal brings a sense of style and artistry to her work that brings out her client’s inner confidence, showcases their beauty both inside and out, and puts them at ease. She also specializes in using the correct lighting and branding for women entrepreneurs.
This article has been viewed 13,960 times.
Light boxes come in a variety of forms. Pick one designed for light therapy if you suffer from depression or seasonal affective disorder. If you're a photographer, opt for a soft light box that's used to create natural light in photos, and, if you want to draw a pretty picture, use an art version to trace your drawing. Now let there be light!
Steps
Using a Light Box to Treat Depression
-
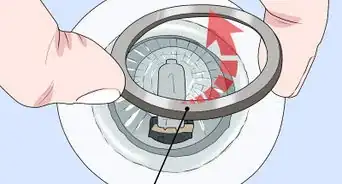
1Choose a light box with a UV filter in the intensity of your choice. The intensity is measured in lux, with the most commonly used box being 10,000 lux. Buy one that has a built-in UV filter, which will protect your skin and eyes from any harmful rays.[1]
- Be sure you’re buying a light box specifically for managing symptoms of depression. There are other boxes that are for skin conditions.
- You can buy a light box from most department stores or an online retailer. They start around $40 but models with higher light intensity or better quality bulbs can cost several hundred dollars.[2]
How to Choose a Light Box
If you want to spend less time under the lamp, pick a higher intensity light box between 5,000 and 10,000 lux. Lower intensity boxes, starting as low as 2,500 lux, require more time to get the same effect.
If you don’t want to damage your eyes, look for a box with white light instead of blue light.
If you want to take your box on the go, buy a portable version or one with a smaller screen.
-
2Set up the light box so that you can sit under it comfortably. Most light boxes are about the size of a desktop computer screen, so they need to be placed on a piece of furniture or ledge slightly higher than your height when seated. A bar-height table or counter are both good spots to put your light box. [3]
- Read the package or instructions to find out how far away from you the box should be positioned. It will vary based on brand or intensity.
Advertisement -
3Arrange the light box to point slightly away from the front of your body. The light box will not work if it’s behind you. Adjust the box so it’s angled down towards your face, but a little to the left or right so it’s not shining straight into your eyes.[4]
- Keep your eyes open when you use the box. If you sleep or close your eyes, you won’t get the same effect.
- Never stare directly into the light box when it’s turned on or you could damage your eyes.
-
4Sit under the light box for 30 minutes every morning. This will boost your mood and energy and help maintain a natural circadian rhythm, which is your body’s internal clock. Turn on the lamp soon after waking for the best results and sit in a comfortable chair facing the box.[5]
- You can multitask while you’re sitting under the light. Choose sedentary activities like reading, writing, or using a laptop.
- You should start noticing an improvement in your mood or energy after about 1 week.
- Always use the box as early in the day as possible. If you use it at night within 3 hours of bed, the light may disrupt your sleep.
-
5Increase your time to 60 minutes if there's no effect after 2 weeks. This may be necessary particularly if you have more severe symptoms of depression. You can split up your light box use into 2 30-minute sessions to fit your schedule if you’d like, keeping both early in the day.[6]
- If you increase the time and still don’t notice any improvement, or if your symptoms worsen, talk to your doctor about other options.
- There are no reported serious side effects to using a light box for longer. However, if your eyes begin to feel strained or if you get a headache, try sitting farther from the light or using it for less time.
-
6Use the box daily during fall and winter if you have seasonal depression. Seasonal affective disorder typically begins in October and lasts through April. Start using the light box when you first notice symptoms, and then stop using it in the spring when your depression subsides.[7]
- You can also start using the light box earlier, like in September, as a preventative measure if you’d like.
- If you have general depression or bipolar disorder, you can sit under a light box year round.


Tracing a Drawing on a Light Box
-
1Tape the picture that you’ll be tracing onto the top of the light box. This is the flat surface, which is usually a thin layer of plastic. Place strips of tape onto the corners or sides to hold the picture in place.[8]
- Choose a picture with bold, dark lines that will be easily visible through your paper when you go to trace it.
- You can go over the picture with a black permanent marker to make the lines stand out more.
- Buy a light box from an art store, craft store, or online retailer.
-
2Lay a piece of paper on top of the taped picture. This is the paper that you will be tracing the design onto. Line it up so that the picture is underneath of the spot where you want to transfer it to on the blank sheet of paper.[9]
- You can tape this piece of paper down, too. However, the tape could tear or scuff the paper.
What Kind of Paper is Best for Tracing?
Pick a lighter weight paper, like printer paper or cardstock. You might not be able to see the original picture through a heavier option, like poster board or cardboard.
-
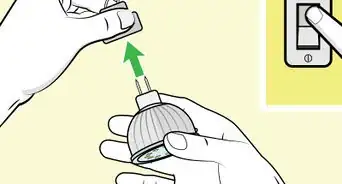
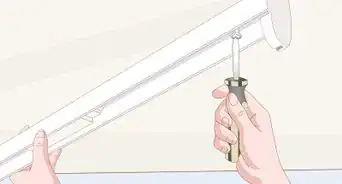
3Turn the light box on using the switch on the side. Typically, the power button is a small switch on either side of the box. Once you click it into the “on” position, the top of the box will be illuminated by a light bulb underneath the plastic covering.[10]
- If the light doesn’t come on, check that the batteries aren’t loose, then try replacing them.
-
4Trace the original picture onto the blank piece of paper. You should be able to see the original design clearly once the light is turned on. Use a pencil on the top sheet of paper to closely follow the lines of the picture, making sure you don’t miss any areas.[11]
- If you can’t see the original picture, your top piece of paper might be too thick. Try using a lighter paper.
- Go slowly as you trace so your final picture comes out clean and clear.
- It’s best to use a pencil first if you’re worried about making a mistake. You can always go back over it later with marker.


Taking Better Pictures with a Light Box
-
1Decide how many lights you want to use with your box. The ideal number is 3, with 1 on the top, 1 on the left side, and 1 on the right side. This is best for avoiding shadows and for making the background as white as possible.
- Using just 1 light will give you a darker, more shadowy vibe.
- You can use standing lamps or lights that clip onto the sides of the box.[12]
- Buy a light box, along with the lamps, from an online retailer or make your own box at home.
-
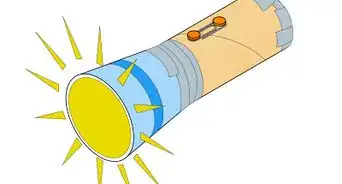
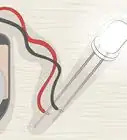
2Install daylight bulbs to mimic natural light. While actual natural light is ideal for photographs, daylight bulbs, which are bulbs that are 4,500 Kelvin or higher, are the next best thing. Use them in your light box for a soft, white glow.[13]
- Avoid fluorescent bulbs. They’ll give pictures an artificial, yellow-green hue.
- For a more energy efficient box, choose LED daylight bulbs.
-
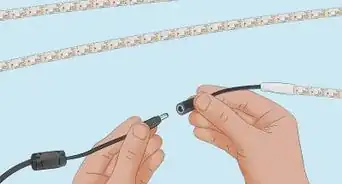
3Place the light box on a flat surface and plug in the light. The best spot for your box is on a sturdy table or on the ground, so you can arrange your items inside the box without them falling over.[14] Make sure it’s near an electrical outlet so you can plug your light in, too.[15]
- If the box won’t reach an outlet, use an extension cord or power strip to connect your light with the outlet.
-
4Set your camera on a tripod in front of the light box for clearer photos. By using a tripod, you’ll eliminate any shakiness or blurred edges that can come from holding a camera in your hand. Place the camera and tripod outside of the light box, pointing into it.[16]
- Adjust the height of the tripod so that the camera is the same height as the center of the light box.
- If you don’t have a tripod, you can put your camera on another sturdy object, like a stack of books or a shoe box, to steady it.[17]
-
5Zoom in before taking your pictures to hide the edges of the box. You don’t want your photos to have a black border around them from the light box. Look through the viewfinder and zoom in enough so that you no longer see any part of the outside of the box.[18]
- If you forget to do this, you can always crop the edges out later in a photo editing program.
- Avoid zooming in too much as this can compromise the quality of the pictures. If you feel like you’re zooming in a lot, simply move the tripod closer to the box.


Community Q&A
-
QuestionYou can use a lightbox for what purpose?
 Crystal BearCrystal Bear is a Professional Photographer and the Owner of Summer Bear Photography. Crystal specializes in weddings and portraits for women. She holds a BS in Interior Design and Consumer Science from San Francisco State University. Coming from a design background, Crystal brings a sense of style and artistry to her work that brings out her client’s inner confidence, showcases their beauty both inside and out, and puts them at ease. She also specializes in using the correct lighting and branding for women entrepreneurs.
Professional PhotographerA lightbox is like a box that has one open side. Most of the lightboxes have a filament of LED lighting around the top. You can use a lightbox for product photography. -
QuestionWhat color background does it have?Crystal BearCrystal Bear is a Professional Photographer and the Owner of Summer Bear Photography. Crystal specializes in weddings and portraits for women. She holds a BS in Interior Design and Consumer Science from San Francisco State University. Coming from a design background, Crystal brings a sense of style and artistry to her work that brings out her client’s inner confidence, showcases their beauty both inside and out, and puts them at ease. She also specializes in using the correct lighting and branding for women entrepreneurs.
Professional PhotographerUsually, it has a white background. But many lightboxes have colored backgrounds like black, blue, and yellow.


References
- ↑ https://sad.psychiatry.ubc.ca/resources/public-resources/light-therapy-procedure-for-using-the-10000-lux-fluorescent-light-box/
- ↑ https://www.fammed.wisc.edu/files/webfm-uploads/documents/outreach/im/handout_light_therapy.pdf
- ↑ https://sad.psychiatry.ubc.ca/resources/public-resources/light-therapy-procedure-for-using-the-10000-lux-fluorescent-light-box/
- ↑ https://www.fammed.wisc.edu/files/webfm-uploads/documents/outreach/im/handout_light_therapy.pdf
- ↑ https://sad.psychiatry.ubc.ca/resources/public-resources/light-therapy-procedure-for-using-the-10000-lux-fluorescent-light-box/
- ↑ https://sad.psychiatry.ubc.ca/resources/public-resources/light-therapy-procedure-for-using-the-10000-lux-fluorescent-light-box/
- ↑ https://www.fammed.wisc.edu/files/webfm-uploads/documents/outreach/im/handout_light_therapy.pdf
- ↑ http://www.dibujosparapintar.com/english/drawing_course_tracing_table.html
- ↑ http://www.dibujosparapintar.com/english/drawing_course_tracing_table.html
- ↑ http://www.dibujosparapintar.com/english/drawing_course_tracing_table.html
- ↑ http://www.dibujosparapintar.com/english/drawing_course_tracing_table.html
- ↑ Crystal Bear. Professional Photographer. Expert Interview. 21 January 2021.
- ↑ https://www.lightstalking.com/an-end-to-end-guide-to-light-boxes-for-product-photography/
- ↑ Crystal Bear. Professional Photographer. Expert Interview. 21 January 2021.
- ↑ https://remembereverything.org/using-my-new-photo-light-box/
- ↑ https://remembereverything.org/using-my-new-photo-light-box/
- ↑ Crystal Bear. Professional Photographer. Expert Interview. 21 January 2021.
- ↑ https://remembereverything.org/using-my-new-photo-light-box/


Medical Disclaimer
The content of this article is not intended to be a substitute for professional medical advice, examination, diagnosis, or treatment. You should always contact your doctor or other qualified healthcare professional before starting, changing, or stopping any kind of health treatment.
Read More...