X
wikiHow is a “wiki,” similar to Wikipedia, which means that many of our articles are co-written by multiple authors. To create this article, volunteer authors worked to edit and improve it over time.
This article has been viewed 4,148 times.
Learn more...
It's great being able to save username and password credentials in your auto-complete list of Microsoft Edge on Windows 10, but sometimes it's good to review these details. This article will allow you to view all of the details for your saved entries - quickly and painlessly without much typing involved.
Steps
-
1Open your version of Microsoft Edge. At this time, this feature is only available on the Microsoft Chromium Edge as opposed to Legacy Microsoft Edge. Most often, you can find this on your Windows 10 taskbar or inside your Start menu, though your computer may differ on how this browser's shortcuts were added.
-
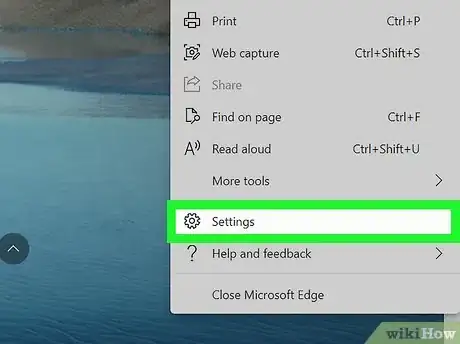
2Open your settings list. Click the three dots menu to the right of your profile picture icon in the top right corner and click "Settings."Advertisement
-
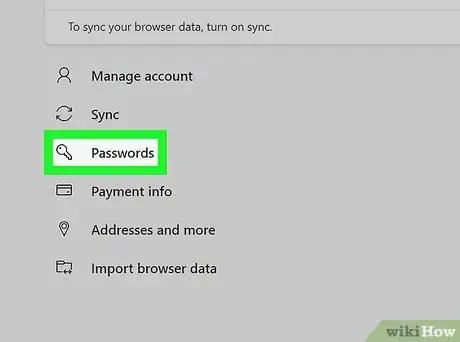
3Tap Passwords from the shortlist that's shown upon opening your Settings page.
-
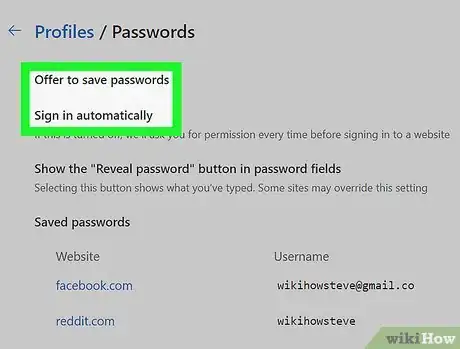
4Don't worry too much about the switches for "Offer to save passwords" and "Sign in automatically."
-
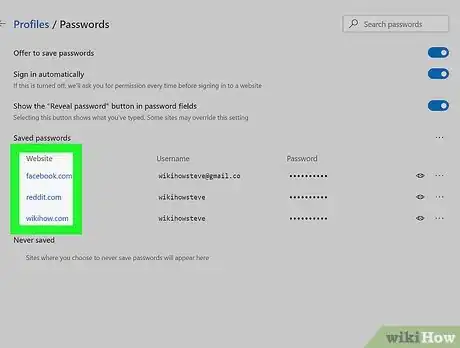
5Read the chart's title line. There are essentially four columns that make up this chart. The left-hand column is the website that the credentials are to. If you have to log in to a WiFi router's online portal and save your details, these should be displayed here. The next two lines are your username and your password. These are masked for your privacy via asterisks, and aren't real copies for character totals. The right-most column contains a drop-down box that controls the reading of the "Details" and the deletion.
- You needn't worry too much about the Details button of this last column's list. This is for the nerd in saving for all of us.
-
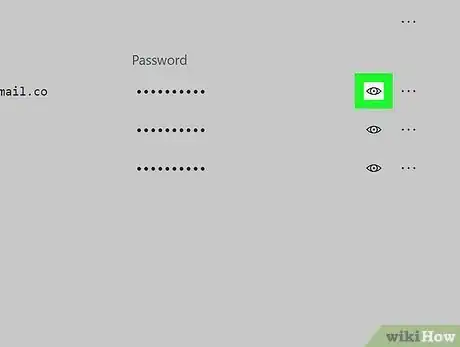
6Tap the eye button - if all you need is the password for that one entry.
-
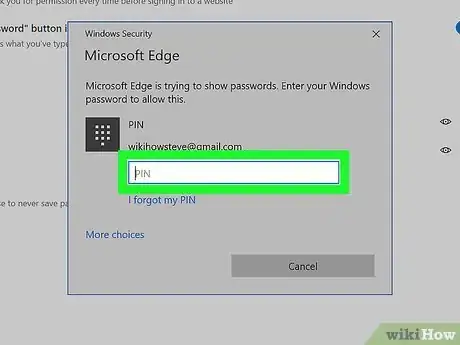
7Confirm your Windows login credentials - the same credential as you use to log in. If you log in with a Windows 10 4-digit pin, you'll be asked to type in that same pin for verification that it's you. If not, you'll be asked to confirm via your Windows or Microsoft account password (dependant on account type used).
-
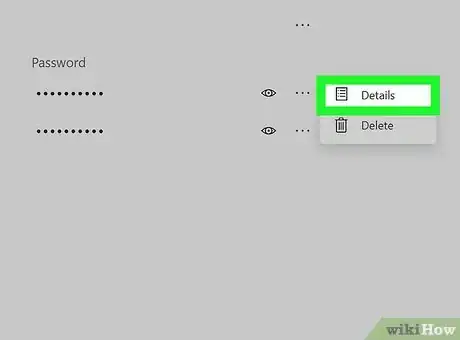
8Learn another way to see the same information in a more readable format. Clicking the three dots icon to the right of the eye - then clicking Details will display all three pieces in their own lines - masking the password until you confirm your password or PIN. However, once you've read this dialog box, you'll need to click Done to move on.
- Learn what the other button does in this drop-down. With the "Delete" button, you can delete an entry - just as simple - and the only place where these entries can be deleted from.
Advertisement
About This Article
Advertisement
