This article was co-authored by wikiHow Staff. Our trained team of editors and researchers validate articles for accuracy and comprehensiveness. wikiHow's Content Management Team carefully monitors the work from our editorial staff to ensure that each article is backed by trusted research and meets our high quality standards.
This article has been viewed 1,780,684 times.
Learn more...
Adobe Photoshop is one of the top image manipulating software programs in the world, used by amateurs and professionals alike. Adding text to pictures and photos is a popular feature of the program, and it offers a wide variety of fonts beyond those already on your computer. Adding fonts to Photoshop is an easy task, as they only need to be added to the hard drive of your computer—the program will take care of the rest.
Steps
Adding Fonts on Windows (All OS)
-
1Download your fonts from the internet. You can search online for "free fonts," then simply click on "download" to get the ones you want. There are hundreds of sites that offer fonts online, and usually the first page of your search should have safe, plentiful options.
- You can also buy CDs of fonts at any computer store.
- It is usually easiest to save all your fonts onto a folder on your desktop for easy organization. However, as long as you know where you downloaded the fonts to, it doesn't matter.
-
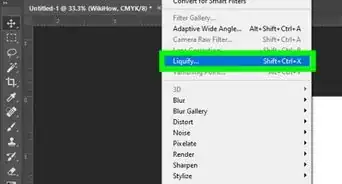
2Open a window to view the fonts. It doesn't matter what version you're using. Even Windows XP, which is no longer supported or receives updates, can install fonts. If they are in a .ZIP file, right-click and choose extract. Then find the font itself by looking at the extension (the . after the file). Photoshop fonts come with the following extensions:
- .otf
- .ttf
- .pbf
- .pfm[1]
Advertisement -
3Right click on the font and select "Install." If this option is available you're in luck: everything is installed! You can even Ctr-Click or Shift-Click to select and install more than one at once.[2]
-
4Use the Control Panel to add fonts if you have no "Install" option. Some computers will not allow the easy install, but it is still simple to add a new font. Click on the Start Menu, then click on Control Panel. From there:
- Click on "Appearance and Personalization" (Note: You skip this step in Windows XP).
- Click on "Fonts."
- Right-click in the list of fonts and select "Install New Font." (Note: In Windows XP, this is under "File").
- Select the fonts you want and hit "OK" when done.[3]


Adding Fonts on Mac OS X
-
1Find and download your new fonts. Search online for "Free Photoshop Fonts Mac." This will bring up hundreds of options, all of which can be easily downloaded and added. Save them to a new folder on your desktop, such as "Temporary Fonts," for safe-keeping.[4]
-
2Close all active applications. Most applications have font support, which means they will be checking your Mac for fonts to use. You want to install the fonts before the programs go looking for them, so make sure everything is closed before you begin working.[5]
-
3Double click on the actual font to bring up Font Book. The fonts may be in a ZIP folder, which you can double-click to open. From there, simply double click on the actual font to open it in your Font Book. Fonts have the following extensions at the end:
- .ttf
- .otf
-
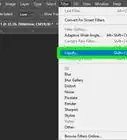
4Click "Install Font" when the Font Book appears. Your new .ttf or .otf file should open in Font Book. From there, simply click "Install Font" in the lower left corner to install it to your Mac. Photoshop will then find it and take care of the rest.[6]
-
5Alternatively, navigate to your font libraries in Finder and place the fonts manually. There are two places you can put your fonts, both of which are incredibly easy to find. You can even input the following string directly into the search bar substituting your own username for <username>, of course. Find one of these two locations, using the first one if you have Administrative Privileges. Both, however, will work.[7]
- /Library/Fonts/
- /Users/<username>/Library/Fonts/
-
6Click and drag the new fonts into the folder to activate them. Once they're in, you're good to go. Reopen you applications to start using your new fonts in Photoshop.


Community Q&A
-
QuestionWhy won't my font work in Photoshop?
 Community AnswerMake sure Photoshop is not running when you are adding the fonts. Not all fonts support Photoshop, so you will have to experiment a bit to see which work and which don't. Look for True Type or Open Type fonts to be sure they will work.
 -
QuestionIs there any way to install a font file without having administrative privileges?
 Community AnswerNo, you need access to the Control Panel and other system settings. To fully access these, you need admin privileges.
 -
QuestionIs the process the same for Windows 8.1?Community AnswerYes, the process of installing fonts is the same in all versions of Microsoft Windows.
Warnings
- When using fonts from a CD, extract and save them to the "Fonts" folder in the "Control Panel" or else they won't be available for use in Photoshop.⧼thumbs_response⧽
Things You'll Need
- Adobe Photoshop program
- Fonts of your choice


-Step-9.webp)

References
- ↑ http://www.adobe.com/products/type/install-instructions.html
- ↑ http://www.5min.com/Video/How-To-Install-Fonts-159212308 http://www.5min.com/Video/How-To-Install-Fonts-159212308
- ↑ http://www.adobe.com/products/type/install-instructions.html
- ↑ http://www.webdesign.org/photoshop/photoshop-basics/install-fonts-and-brushes.9960.html http://www.webdesign.org/photoshop/photoshop-basics/install-fonts-and-brushes.9960.html
- ↑ http://www.adobe.com/products/type/install-instructions.html
- ↑ http://www.guidingtech.com/6437/how-to-install-new-fonts-in-mac-os-x/
- ↑ https://www.quora.com/How-can-I-add-fonts-for-Photoshop-CS6-on-a-Mac
About This Article

If you’re using Windows, right-click the font file, then select Install. If you’re using macOS, double-click the font file, then click Install Font.