wikiHow is a “wiki,” similar to Wikipedia, which means that many of our articles are co-written by multiple authors. To create this article, volunteer authors worked to edit and improve it over time.
The wikiHow Culinary Team also followed the article's instructions and verified that they work.
This article has been viewed 44,322 times.
Learn more...
Artistic chefs in Thailand, China, and Japan have been carving fruits and vegetables into astounding shapes for many centuries. Most designs require nothing more than a sharp paring knife and a fruit or vegetable of your choice. With enough practice, you can turn these simple ingredients into everything from attractive garnishes, to statuesque centerpieces.
Steps
Carving a Melon Bowl
-
1Select a melon. You may use any melon with a firm, hard rind, and no noticeable bruising or soft spots. Watermelons are often used for this purpose due to their size, but any large, hard melon will work.
-
2Slice a small portion off the base of the melon. Use the sharpest knife you have, for best control over the carving. Begin by using the knife to cut a small section on one end of the melon, so it will remain in one position. You may stand the melon vertically, or lie an elongated melons on its side for a longer bowl.
- A stainless steel or bronze knife may work best, as it is unlikely to discolor the fruit.[1]
Advertisement -
3Draw a pattern on the melon. Use a fine permanent market to trace a pattern onto the melon, such as the silhouette of a swan head and wings. You may draw a pattern freehand, but many people prefer to cut out a paper stencil and trace it. You may find these stencils in craft store booklets or online.
- While designs specifically for melon carving may be difficult to find online, many sites are devoted to pumpkin carving templates, which may be easily adapted to a melon.
- Position your pattern so it won't cover most of the top surface of the melon, which is typically removed to create a bowl shape.
-
4Cut along the pattern. Insert the knife into the rind anywhere on the permanent marker lines, and methodically cut through the entire pattern. Depending on the hardness of the rind and the sharpness of the knife, you may slice along the pattern, or use a back-and-forth sawing motion. Be sure to cut through the entire rind, into the flesh underneath.
-
5Remove the remaining rind. Once the whole pattern is cut out, the portions of the rind that won't stay on the melon can be removed. If necessary, make an additional round or oblong cut around the top of the melon, in order to open it up into a bowl shape. Carefully pull these portions off the melon, wiggling or cutting if necessary to detach it from the melon flesh inside.
-
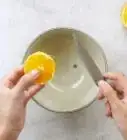
6Hollow out the melon. Use a melon baller to remove all the flesh from the melon. Scrape the inside surfaces so only the rind remains, or a thin layer of flesh if you enjoy the variation in color.
-
7Fill the bowl. Fruit salad is probably the most common filling for a melon bowl. Serve this on-theme dessert immediately, or store it in the refrigerator. Alternatively, use the bowl to hold snacks, a trifle, or any other filling. Melon bowls are rarely used to hold non-food items, since the rind will eventually decay.
- Optionally, drain the liquid from the fruit salad before serving by puncturing a couple holes at the base of the bowl and keeping it in a pan.[2]
- If the contents are falling through large holes at the lower surface of the melon, consider lining the bowl with parchment paper or another material.
-
8Carve a lid for your bowl (optional). If the top portion of the melon you removed came off intact, you may carve a pattern in it. This can be placed on top of the melon bowl for an attractive lid. This is entirely optional, and most commonly used for abstract designs. If your pattern is more realist, such as the popular swan silhouette, a lid may detract from the design or make it harder to distinguish.


Carving a Cucumber Flower
-
1Cut off a section of cucumber. Cut a medium or large cucumber a third of the way from the end, or a small cucumber in half. The exact size is not too important, but the piece you are about to carve should include both an end and a cut surface.
- Keep the remaining portions around, as successfully creating a flower for the first time often takes more than one attempt.
-
2Create a strip by slicing just beneath the skin. Take a sharp, stainless steel paring knife and place it against the edge of the cut end. Slice off about 1/8 of the circumference of the cucumber, just barely beneath the green skin. Move the knife slowly under the skin, to within 1/2 inch (1.25 cm) of the end. Remove the knife, leaving the strip of skin attached to the end.[3]
- If the strip breaks, you can still continue to use the same cucumber piece as practice.
-
3Make additional strips around the whole cucumber section. Repeat this process until all of the green skin has been formed into strips, or "outer petals" of the flower.
-
4Carefully turn the white flesh into strips. Once again, use your paring knife to create thin strips starting from the cut edge of the cucumber. This time, you will be forming "inner petals" of the flower, from the hard, white portion of the cucumber.
- This may be more difficult than the peel, as you need to create strips thin enough to bend, but thick enough that they won't break. Go slowly, and take a break if your eyes or hands feel strained.
-
5Remove the seeds. Carefully scrape the seeds and pulp out of the center of the cucumber using your knife. If there is still white flesh not turned into strips, you may remove this as well.
-
6Trim the petals to a triangular point. Use the knife or a pair of scissors to trim the end of each "petal" into a triangular point. Try to cut each triangle to the same length for a more attractive, symmetrical effect.
-
7Add a colorful center. Mimic the pollen center of a flower by cutting a small disc from a carrot, and inserting it at the base between the strips. Other colorful, edible options include a small berry, a circle of tomato peel, or even an actual flower. Small, edible flowers that may look attractive in this position include dandelion buds, clover, or English daisies.[4]


Carving Intricate Designs
-
1Find several sharp, stainless steel knives. Bronze knives may also be used, but other metals are likely to cause discoloration in the fruit. Sharp paring knives or Thai carving knives are ideal. The blade of a knife for fruit carving is often only 2–4 inches (5–10 cm) long, but ideally the handle is long and comfortable to hold.
- Optionally, select additional tools for certain purposes. A zester or garnishing tool with a V-shaped stripe may be the most common of these, used to remove strips from the fruit.[5]
-
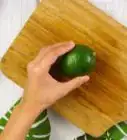
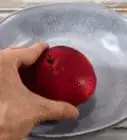
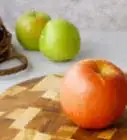
2Select a melon to practice on. A melon provides a great deal of space to practice on, and the firm rind holds a shape well. If you are feeling more ambitious, you can carve almost any fruit. Firm fruits such as apple or pineapple are typically easier to carve than soft fruits, such as kiwis or grapefruit.
- This method will assume you are using a melon, but most of it can be adapted to other fruits.
-
3Learn how to hold the knife. Place the thumb of your dominant hand on the knife handle, right next to the blade. Put your index finger on the dull, upper edge of the blade. Lower your middle finger onto the side of the blade, opposite the thumb.[6] Curve your fourth and fifth fingers around the handle, gripping it comfortably.
-
4Carve a simple, shallow pattern. Try to cut or scrape off a simple pattern, such as a heart or a circle, partially through the rind of the melon. Try to cut this to an even depth, without revealing the flesh beneath.
-
5Cut a grid into this pattern. Score the scraped surface into a grid pattern, without removing any rind or flesh. Through the lines in the grid, you may be able to see the attractive color of the underlying flesh.[7]
-
6Practice carving smaller shapes. Carve around this grid or elsewhere on the melon, practicing smaller or more intricate designs. Designs with short, straight lines, such as a diamond pattern, may be easier than designs with curves.
- It may take a significant amount of practice to remove the rind around a thin design without breaking it. Try to make sure the section of rind is cut fully through on all sides before removal. If you're having trouble starting the removal, stab the center of the section with the knife and pull gently.
-
7Try making angled cuts. Angle the knife slightly while cutting, rather than pointing it directly downward, to create a different appearance. This results in a sloping appearance, and can create the suggestion of overlapping designs. For instance, a pattern of "Vs" cut out using this technique can create the appearance of flower petals.


Community Q&A
-
QuestionHow can I keep the fruit from rotting after carving it?
 Community AnswerYou could cover the fruit with plastic wrap or in an airtight container. However, this only works for a day or two at most. You could also brush the fruit with lemon juice to preserve it a bit longer, at the risk of slightly altering the taste of your fruit.
 -
QuestionHow about watermelon?Community AnswerIt's a melon. You can use the same method used for the cantaloupe.
Warnings
- Keep children under close adult supervision while carving, and limit them to simple designs appropriate to their level of control.⧼thumbs_response⧽


References
- ↑ http://www.asian-recipe.com/methods/fruit-vegetable-carving.html
- ↑ http://www.fabulousfoods.com/recipes/how-to-carve-a-watermelon-fruit-basket
- ↑ http://www.asian-recipe.com/methods/fruit-vegetable-carving.html
- ↑ http://whatscookingamerica.net/EdibleFlowers/EdibleFlowersMain.htm
- ↑ http://www.fruitsinfo.com/fruits-carving-tools.php
- ↑ https://www.youtube.com/watch?v=S0bW6FLYWTs
- ↑ https://www.youtube.com/watch?v=J0Ozl_SRGVE
About This Article
To carve a melon bowl, start by slicing a little bit off the base so the melon can sit flat. Then, trace a design onto the melon using a permanent marker, and cut along the lines with a knife to cut out the design. Next, cut a hole around the top of the melon, and scoop out all of the flesh inside. Finally, fill your melon bowl with fruit salad or trifle, and set it out so guests can snack out of it. To learn how to carve fruit into a flower, scroll down!