This article was co-authored by wikiHow staff writer, Travis Boylls. Travis Boylls is a Technology Writer and Editor for wikiHow. Travis has experience writing technology-related articles, providing software customer service, and in graphic design. He specializes in Windows, macOS, Android, iOS, and Linux platforms. He studied graphic design at Pikes Peak Community College.
This article has been viewed 3,381 times.
Learn more...
By default, free Google accounts get 15 GB of storage space across Gmail, and Google Drive. Starting on June 1, 2021, Google Photos and Google Docs will also be included in that data.[1] If you don't have enough space for all your emails, photos, and files, you may lose some of your old emails you want to keep. You can prevent this by clearing out your Gmail inbox of any old emails you don't want to keep. Plus cleaning out your Inbox is a good way to keep your emails organized and neat. You'll also need to empty the trash in order to free up storage space.
Steps
Clearing Out Your Promotions Emails
-
1Go to https://mail.google.com/ in a web browser. This takes you to Gmail in a web browser. While you can delete individual emails using the Gmail app on your smartphone, using a desktop web browser gives you access to more tools that allow you to delete emails in bulk. This makes the process much quicker.
- Make sure you are signed into the correct Gmail account. If you are not, click the profile icon in the upper-right corner of Gmail and either select the correct Gmail or click Add another account and sign in with the email address and password associated with your Gmail.
-
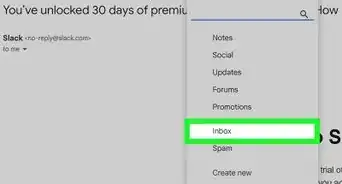
2Click the Promotions tab. It's the third tab at the top. This is where promotional emails go. Most emails under the Promotional tab are spam. You can usually delete most of these emails fairly safely without deleting anything important.Advertisement
-
3
-
4Click the checkbox above your list of emails. There is a checkbox to the left of each individual email in your inbox. Click the checkbox next to an email to select it, click the checkbox at the top of the list to select all emails on a page. This also gives you the option to select all emails under the Promotions tab.
-
5Click the checkbox drop-down menu and select All. It's the gray box with a white dash in it on the left of the toolbar. This selects all emails under the Promotions tab.
-
6
-
7
-
8If you deleted something in error, press Undo. If you deleted something by mistake, you can undo the action by pressing Undo in the black dialog that appears in the bottom left of your screen. By default, emails will remain in your Trash for 30 days before they are permanently deleted.
- If you need to clear up space sooner than that, you can empty your trash.
- If you have a lot of emails under Promotions, you may need to repeat these steps a few times to get all of them.


Clearing Out Your Social Emails
-
1Click the Social tab. This tab contains all social media alerts. This includes emails from Facebook, Twitter, LinkedIn, Tumblr, and more.
-
2
-
3Click the checkbox above your list of emails. There is a checkbox to the left of each individual email in your inbox. Click the checkbox next to an email to select it. Click the checkbox at the top of the list to select all emails on a page. This also gives you the option to select all emails under the Social tab.
-
4Click the checkbox drop-down menu and select All. It's the gray box with a white dash in it on the left of the toolbar. This selects all pages worth of emails under the Social tab.
-
5
-
6
-
7If you deleted something in error, press Undo. If you deleted something by mistake, you can undo the action by pressing Undo in the black dialog that appears in the bottom left of your screen. By default, emails will remain in your Trash for 30 days before they are permanently deleted.
- If you need to clear up space sooner than that, you can empty your trash.


Clearing Out Your Inbox
-
1Click the Primary tab. It's the first tab at the top of the page. This displays all the emails in your primary inbox.
-
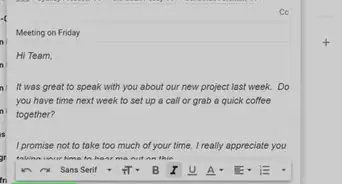
2Click the search bar at the top. You probably don't want to just mass-delete every email in your Primary inbox. You're probably going to want to keep some important emails. You'll need to use the search bar at the top to filter some of the emails so that you only select the ones you want to delete.
-
3Enter a search term in the search bar. This searches your entire inbox for emails that match your search criteria. You can click the bracket pointing down to display advanced search options. There are also commands you can type in the search bar that will allow you to do an advanced search. The following are some commands you can type in the search bar to narrow down your emails:
- From:[contact name]: Type "From:" followed by a contact's name or email address to search for emails from that contact.
- is:important: Typing "is:important" in the search bar searches for all emails marked as Important.
- has:attachment: Typing "has:attachment" in the search bar searches for all emails that have an attachment.
- filename:[name or type]: Type "filename:" followed by the file name of an attachment or an attachment type to search for emails with that attachment. Attachment types include "pdf". "doc", "jpeg", "jpg", "mp4", "mov" and more. For example, you could type "filename:pdf" to search for emails containing a PDF.
- larger:[email size]: Type "larger:" followed by the size of an email to search for emails larger than that size. For example, you can type "larger:150" to search for an email that is larger than 150 bytes, or "larger:2M" to search for emails larger than 2 megabytes. You can also use "size:" in place of "larger:".
- smaller:[email size]: This is just like the "larger:" command except it searches for emails smaller than a certain size.
- before:mm/dd/yyyy: This command searches for emails before a specific date. For example, you can type "before:06/01/2020" to search for all emails before June of 2020.
- after:mm/dd/yyyy: This is just like the "before:" command, except it searches for emails that came after a specific date. You can also combine the "before:" and "after: commands to create a date range. For example, you could type "before:06/01/2020 after:02/01/2018" in the search bar to search for emails after 02/2018 and before 06/2020.
- older_than:[time]: To search for emails that are older than a specific time frame, type "older_than:" followed by the number and unit of times. For example, you can type "older_than:6m" to search for emails older than 6 months. You can also type "d" to search by days instead of months, or type "y" to search by years.
- newer_than:[time]. This is similar to the "older_than:" command, except it searches for emails after a specific time frame.
-
4
-
5
-
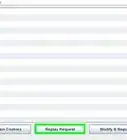
6Click Select all conversations that match this search. This selects all pages that are included in your criteria.
-
7
-
8
-
9Click Ok. This confirms that you want to delete all the selected emails and it moves them to the Trash.


Emptying Your Trash
-
1Scroll down click Trash. It's in the menu of inboxes to the left. Click Trash to view all emails in your Trash. If you do not see "Trash" in the menu to the left, click and drag the slider bar to the right of the menu down to scroll down. Alternatively, you can place the mouse cursor over the menu and use the mouse wheel to scroll down.
-
2Tap or to view the different pages. Once you empty the Trash, all emails in the Trash will be deleted permanently. You will not be able to recover any of the emails that you deleted. Go through your Trash and make sure there aren't any emails you want to keep. Click the brackets pointing to the left and right in the upper-right corner to move from one page to the next.
-
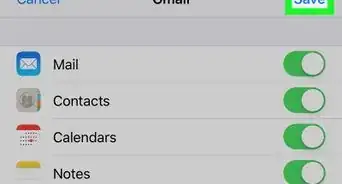
3Right-click any emails you want to keep. If you see an email you want to keep, right-click it to display a pop-up menu.
-
4Click Move to Inbox. It's in the menu that pops up when you right-click an email in the Trash. This moves the email from the Trash back to your Primary Inbox. Do this for all emails you want to keep.
-
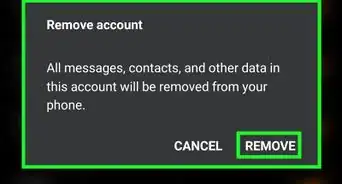
5Click Empty Trash Now. It's the blue text above the list of emails in the Trash. This displays a pop-up that asks if you are sure you want to permanently delete all the emails in the Trash.
-
6Click Ok. This deletes all emails in the Trash.


References
About This Article

1. Go to https://mail.google.com/ in a web browser.
2. Click Primary, Social, or Promotions.
3. Click the checkbox above the list of emails to select the entire page.
4. Click the option to select all emails under the tab at the top of the list.
5. Uncheck any emails you want to keep to deselect them.
6. Press Delete or click the icon that resembles a trashcah, and click Ok.
7. Click Trash in the menu bar to the left.
8. Make sure there are no emails you want to keep in the Trash.
9. Click Empty Trash Now and click Ok.