This article was co-authored by wikiHow staff writer, Travis Boylls. Travis Boylls is a Technology Writer and Editor for wikiHow. Travis has experience writing technology-related articles, providing software customer service, and in graphic design. He specializes in Windows, macOS, Android, iOS, and Linux platforms. He studied graphic design at Pikes Peak Community College.
The wikiHow Tech Team also followed the article's instructions and verified that they work.
This article has been viewed 19,555 times.
Learn more...
Google Pay is a digital wallet that allows you to quickly send and receive money. In 2018, Google Pay replaced both Google Wallet and Android Pay. Google Pay allows you to add and manage your debit and credit cards, as well as your PayPal account. This information is stored on a secure server. Google Pay uses a virtual account number, instead of your credit or debit card number to make transactions.[1] You can use Google pay to send and receive money from your contacts, as well as pay at stores that support Google Pay. You can also use Google Pay to add transit passes, loyalty cards, and gift cards to your account. This wikiHow teaches you how to use Google Pay.
Steps
Creating a Google Pay Account
-
1Open Google Pay. It has an icon with a blue, red, green, and yellow "G" with the word "Pay" next to it. Tap the icon to open the Google Pay app.
- If you do not have the Google Pay app installed on your phone, you can download Google Pay for free using the Google Play Store on Android, or the App Store on iPhone.
-
2Select your email address. If you are using an Android device, you will see a list of all Google accounts you have signed into on your device. Tap the email address you want to use to set up your Google Pay account to continue. On iPhone and iPad, use the drop-down menu at the bottom of the screen to select your email address and tap the blue button at the bottom to continue.
- If you don' t see the email address you want to use listed, tap Use another account on iPhone and iPad and sign in with the username and password associated with your Google account. On Android, you will need to add another Google account in the Settings menu of your smartphone.
Advertisement -
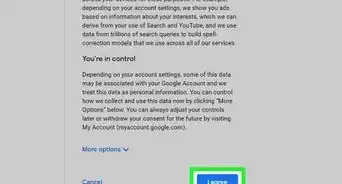
3Tap Get Started. It's the blue button at the bottom of the screen. This will take you to the Google Pay main menu.
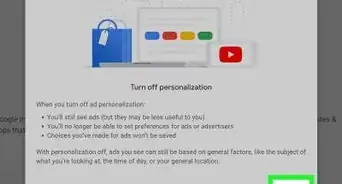
- If you have Locations turned off, you may be asked to turn them on so that you can be notified when you can use Google Pay. You can either tap Turn on or No thanks at the bottom of the screen. Be aware that if you have Locations turned on, Google may use your information for targeted advertising.


Adding a Credit or Debit Card
-
1Open Google Pay. It has an icon with a blue, red, green, and yellow "G" with the word "Pay" next to it. Tap the icon to open the Google Pay app.
-
2Tap Payment or Payment Methods. It's the second option at the bottom of the screen. It has an icon that resembles a credit card.
-
3Tap + Add Payment Method. It's the blue button at the bottom of the screen.
- If you already have a credit or debit card set up with another Google service, such as Google Play, you'll be given the option to connect that card to your Google Pay account.
-
4Tap Credit or debit card. It's the first option at the bottom of the screen when adding a payment method.
-
5Enter your credit card information. You will need to enter your credit card number, the month and year of your expiration date, and the CVC security code on the back of the card. You may also need to enter your name and billing address if it isn't automatically populated by your Google account information.
- If you have the right kind of camera, you can line up your card with camera feed in the center of the screen to scan your card number automatically. Alternatively, you can tap Enter manually to skip using your camera.
-
6Tap Save. It's the blue button at the bottom of the screen. This saves your credit or debit card information.
-
7Scroll to the bottom and tap Accept & continue. You must agree to the Issuer terms. To do so, read the text. When you get to the bottom, tap the button that says Accept & continue. Google Pay will contact your bank and verify your card.
-
8Tap Got it. After your card has been verified, you will see a screen informing you phone security sign-in method will be used for Google Pay. This may be your password, screen-lock code, or pattern.
-
9Tap Continue to confirm your identity. Most likely, this will open your Bank app and ask you to sign in to your bank account.
-
10Sign in to your bank app. Your bank app will open automatically. To confirm your identity, sign in with your username and password or PIN. Once your identity is confirmed, you will see a screen informing you that you are ready to use Google Pay.


Adding a PayPal Account
-
1Open Google Pay. It has an icon with a blue, red, green, and yellow "G" with the word "Pay" next to it. Tap the icon to open the Google Pay app.
-
2tap Payment or Payment Methods. It's the second option at the bottom of the screen. It has an icon that resembles a credit card.
-
3Tap + Add Payment Method. It's the blue button at the bottom of the screen.
-
4Tap PayPal. It's the second option at the bottom of the screen when you add a payment method.
-
5Enter the email. Use the first line to enter the email address associated with your PayPal account.
-
6Tap Allow. It's the blue button at the bottom of the screen.
-
7Tap Next. It's the blue button at the bottom of the screen that explains using PayPal with Google Pay.
-
8Enter and confirm your PIN. Type a 4-digit number you want to use as your PIN. Then type it again to confirm it.
-
9Tap Agree & Continue. It's the blue button at the bottom of the screen.
-
10Confirm your address and tap Continue. Check to make sure your address at the top is correct. If it is incorrect, tap it and enter your correct address. Tap Continue at the bottom of the screen when you are ready to continue.


Sending and Requesting Money
-
1Open Google Pay. It has an icon with a blue, red, green, and yellow "G" with the word "Pay" next to it. Tap the icon to open the Google Pay app.
-
2Tap Send. It has an icon that resembles a paper airplane. It's in the lower-right corner of the screen.
-
3Tap + Send or request. It's the blue button the blue button at the bottom of the screen.
-
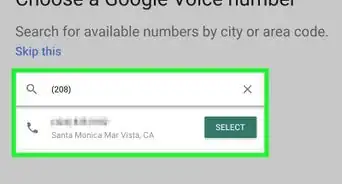
4Enter a contact you want to send or request money from. Use the search bar at the top to enter a contact's name, phone number, or email address. Then tap the contact's name when they appear in your list of search results.
-
5Enter the amount you want to send or request. Use the on-screen number pad to enter the amount you want to send or request.
-
6Add a note (optional). If you want to add a note, tap Add note below the amount. Type a brief note and tap Done.
-
7Tap Send or Request. Both these options are at the bottom of the screen. If you want to send money to a contact, tap Send. If you want to request money, tap Request.
-
8Tap Confirm & Send or Done. If you are sending money, tap Confirm & Send. If you are requesting money, tap Done to send your request.
- You can also send and request money using Gmail. To do so, open the Gmail app and compose a new email. Tap the paperclip icon to add an attachment. Then tap Send money or Request money. Enter the dollar amount you want to send or request.


Paying in Person
-
1Find a vendor or machine that supports Google Pay. Most merchants that support Google Pay have a sticker that says that they accept Google Pay. Look for this sticker during checkout.
-
2Go through the checkout process. Place your items on the counter and let the cashier scan them. If you’re using a vending machine, make the order by pressing the correct buttons for the item you want.
-
3Unlock your phone. To use Google Pay, you must unlock your phone. Use your password, on-screen pattern, or fingerprint scanner to unlock your phone.
-
4Hold the back of your phone close to the payment scanner. A blue checkmark will appear on the screen.
- Some stores may require you to enter a PIN or signature in the payment reader.[2]
- You can also use Google Pay to withdraw cash at ATMs that support Google Pay. You will still need to enter your PIN on the ATM keypad.


Adding Transit Passes, Loyalty Cards, and Gift Cards
-
1Open Google Pay. It has an icon with a blue, red, green, and yellow "G" with the word "Pay" next to it. Tap the icon to open the Google Pay app.
-
2Tap Passes. It has an icon that resembles a ticket stub. It's the third icon at the bottom of the screen. This menu allows you to add public transportation passes, loyalty cards, and gift cards to your Google Pay account.
-
3Tap + Pass. It's the blue button at the bottom of the screen.
-
4Tap Transit, Loyalty program, or Gift card. Tap the type of pass you want to add. Tap Transit to add a public transportation pass. Tap Loyalty program to add a discount or rewards card for a store your frequently shop at. Tap Gift card to add a gift card to your Google Pay account.
- Transit is currently only available in a few select cities.
-
5Tap the name of a store or business. You can either browse the list of stores and chains nearby, or you can use the search bar at the top of the screen to enter the name of a store or business you have a loyalty, discount, or gift card for.
-
6Enter the card information. The way you enter the card information is different for each card type. Use one of the following steps to enter your card information:
-
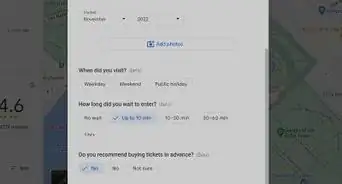
7"Transit:' Transit is currently only available in a few select cities. To add a transit pass, you may be asked to buy tickets online, create or scan a transit card, or sign in to Token Transit or your local public transportation company.
-
8Loyalty card: Hold your phone steady over the barcode on the card until it scans. If you are unable to scan the card, tap Enter manually and use the number pad to enter the card number.
- Gift card: Use the on-screen number pad to enter the card number, PIN or security code, and the balance on the card.
-
9Tap Save. It's the blue button at the bottom of the screen. This saves your card to your Google Pay account.


Using a Loyalty Card, Gift Card or Offer
-
1Go through the checkout process. When you are finished shopping, have the cashier scan your items.
-
2Open Google Pay. It has an icon with a blue, red, green, and yellow "G" with the word "Pay" next to it. Tap the icon to open the Google Pay app.
-
3Tap Passes. It has an icon that resembles a ticket stub. It's the third icon at the bottom of the screen. This menu displays all the gift cards, loyalty cards, and offers you have added to your Google Pay account.
-
4Tap the card you want to use. This displays a number and barcode for the card on-screen.
-
5Ask the cashier to scan the barcode. The cashier can use their scanning device to scan the barcode directly from your phone.
- If your screen is dirty or cracked, the cashier may not be able to scan the barcode. If they are unable to scan the barcode, you can ask them to enter the card number manually.[3]


Viewing Your Activity
-
1Open Google Pay. It has an icon with a blue, red, green, and yellow "G" with the word "Pay" next to it. Tap the icon to open the Google Pay app.
-
2Tap ☰. It's the icon with three vertical lines in the upper-right corner. This displays the menu.
-
3Tap Activity. It's the first option at the top of the screen. It's next to an icon that resembles a ledger. This displays all your purchases and requests.


Changing the Settings
-
1Open Google Pay. It has an icon with a blue, red, green, and yellow "G" with the word "Pay" next to it. Tap the icon to open the Google Pay app.
-
2Tap ☰. It's the icon with three vertical lines in the upper-right corner. This displays the menu.
-
3Tap Settings. It's next to an icon that resembles a gear in the Menu. This displays the Settings menu.
-
4Tap General. This displays the General Settings menu. The General Settings menu has the following icons.
- Email Updates: If you want to receive email updates about Google Pay, tap the toggle switch next to "Email Updates".
- Gmail Imports: This option allows you to connect to Gmail so that they may send rewards and offers to your Gmail inbox. To turn this feature on, tap the toggle switch next to "Gmail Imports".
- Location Settings: This opens your Location Settings menu on your smartphone. You can turn on Locations in this menu.
-
5Tap Edit account info. It's in the General Settings menu in Google Pay. This menu has a few important account-related settings you may want to look at. They are as follows:
- Require a PIN to send money: This provides an extra layer of security. Tap the checkbox next to this option to require a PIN before sending money.
- Receive commercial payments: If you plan on using your Google Pay account for business-related transactions, tap the checkbox next to this option.
- Country/Region: If you need to change your country or region, tap the pencil icon next to this option and select your country or region.
- Tax exemption info: If you want to add any tax exemption info, tap the pencil icon next to this option and add your tax exemption info.
- Name and Address: If you need to change your name or address, tap the pencil icon next to this option and fill out the form to change your name and address.
- Document language preference: If you want to change your language preference, tap the pencil icon next to this option.
-
Privacy Settings: There are three options below "Privacy Settings." It is recommended that you review these and tap the checkbox to turn them off if you want to protect your privacy. The options are as follows:
- Allow Google Payment Corporation to share third party creditworthiness information about you with other companies owned and controlled by Google LLC for their everyday business purposes.
- Allow your personal information to be used by other companies owned and controlled by Google LLC to market to you.
- Allow Google LLC or its affiliates to inform a third party merchant, whose site or app you visit, whether you have a Google Payments account that can be used for payment to that merchant. Opting out may impact your ability to use Google Payments to transact with certain third party merchants.
-
6Tap Save. It's the blue button at the bottom of the General Settings menu.
-
7Return to the Settings menu. If you are in the General Settings menu, tap the arrow icon in the upper-left corner to return to the Settings menu. Otherwise, tap the icon with three lines in the Google Pay app and then tap Settings.
-
8Tap Notifications. This menu displays notifications. To turn off a notification, tap the toggle switch next to it. The notifications are as follows:
- Purchases: This allows you to receive notifications about transactions you make.
- Offers & Tips: This allows you to receive notifications about rewards and discounts.
- Where you can pay in store: This option allows you to receive notifications about stores near you that accept Google Pay.
- Where you can use passes: This allows you to receive notifications about where you can redeem rewards programs.
- Updates about your passes: This allows you to receive notifications about new rewards you earn.
- Money sent to you: This allows you to receive notifications when someone sends you money.
- Reminders to send money: This allows you to receive notifications when you need to send money.
-
9Return to the Settings menu. If you are in the Notifications menu, tap the arrow icon in the upper-left corner to return to the Settings menu. Otherwise, tap the icon with three lines in the Google Pay app and then tap Settings.
-
10Tap Sending Money. This menu has two settings. They are as follows:
- Require a PIN: If you want to require a PIN to send money, tap the toggle switch next to this option.
- Use biometrics instead: If you want to use your fingerprint scanner or eye scanner instead of a PIN, tap the toggle switch next to this option.


References
About This Article

1. Open Google Pay.
2. Tap Payment methods.
3. Tap + Add Payment Method.
4. Select Debit or credit card or PayPal.
5. Follow the instructions to add a new payment method.
6. Tap Send.
7.. Tap + Send or request.
8. Select a contact.
9. Enter the dollar amount you want to send or request.
10. Tap Send or Request.
11. Tap Confirm & Send or Done.
12. Unlock your phone and hold it close to the payment scanner to pay during checkout at a store.