X
This article was co-authored by wikiHow staff writer, Nicole Levine, MFA. Nicole Levine is a Technology Writer and Editor for wikiHow. She has more than 20 years of experience creating technical documentation and leading support teams at major web hosting and software companies. Nicole also holds an MFA in Creative Writing from Portland State University and teaches composition, fiction-writing, and zine-making at various institutions.
The wikiHow Tech Team also followed the article's instructions and verified that they work.
This article has been viewed 129,751 times.
Learn more...
This wikiHow teaches you how to get started with the Microsoft Windows 10 operating system on your PC.
Steps
Method 1
Method 1 of 9:
Using the Start Menu
-
1
-
2Locate your apps. Windows 10 features many ways to find the app you’re looking for:
- On the rightmost panel, you’ll see colorful tiles. Some tiles are just links to open apps, while others show live updates.
- Right-click a tile to open its editing menu. Here you can change the tile’s size, opt to pin it to the taskbar (at the bottom of the screen), or remove (unpin) it from the menu.
- You can arrange these tiles any way you wish. Just click and drag a tile to the desired location.
- In the left panel is the apps list. Here, you can see all of the apps and programs that are installed on your computer.
- To create a tile from an app from apps list, just drag it to the right panel and drop it where you wish.
- Right-click any app to see if it has other options you can control from the Start menu.
- Type an app’s name into the search bar at the bottom-left corner of the menu to search for an app. You can search for anything this way, including apps to download and items on the internet.
Advertisement - On the rightmost panel, you’ll see colorful tiles. Some tiles are just links to open apps, while others show live updates.
-
3Adjust the size of the menu. You can make the Start menu as large or small as you wish. To adjust the size, place the mouse cursor at the top-right corner of the menu until it becomes two arrows, and then click and drag outward (to make it larger) or inward (to make it smaller).
-
4Hover your mouse near the bottom-left corner of the Start menu, just above the start button. Now you’ll see several options running down the left side of the menu.
-
5
-
6Click Personalization. This is where you can go to change the colors, fonts, and other visual elements of Windows.
-
7Click Start to personalize the start menu. It’s in the left column. Here’s a brief overview of what you can do:
- Check out the other options on this page. Slide anything that interests you to the On position, and anything that doesn’t to the Off position.
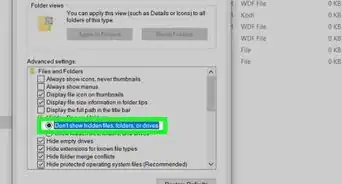
- Scroll down and click Choose which folders appear on Start at the bottom of the right panel.
- Use these switches to determine which of folders appear in the Start menu. To get you started, turn on File Explorer, Documents, Downloads, Pictures, and Videos.
- Close the window by clicking the X at the top-right corner.
- Return to the Start menu, and hover your mouse over the bottom-left corner. Now you’ll see all of the folders you added.


Advertisement
Method 2
Method 2 of 9:
Using Built-in Apps
-
1Browse the web with Microsoft Edge. Edge is Microsoft’s replacement for Internet Explorer. To get started with Edge, click the Start menu, and then select Microsoft Edge. You can also type "Edge" into the search bar and select the app.
- If you’re new to Edge, check out Reading View, a feature that displays text-heavy websites without all of the ads and special formatting.
- To access your Edge settings, click ⋯ at the top-right corner of the browser, and then click Settings.
-
2Use the Photos app to manage and edit your photos. Any photos you save to the Pictures directory on your computer will be added to the Photos app. This makes it easy to find and edit your photos without having to worry about where they are stored. To open the app, click the Start menu, and then select Photos or type "Photos" into the search bar and select the app.
- Double-clicking photos on your computer should open them in Photos automatically.
- To add additional folders to the Photos app (for example, if you keep your photos stored somewhere other than the Pictures folder), click Folders at the top of the app, click Add a Folder, and then select the folder.
- To edit a photo, simply click it in the Photos app, click Edit & Create at the top, and then choose your desired editing tools.
-
3Use the Xbox app. If you’re an Xbox user, you’ll be able to find all of your game history, achievements, friends, activity and messages in the Xbox app, which you’ll find in the apps list.
-
4Use the Maps app. With the new Maps app you can explore in 3D, view street level, download maps, print directions, view the traffic and find new places.
-
5Use OneNote to organize your notes. OneNote is now pre-installed on all computers running Windows 10. You can use OneNote to create virtual notebooks that help keep you organized. Like the other apps, you’ll find it in the apps list in the Start menu.


Advertisement
Method 3
Method 3 of 9:
Installing Apps
-
1Meet the Windows Store. Windows 10 now encourages you to download apps directly from their "Store." This makes it easier to install apps and ensure you're downloading only the most legitimate (and latest) versions.
-
2
-
3
-
4Browse for apps. Find specific apps using the search bar at the top-right corner, or use the categories at the top of the screen to see what’s available. You can also scroll down to see what’s new and popular.
-
5Click an app that interests you. Now you can check out information about the app, including reviews, system requirements, and price (if it’s a paid app).
- If an app is free, you’ll see the word ″Free″ above the ″Get″ button.
-
6Tap Get to install an app. The app will begin downloading. Once the app is finished installing, it will be added to the Start menu.
- If the app costs money, follow the on-screen instructions to sign into your account and process your payment.


Advertisement
Method 4
Method 4 of 9:
-
1Check the taskbar to see what’s open. Windows displays all of your running programs on the taskbar, which is the long bar (between the Start menu and the clock) that runs along the bottom of the screen. If you’ve got an app open, its name and/or icon appears on the taskbar.
- To minimize a window to the taskbar, click - near the top-right corner of the app.
- To bring an app into view, click its name or icon on the taskbar.
- To close an app from the taskbar without bringing it into view, right-click its name on the taskbar, then click Close window.
- To change the way apps appear on the taskbar, right-click the area with the clock, then click Taskbar settings.
-
2Use Task View to view all opens apps on the same screen. Once you can see all of the apps together, you can simply click on the one you want to bring into focus. Here are three ways to open Task View:
- Click toward the left side of the taskbar.
- Press ⊞ Win+Tab ↹.
- Swipe three fingers up on the touchpad.
-
3Press ⊞ Win+D to view the desktop. This shortcut minimizes all open apps at once, making it easy to access your desktop quickly when you need it.


Advertisement
Method 5
Method 5 of 9:
Using Windows Search and Cortana
-
1Open the Search box. In Windows 10, you’ll do this by opening Cortana, the virtual assistant. There two ways to open the search bar:
- Click the circle or magnifying glass to the right of the Start menu.
- Press ⊞ Win+S to open the Search bar, and then type what you’re looking for.
- If you’re using a version of Windows 10 that hasn’t been updated, click the Start menu to display the search bar.
-
2Select what you’re searching for. At the bottom of the Cortana window (right above the typing area), click Apps, Documents, or Web.
-
3Start typing your search term or keyword. As you type, Windows will attempt to find what you’re looking for. Items that match what you’ve typed will appear above the search bar.
-
4Click an app, document, or website to open it. This closes the search bar and refocuses on the app.
-
5Manage your Cortana preferences. For a deeper look into all Cortana can do, including using voice recognition, see How to Use Cortana.


Advertisement
Method 6
Method 6 of 9:
Managing Files
-
1Press ⊞ Win+E to open the File Explorer. All of the files on your computer can be found in this app. File Explorer will open to a list of your most frequently-accessed folders.
-
2Click This PC in the left panel. This displays a list of drives and folders on the computer in the right panel.
- Any files you’ve saved to your desktop will appear in the Desktop folder.
- Files you’ve downloaded from the internet are automatically saved to the Downloads folder.
- If you use Microsoft OneDrive, click OneDrive on the left side of the screen to open the contents of your drive. For more information on setting up OneDrive with Windows 10, see How to Use OneDrive.
-
3Double-click a folder to open it. The files contained in the folder will appear.
- To change the size of the icons or thumbnails displayed, click the View menu at the top of the window, then make your selection(s) from the ″Layout″ tab.
- To change the order in which the files are displayed, click the View menu, click Sort by (on the ″Current View″ tab), and then choose an order (Name, Size, etc.).
-
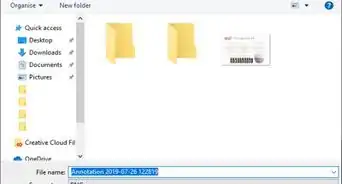
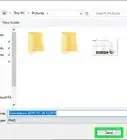
4Create a new folder. Here’s how:
- Open the folder in which you want to create the new one.
- Click New folder in the ″New″ tab at the top of the window.
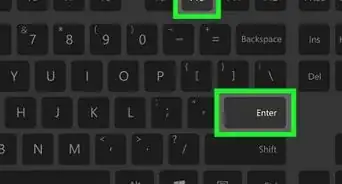
- Type a name for the folder.
- Press ↵ Enter.
-
5Copy a file (or folder) to another folder. Here’s how to move a file from one folder to another:
- Right-click the file or folder you want to copy. A menu will appear.
- Click Copy.
- Double-click the folder you want to copy it to.
- Right-click a blank space in the background of the folder. A menu will appear.
- Click Paste.
-
6Rename a file. To change the name of a file:
- Right-click the file.
- Click Rename.
- Type a new name.
- Press ↵ Enter to save.
-
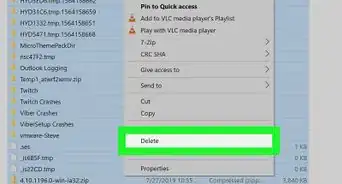
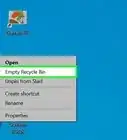
7Delete a file. To delete any file or folder:
- Right-click the file or folder.
- Click Delete.
- You may have to provide permission to confirm.


Advertisement
Method 7
Method 7 of 9:
Using the Action Center
-
1Click the square-shaped chat bubble next to the clock. It’s usually at the bottom-right corner of the screen. This opens the Action Center, which is where you’ll find your notifications and quick settings.
- You can also open the Action Center by pressing ⊞ Win+A.
-
2Check your notifications. Like on a phone or tablet, your Windows 10 PC keeps track of the notifications you receive through apps. They’ll appear at the top of the Action Center.
- Sometimes notifications will display buttons you can use to perform actions, such as launching an app or changing a setting.
- To customize the way you are notified by a certain app, click the small gear icon on a notification, then make your changes.
-
3Toggle options on and off. The buttons that run along the bottom of the Action Center are quick links to enable or disable features like Bluetooth, Wi-Fi, and Battery Saver mode.
- If a tile is gray, that feature is turned off. If it’s blue, it’s enabled.
- Tap a tile to toggle its feature on or off.


Advertisement
Method 8
Method 8 of 9:
Uninstalling Apps
-
1
-
2
-
3Click Apps. This opens the Apps & features window. All of your installed apps (including those that came pre-installed on the computer) appear in the right panel. Scroll down to see what’s there.
-
4Click an app you want to remove. Depending on the app, you may see several buttons appear below.
-
5Click Uninstall. A confirmation message will appear.
- If the option is not available, you’ve selected an app that can’t be uninstalled. This usually happens because it’s a system app or part of another app’s installation.
-
6Click Uninstall to confirm. The app will now be removed.


Advertisement
Method 9
Method 9 of 9:
Shutting Down, Restarting, and using Sleep Mode
-
1
-
2
-
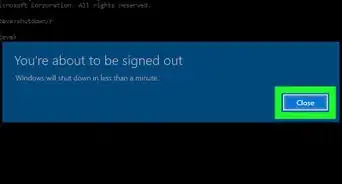
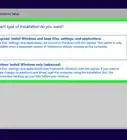
3Select a shutdown option.
- Click Sleep if you want to put the computer into a very low-power state. Since this option doesn’t turn the computer off, you’ll be able to ″wake″ the computer up again when you’re ready to use it and see the same open files and apps you saw before.
- Click Restart to shut down and restart the computer.
- Click Shut down to turn the computer off.


Advertisement
Community Q&A
-
QuestionHow do I save an email in Windows 10 to a folder and then print it?
 Community AnswerYou cannot exactly save it to a folder. But you can still print it. Go to the Mail App. Access your email account with email you want to print (if necessary). Open the email you wish to print. Click on the three dots in the upper right corner. Select Print. A print menu should show up. Click Print.
 -
QuestionWhere do I find My Computer and Control Panel in Windows 10?
 Community AnswerIn Windows 10, you can open the start menu and type in what you want to find. The Control Panel is still available in Windows 10, but My Computer has been renamed to This PC.
 -
QuestionHow can I pin an icon to the desktop?
 Community AnswerRight-click on the the icon. Then you can 1) copy it from current location and paste it on the desktop, or 2) create shortcut on desktop.
Advertisement


-Step-17.webp)


About This Article

Nicole Levine, MFA
wikiHow Technology Writer
This article was co-authored by wikiHow staff writer, Nicole Levine, MFA. Nicole Levine is a Technology Writer and Editor for wikiHow. She has more than 20 years of experience creating technical documentation and leading support teams at major web hosting and software companies. Nicole also holds an MFA in Creative Writing from Portland State University and teaches composition, fiction-writing, and zine-making at various institutions. This article has been viewed 129,751 times.
How helpful is this?
Co-authors: 30
Updated: September 24, 2020
Views: 129,751
Categories: Windows 10
Advertisement
-Step-17.webp)


