This article was co-authored by wikiHow staff writer, Travis Boylls. Travis Boylls is a Technology Writer and Editor for wikiHow. Travis has experience writing technology-related articles, providing software customer service, and in graphic design. He specializes in Windows, macOS, Android, iOS, and Linux platforms. He studied graphic design at Pikes Peak Community College.
This article has been viewed 668,527 times.
Learn more...
Snap.Do is a custom search engine and toolbar program that may have been installed at the same time you downloaded a separate third-party application to your computer, such as vShare. Applications such as Snap.Do are commonly referred to as browser hijacker software. They are designed to alter your personal browser and search engine settings. Even when you uninstall Snap.Do in the control panel, there may be some remnants of Snap.Do left in your system. This wikiHow teaches you how to completely remove Snap.Do from your system.
Steps
Preparing to Uninstall Snap.Do
-
1Back up your computer. Before you begin, it's a good idea to back up your computer. Save any important files you want to keep to an external hard drive, flash drive, or cloud service such OneDrive, Google Drive, Dropbox, or iCloud Drive.
-
2Login to Windows as an administrator. Logging in as a system administrator gives you permissions that normal users don't have. This makes it easier to remove programs and processes. Use the following steps to log in as an administrator:
- Click the Windows Start menu.
- Type "CMD".
- Right-click the CMD/Command-prompt and click Run as administrator.
- Type "net user administrator /active:yes" and press Enter.
- Log out of your current Windows session.
- Log back in under the "Administrator" user account (the password is left blank by default).
Advertisement -
3Close all web browsers. If you currently have any web browsers open, be sure to close them. Click the "X" icon in the upper-right corner to close yoru web browser.
-
4Open the Task Manager. To do so, simply right-click your taskbar and click Task Manager.
-
5Click the Processes tab. It's the first tab at the top of Task Manager. This displays different processes that are active at the moment.
- If you don't see the "Processes" tab, click More Details at the bottom of Task Manager.
-
6Click "Lrcnta.exe" and click End Task. The "End Task" button is in the lower-right corner of Task Manager. This stops the program from running. "Lrcnta.exe" is a Snap.Do program that runs in the background.[1]
-
7Click "SnapDo.exe" and click End Task. This stops the main Snap.Do program from running.
-
8Click the Services tab. It's at the top of Task Manager.
-
9Right-click "LPT System Updater" and click Stop. This is another service from the company behind Snap.Do. It is used to display ads and pop-ups inside your web browser. To stop this service, right-click it under the "Services" tab in Task Manager and click Stop.[2]


Uninstalling Snap.Do Software
-
1Open the Control Panel. To do so, click the "Windows Start" button and type "Control Panel". Then click the Control Panel.
-
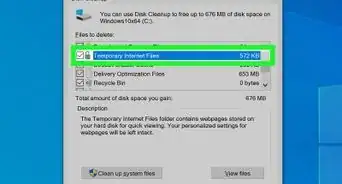
2Click Programs and Features or Uninstall a program. If you are in one of Icons View mode, click the large green text that says Programs and Features. If you are in Category View, select "Uninstall a program" below "Programs".
-
3Right-click Snap.Do and click Uninstall. This will open the Snap.Do uninstall wizard.
-
4Click Custom. This allows you to do a custom uninstall, instead of Snap.Do's typical installation.
-
5Click the checkbox next to "Remove Snap.Do" and click Next. Make sure the other two checkboxes are not checked.
-
6Click Accept followed by Continue. The uninstall wizard asks you to close any web browser before continuing. You should already have all web browsers closed, so simply click Continue to uninstall Snap.Do and wait for the uninstall process to complete.
-
7Press F5. This refreshes your programs list in Control Panel.
-
8Find and delete any Snap.Do entries. Look over the list of programs and check for any more entries from "Snap.Do," or it's publishers. Right-click any leftover entries you find and click Uninstall. Follow the instructions to complete the software removal. Some of the following are entries you may find:
- Snap.Do Engine
- SnapDo toolbar
- Snap.Do Updater
- Shopping Helper Smartbar
- Shopping Helper Smartbar Engine
- Saving Expert Smartbar
- Any programs published by ReSoft Ltd.
- Any programs published by Pando Networks.
- Any programs published by Linkury.
-
9Use Revo Uninstaller for tricky programs. If any of the programs in the list will not allow you to remove them, you can use Revo Uninstaller to get rid of them. You can use the free version of Revo Uninstaller to scan for leftovers after a standard uninstall.


Manually Removing Snap.Do Files
-
1Ensure hidden files, folders, and drives are visible. In order to find the folders that contain all Snap.Do files and folders, you'll need to make sure hidden files and folders are showing. Warning: Manually removing files and folders can cause damage to your system. Continue at your own risk. Use the following steps to show hidden files and folders:
- Open the Control Panel.
- Click Appearance and Personalization.
- Click File Explorer Options (Windows 10) or Folder Options (Windows 8 and below).
- Click the View tab.
- Click the radio option or checkbox next to "Show hidden files, folders, and drives."
-
2Press ⊞ Win+E to open File Explorer and navigate to the Temp folder. File Explorer has an icon that resembles a folder with a blue clip. Either click the icon or press Windows key + E to open File Explorer. Then navigate to the following location:
- Click This PC.
- Click the C: drive.
- Click Users.
- Click the folder that is named after your username.
- Click AppData.
- Click Local.
- Click Temp.
-
3Delete all files in the "Temp" folder. If you receive a message that any of the files can't be deleted, go ahead and click the option to skip that file. Use the following steps to delete all files in the "Temp" folder.
- Press Ctrl + A to select everything.
- Hold Shift and press Delete.
- Click Yes to delete everything.
-
4
-
5Delete the "Smartbar" folder. Look for the "Smartbar" folder in "Local" folder. Click it and then press Delete to delete the folder.
-
6Navigate to the "Program Files (x86) folder in File Explorer. With File Explorer still open, use the following steps to navigate to the "Program Files (x86)" folder.
- Click This PC in the menu bar to the left.
- Click the C: drive.
- Click Program Files (x86).
-
7Delete the "LTD" folder. The LTD folder is where Resoft LTD keeps all it's files and folders. Click the "LTD" folder to select it and press Delete.[3]


Reset Your Web Browsers Back to Their Default Settings
-
1Reset Google Chrome back to it's default settings. This will reset your default search engine, home page and tabs, new tabs page, tabs you have pinned, content settings, cookies, site data, as well as extensions and themes to their default settings. It will be as if Google Chrome has just been installed. Use the followings steps to reset Google Chrome back to it's default settings.:[4]
- Open Google Chrome.
- Click the icon with three vertical dots (⋮) in the upper-right corner.
- Click Settings.
- Click Advanced.
- Click Advanced in the menu bar to the left.
- Click Reset and clean up in the menu bar to the left.
- Click Restore settings to their original defaults
- Click Reset Settings.
-
2Reset Firefox back to it's default settings. The following steps will restore your extensions and themes, website permissions, modified preferences, added search engines, DOM storage, security certificates, device settings, download actions, toolbar customization, and user styles to their default settings. Use the following steps to reset Firefox:[5]
- Open Firefox.
- Click the icon with three horizontal lines (☰) in the upper-right corner.
- Click Help
- Click More troubleshooting information.
- Click Refresh Firefox in the box in the upper-right corner.
- Click Refresh Firefox in the confirmation pop-up.
- Click Finish.
-
3Reset Microsoft Edge. This will restore your startup page, new tab page, search engine, and pinned tabs to their default settings. It will also disable all extensions, and clear your temporary data and cookies. Use the following steps to reset Microsoft Edge:[6]
- Click the icon with three horizontal dots (⋯) in the upper-right corner.
- Click Settings
- Click Reset Settings in the menu to the left.
- Click Restore settings to their default values.
- Click Reset in the confirmation pop-up.
-
4Reset Internet Explorer. Even if you don't use Internet Explorer on a regular basis, you'll still need to reset it as it is used for some Windows functions. Especially if you are using an older version of Windows. Use the following steps to reset Internet Explorer.
- Open Internet Explorer.
- Click the Gear icon in the upper-right corner.
- Select "Internet options".
- Click the Advanced tab
- Click the Reset button.
- Check the "Delete personal settings" box and click Reset.


Run an Antivirus and Adware Scan
-
1Download and install Malwarebytes or another antivirus program. Malwarebytes is an antivirus program that allows you to scan for viruses for free. Alternatively, if you have a paid subscription to an antivirus program such as Norton or McAfee, you can use those in place of Malwarebytes. If you don't have any antivirus protection, use the following steps to download and install Malwarebytes:
- Go to https://www.malwarebytes.com/ in a web browser.
- Click Download Now
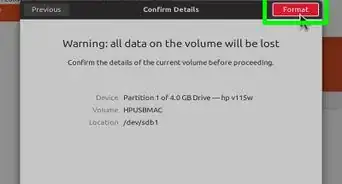
- Double-click the Malwarebytes install file in your web browser or Downloads folder.
- Click Yes.
- Follow the instructions to complete the installation.
-
2Open Malwarebytes. It has an icon with a blue capital "M". Click the icon to open Malwarebytes. If you are using an antivirus app that has a paid subscription, open that app instead.
-
3Make sure your antivirus program is up-to-date. Each antivirus app has a different interface. Most antivirus apps are set to download and install updates automatically by default. You can generally find the option to check for updates manually in the "PC Security" or "Settings" section of the app. Locate the option to check for updates and click it. Wait for the update to complete.
-
4Run an antivirus scan. Once your antivirus software is up-to-date, click Scan, Scan Now, or something similar to perform an antivirus scan. Wait until the scan is complete. If any harmful files are detected, click the option to quarantine those files.
-
5Download and install an adware scanner app. In addition to running an antivirus scan, you can also download an install an adware scanner app, which specializes in adware like Snap.Do. Adware scanner apps include AdwCleaner (from Malwarebytes) and Adaware. Both offer a free version. Use the following steps to download and install an adware scanner app:
-
6Make sure your adware scanner is up-to-date. If you are using AdwCleaner, you will need to download and install the latest version from the website. If you are using Adaware, open the Adaware app and click Check for Updates below "Protection Summary" on the main page. Wait for it to finish downloading and installing the latest version.
-
7Scan for malware using an adware scanner. To do so using AdwCleaner, simply open the app and click "Scan Now'. To do so using Adaware, open the app and click Full Scan. If any adware files are found, click the option to quarantine or delete the files.


Fixing Your Browser Shortcuts
-
1Delete any browser shortcuts that don't have the correct icon. If you see any web browser icons on your desktop that have broken incorrect icons, right-click them and click Delete.
-
2
-
3Navigate the the location of your web browser's executable file. You generally find your web browser's location at the following locations:
- Google Chrome: "C:\Program Files\Google\Chrome\Application"
- Firefox: "C:\Program Files\Mozilla Firefox"
- Microsoft Edge: "C:\Program Files (x86)\Microsoft\Edge\Application"
- Internet Explorer: "C:\Program Files\Internet Explorer"
-
4Right-click the executable file. Check to make sure the executable file has the correct icon and then right-click it. The executable files for the web browsers are as follows:
- Google Chrome: chrome.exe
- Firefox: firefox.exe
- Microsoft Edge: msedge.exe
- Internet Explorer: iexplorer.exe
-
5Click Create Shortcut. It's in the menu that appears when you right-click an executable icon. This creates a new shortcut on your desktop.


Community Q&A
-
QuestionIf I reset the search engine, will the favorites and bookmarks be deleted?
 Community AnswerResetting the search engine will not affect your bookmarks and/or favorites. Resetting your browser will not affect them either. However, in Google Chrome it causes closure of extensions and removal of backgrounds.
 -
QuestionI got a message that ADW is from an unknown publisher and was not comfortable downloading it. Did you do a scan on all of the downloaded software to be sure it is safe?
 Community AnswerOfficial ADWCleaner is safe, make sure you download it from the official site: bleepingcomputer.com/download/adwcleaner/


References
- ↑ https://www.file.net/process/lrcnta.exe.html
- ↑ https://www.shouldiremoveit.com/LPT-System-Updater-Service-111452-program.aspx
- ↑ https://www.adaware.com/blog/how-to-remove-snapdo-browser-hijacker
- ↑ https://support.google.com/chrome/answer/3296214?hl=en
- ↑ https://support.mozilla.org/en-US/kb/refresh-firefox-reset-add-ons-and-settings
- ↑ https://www.businessinsider.com/how-to-reset-microsoft-edge
About This Article