X
This article was co-authored by wikiHow staff writer, Nicole Levine, MFA. Nicole Levine is a Technology Writer and Editor for wikiHow. She has more than 20 years of experience creating technical documentation and leading support teams at major web hosting and software companies. Nicole also holds an MFA in Creative Writing from Portland State University and teaches composition, fiction-writing, and zine-making at various institutions.
This article has been viewed 10,494 times.
Learn more...
This wikiHow teaches you how to use Adobe Lightroom to work with photos on a PC or Mac.
Steps
Method 1
Method 1 of 4:
Importing Photos
-
1Open Lightroom on your computer. You’ll find it in the All Apps area of the Start menu (Windows) or the Applications folder (macOS).
-
2Connect the camera or drive to your computer. If the photos are on a camera or removable storage card, connect the card reader to the computer.Advertisement
-
3Click +. It’s at the top-left corner of Lightroom. A context menu will appear, displaying all connected devices.
-
4Select the device where your photos are stored. If the photos are on your computer, click Browse… to open your computer’s file browser.[1]
-
5Select the photos you want to add. Clicking a photo preview adds a check mark to the photo, indicating that it’s selected.
- If the photos are all in one folder, select the folder, then click Review for Import (Mac) or Choose Folder (PC).
- To select one or more individual photos, click each photo you want to add (hold Ctrl (PC) or ⌘ Command (Mac) as you click to select multiple photos at once), then click Review for Import.
-
6Click Add Photos. The selected photos are now added to Lightroom.


Advertisement
Method 2
Method 2 of 4:
Creating Albums and Adding Photos
-
1Open Lightroom. You’ll find it in the All Apps area of the Start menu (Windows) or the Applications folder (macOS).
- You can also use Lightroom online at https://lightroom.adobe.com
-
2Click Add an Album. It’s in the left panel under the Albums header.[2]
-
3Type an album name and click Create. This creates the album and adds it to the “Albums” section of the left panel.
-
4Click the album name. This opens the album, which currently contains no photos.
-
5Drag photos from the grid to the album. Another way to add photos is to click the blue Select Files… button, then select the photos you want to add.


Advertisement
Method 3
Method 3 of 4:
Editing Photos
-
1Open Lightroom. You’ll find it in the All Apps area of the Start menu (Windows) or the Applications folder (macOS).
- You can also use Lightroom online at https://lightroom.adobe.com
-
2Click the photo you want to edit. This opens a larger version.
-
3Click the edit icon. It’s at the top of the column that runs along the right side of the screen (looks like several horizontal sliders). Editing tools will open in the far right panel.[3]
- You can also go into editing mode by pressing the E key on the keyboard.
-
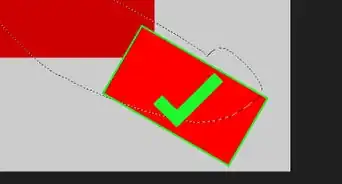
4Click CROP to crop the image. You can skip this step if you don’t want to crop.[4]
- Drag the edges of the square to surround only the part of the image you want to keep.
- Click Done.
-
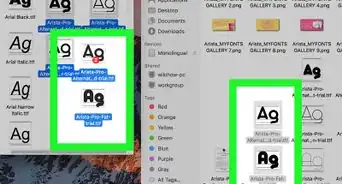
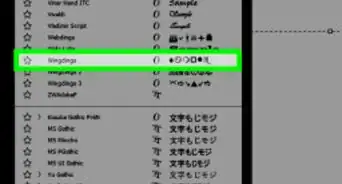
5Click the PRESETS tab. It’s at the top of the right panel. This displays a list of preset filters you can use.
- The presets are broken into groups. Click the arrow next to each group in the right panel to see its contents.
- Click one of the previews to apply it to your image.
-
6Click the ADJUST tab. It’s next to the “PRESETS” tab. This is where you can do your manual photo editing.
- Use the sliders under the “Light” and “Color” headers (the first two groups in the right panel) adjust the exposure, contrast, highlights, shadows, saturation, tint, and other details.
- You can improve the image quality or add details by adjusting the sliders under “Effects” and “Split Toning.”
- After editing, you may want to view the original photo for comparison.


Advertisement
Method 4
Method 4 of 4:
Saving or Exporting Edited Photos
-
1Open Lightroom. If you have the application installed, you’ll find it in the All Apps area of the Start menu (Windows) or the Applications folder (macOS). You can also use Lightroom online at https://lightroom.adobe.com.
-
2Open the photo you want to save or export. This opens a preview.
- If you’re using the web version of Lightroom, click Save & Exit at the top-left corner of the page. You don’t have to use the rest of this method.
-
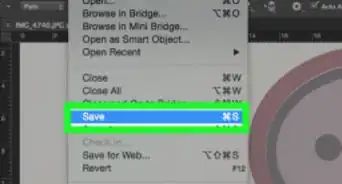
3Click the File menu. It’s at the top-left corner of the screen.
-
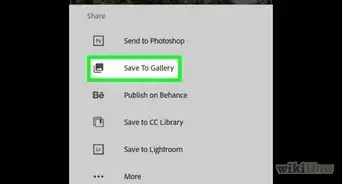
4Click Save To.
-
5Select a format. Select JPEG for a great quality photo at a reduced size, or choose your desired option from the “File Type” menu.[5]
- Select Original+Settings to save the photo in its original size and state.
-
6Select a saving location. Click the folder icon to browse for a folder on your computer.
-
7Select your desired size. If you selected JPEG, choose the size at which you’d like to save the photo from the drop-down at the bottom of the window.
-
8Click Save. This version of the photo is now saved to your computer.


Advertisement


-Step-9.webp)

References
- ↑ https://helpx.adobe.com/lightroom-cc/using/add-photos.html
- ↑ https://helpx.adobe.com/lightroom-cc/using/organize-photos.html#Addyourphotostoanalbum
- ↑ https://helpx.adobe.com/lightroom-cc/using/edit-photos.html
- ↑ https://helpx.adobe.com/lightroom/how-to/crop-straighten-photo.html
- ↑ https://helpx.adobe.com/lightroom-cc/using/save-share-photos.html
About This Article

Nicole Levine, MFA
wikiHow Technology Writer
This article was co-authored by wikiHow staff writer, Nicole Levine, MFA. Nicole Levine is a Technology Writer and Editor for wikiHow. She has more than 20 years of experience creating technical documentation and leading support teams at major web hosting and software companies. Nicole also holds an MFA in Creative Writing from Portland State University and teaches composition, fiction-writing, and zine-making at various institutions. This article has been viewed 10,494 times.
How helpful is this?
Co-authors: 4
Updated: August 4, 2021
Views: 10,494
Categories: Adobe Photoshop
Advertisement